Overhaul of the balcony includes interior walling, ceiling, and flooring. The main objective of such an event is to improve the design of the balcony. At the same time, using certain finishing materials, one can also achieve related goals: to carry out insulation, equip a comfortable relaxation area or make maintenance easier. In most cases, for wall cladding, a crate is installed on which wall panels are attached. Depending on the desired result, wood, plastic and other suitable materials are selected, which will be discussed below.
Lining and euro lining
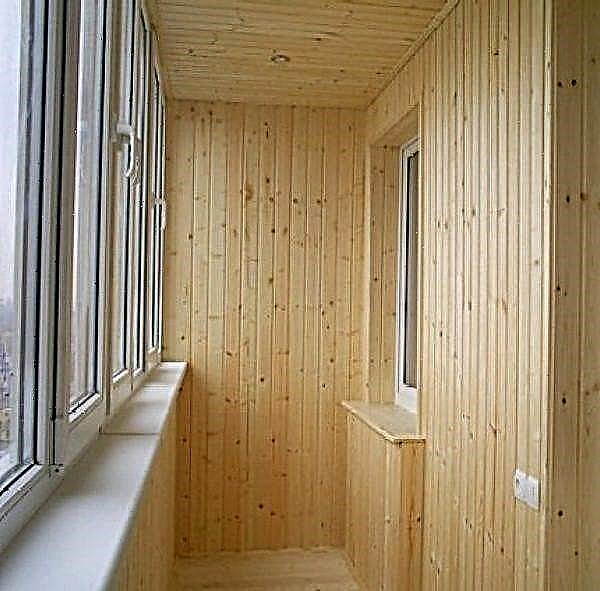
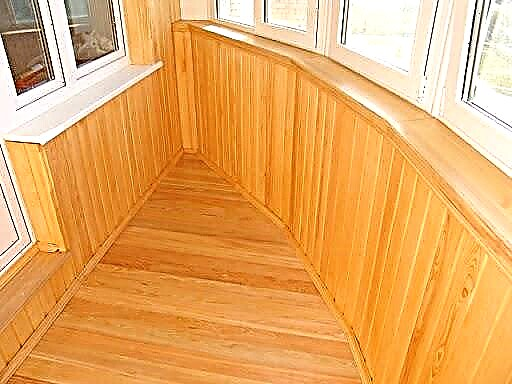
The most famous way to improve the balcony, lining with wooden lining. It was used even before the advent of modern materials and is not inferior to its positions today. Due to the design features of wooden planks, you can get an almost seamless surface. 
Euro lining is made with a more complex profile compared to conventional lining, so it looks more interesting in decoration. In addition, it provides ventilation ducts, which affects the durability of the wood. Naturally, its cost is higher than ordinary analogues.
The main advantage of the material in the environmental friendliness of wood and ease of assembly. Beautiful wood texture allows you to create a pleasant, homely interior on the balcony.
 Clapboard covered balcony
Plastic trim for the balcony
The plastic-sheathed balcony looks modern, has a laconic, austere design, and harmonizes perfectly with metal-plastic glazing.

Advantages of plastic panels:
- Easy to clean
- Service life over 25 years,
- Ease of installation
- The choice of colors,
- Plastic panels can be used to sheathe walls and ceilings.
The statement that plastic is toxic is a myth, because in order for it to start emitting harmful elements, it must be heated to a temperature of more than 300 C. Therefore, plastic panels can be safely used to decorate a balcony if you are not going to conduct similar experiments on it by heating.
Panels are made in width 25 and 38 cm, and if the balcony will not be heated, it is better to choose narrow stripes, since they can more easily tolerate temperature changes.

MDF lining
MDF panels (or lining) resemble plastic panels in design and installation method, but are produced by pressing wood sawdust (without the use of adhesive additives).

Unlike plastic, MDF panels, although they are considered moisture resistant, are afraid of the prolonged action of dampness, so their use on a cold balcony is not recommended. But if in winter the room is maintained at positive temperature and normal humidity, this material can be considered ideal for covering the balcony. The main advantage of MDF lining in a wide selection of wood colors: cherry, oak, apple tree, nut, pear, and other all kinds of wood.
For the installation of MDF panels, as well as for plastic, a crate is arranged, which means that it is possible to carry out additional wall insulation. As a rule, only the sides and facade facing the street need insulation. Since the lining is made practically from production waste, its cost is low, and is used in the decoration of balconies and loggias as a budget option.

Wood boards
Wood-fiber and particle boards are used to decorate heated balconies, as they react poorly to high humidity - they can warp, change structure and swell. This can be said about all the boards made on the basis of sawdust or shavings: MDF, chipboard, solid fiberboard, OSB. 
A plus can be considered their low cost, the ability to cut in any direction and ease of installation. All types of wood boards, except OSB, are available with a decorative coating, so they do not need additional decoration. Installation is done on the crate. After that, the joints are masked by decorative elements, since the connection of parts is done joint to joint.
In addition to wall cladding, plates are suitable for flooring. They are laid on the logs - bars, located across the balcony slab and aligned in the horizontal plane.

Cork panels
If you need to create a homely cozy atmosphere on the balcony, cork panels are suitable for decoration. They are of natural origin, since they are made from bark of cork oak. The lower layer of the panel with a thickness of 3-6 m consists of crushed and pressed cork, and the upper layer is a natural cork veneer 1 mm thick, treated with a wax coating. 
Advantages of cork coating:
- Does not burn,
- Easy to cut
- Environmental friendliness
- Does not rot
- Doesn't attract dust
- Top wax layer provides water resistance.
The panels are mounted on a leveled wall: if the outer wall is brick, it is first plastered and putty, after which the finish coating is glued. On a very uneven surface, the main difficulty is to level it. The most reliable way to get a perfectly flat wall is to plaster it with plasterboard. Since drywall is attached to the crate, the outer walls can be additionally insulated by laying sheets of insulation material (mineral wool, fiberglass, polystyrene foam) between the boards. The panels are glued to a special adhesive for cork.
Despite the small range of colors, cork coating looks very noble and aesthetically pleasing. Mostly produced panels of coffee, brown, sand and beige shades, close to natural.

Actual prices on the panel:
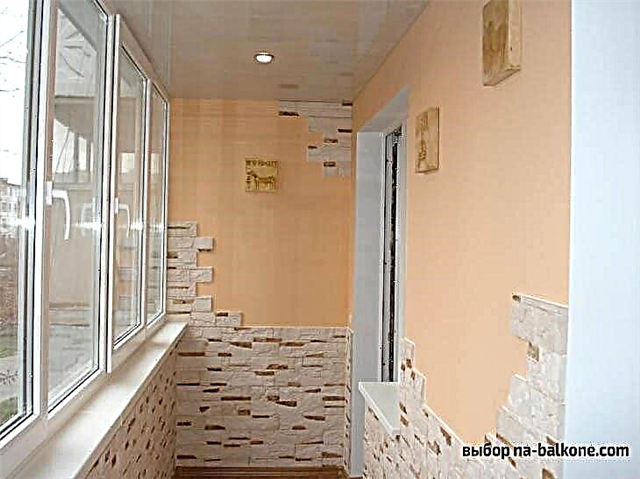
Decorative rock
Artificial stone can be attributed to a variety of ceramic tiles that mimic natural material. The technical indicators of the stone make it possible to use it in places of increased risk, including on the balcony, since it is not always possible to create favorable conditions on it, even if it is glazed. 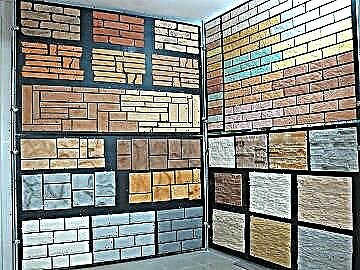
- Variety of textures,
- Laying is quick, often without prior surface preparation,
- Ease of installation
- Fire safety
- Durability, not susceptible to decay,
- Resistance to the chemical components contained in detergents.
The dark colors of the stone bring into the interior of small rooms, which include the balcony, some gloom, and this is the main disadvantage of the material. To solve the problem, it is combined with other types of finishes. The most problematic areas - panels, areas near the door and under the window - are faced with stone, and a different type of decoration is used to decorate the rest of the walls. You can also use light colors of decorative stone, which visually push the walls, and increase the size of the room.

Ceramic tile
The simplest, affordable, and never outdated type of wall material is ceramic tile. She truly is a panacea in many situations. As in the case of artificial stone, tiles are usually used to clad surfaces that are most susceptible to contamination, and the upper part of the walls is painted or glued with wallpaper. If the design of the balcony allows, it can be completely tiled with ceramic tiles, choosing different shades of tiles for the panels and the top.

Unlike many finishing materials, not only walls, but also floors can be tiled, harmoniously combining colors. Under the tiles, a warm floor with electric heating is arranged, and then the room is comfortable to use in the winter. This is especially convenient when the balcony is adapted for a study or attached to a living room or kitchen.
In addition to those already listed, there are some more advantages of facing with ceramic tiles:
- Unlimited service life,
- Easy to clean, not afraid of aggressive agents,
- Doesn't fade under the sun
- A wide range of colors, sizes, textures.
Drywall
If you need to perfectly align the walls for decorative decoration, it is better to sheathe the balcony with plasterboard. The material itself is not used for finishing, but is used as a base for painting, wallpapering, including cork and bamboo, stone and ceramic tile lining. 
Pluses of plasterboard lining:
- You can create a perfectly flat surface,
- Under the sheets of drywall, it is easy to lay a heater,
- Easy to cut
- The most convenient material for a spotlight device.
The drawback of drywall is the laboriousness of working with it: for installation, you need to arrange a crate, thereby hiding useful centimeters of an already small space. But if the balcony is large, it is well heated, and its design is important for the owners of the apartment, then drywall may be the best option for wall cladding.
As a rule, walls and ceilings are simultaneously lined with drywall, which can be done in two levels (again, if the area of the balcony allows). Also, a stretch ceiling is well combined with drywall.
How to sheathe a balcony inside?
The choice of material for covering the balcony is determined by what temperature it is supported (or not supported) in the winter, and how the room is used. If the balcony is glazed, but not heated, and in winter it is mainly used for drying clothes, it can be sheathed with plastic panels or tiled with ceramic tiles. In this case, the appearance will be quite aesthetic, and cleaning does not take much time, and the durability of the finish is guaranteed.

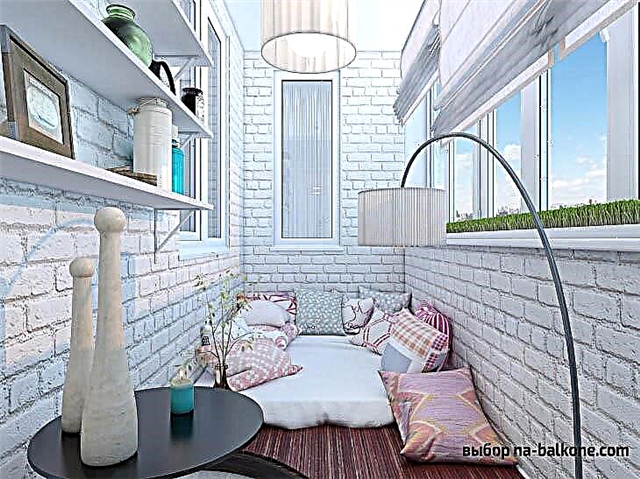
For a heated balcony, on which a study is arranged or a place for relaxation is equipped, cork panels and decorative stone are used in the decoration. Under the cork sticker, the walls are pre-aligned with drywall. You can also combine finishing materials, for example, to use tiles, stone, plastic panels for the bottom, and wallpaper or paint the top. If the balcony is used as a utility room, any kind of wood boards can be used for its decoration.
There are plenty of materials for covering the balcony, and there is always the opportunity to choose the option for a particular case.
Introductory video on the installation of the lathing and finishing with plastic panels:
How to finish the ceiling on the loggia
Warm air always rises up and leaves through the ceiling. Therefore, the first task is to insulate the ceiling. Foiled polyethylene foam is suitable for these purposes. But this method is only suitable for warming ceiling tiles, because it will not be possible to sheathe the top floor. No problems will arise if an expansion profile has been installed and there is space for insulation.
What to do if there is no expansion profile?
- Then it is advisable to use thinner insulation. Good thermal insulation provides foam. Although its thickness is less than polystyrene, the thermal insulation characteristics are more reliable.
- The desired effect can be obtained by using a dense vapor barrier. It is useful, does not allow moisture to settle on the ceiling.
- The effect of thermal insulation of the ceiling can be achieved by applying a thin profile for suspended structures. It can be wooden blocks of the right size.
- If you want to save space, plastic panels or thin drywall are suitable, unlike thicker siding and lining materials.
For the purpose of finishing the ceiling, any materials can be used:
Scheme of insulation and ceiling decoration on the balcony.
The choice of material can be made, taking into account the tastes and preferences of the owner of the balcony. The plaster is suitable for the final finishing of an insulated balcony. Its advantages are durability, moisture and frost resistance.
Frame mounting
This stage is carried out if the sheathing is made of PVC, MDF, siding panels or lining.
For the crate, a wooden beam with a section of 20x30 mm is used.
Tools you need to work:
- screwdriver, drill or screwdriver,
- jigsaw, saw or other tool for cutting wood,
- screws, dowels,
- construction level (hydraulic level).
Installation starts from the bottom of the wall. The first rail is mounted, retreating from the floor surface of 5 cm. A distance of 40-60 cm is maintained between the rails - in this case, the frame is stable. When working, the evenness of each rail must be checked with the help of a building level - the final result depends on the correct installation of the battens.
To fix the battens to the balcony wall, dowels and screws are used. They work from the bottom up, in stages, installing the frame first on one wall, then moving on to the next.
It must be remembered that horizontally the bars of the crate are installed if they plan to place the panels vertically, and for horizontal or diagonal sheathing, the rails are mounted vertically.
If the wall has defects (chips, bumps), when installing the frame, use a plumb line to determine the place and degree of deviation of the site, in the places of chips under the rail, put wedges.
MDF panels
MDF panels were invented by chance, this was facilitated by the malfunction of the steam press and the forgetfulness of the inventor William Mason. Particleboard panels are made from waste obtained after processing wood materials. MDF panels are stronger and more durable than chipboard, due to the use of surface lamination. Panels are resistant to high humidity
Using a special processing technology, the surface of MDF boards is more even and has constant dimensions, which is very important when finishing
MDF boards are produced in three main types, which have water, fire and biostable characteristics.
The use of MDF panels for cladding balconies or loggias has proven itself and is considered a good option in terms of financial savings.
Installation is carried out using wooden rails, as well as when lining the clapboard. This method makes it possible to hide the irregularities of the walls of the balcony, to use thermal insulation materials. In the case of using MDF boards, special brackets are also required. So the main difference is only in price.
Possible purpose
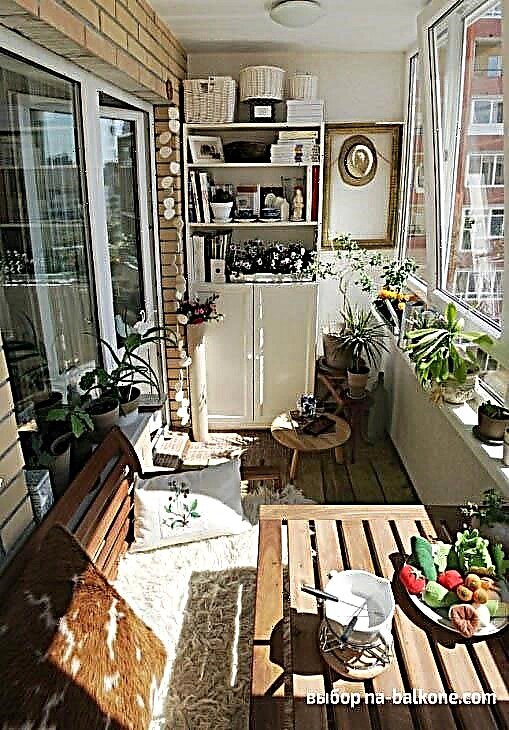
The interior decoration of the balcony will help turn the technical space into a room, which is so lacking in the apartment. Even if its area is very small, it can turn out:
- play area for children,
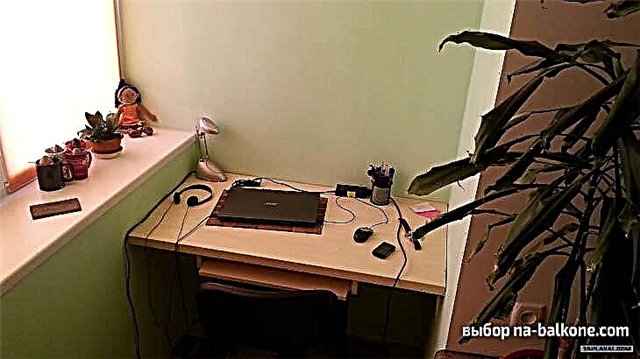
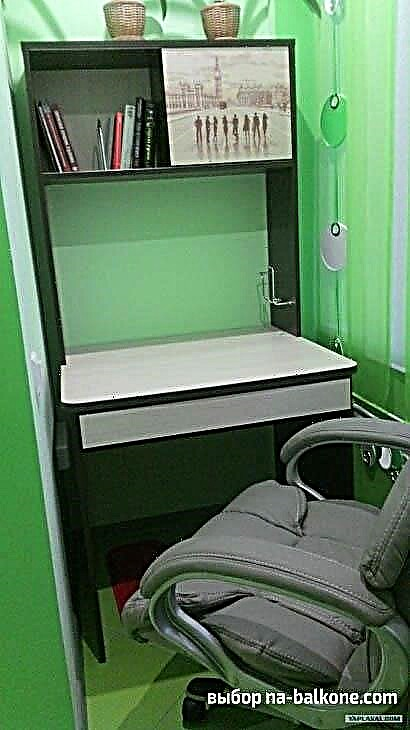
- home "office" (with a desk, computer and a wardrobe),
- a place for sports
- home theater
- wardrobe,
- a warm warehouse for storing things on the balcony.
Warming of the balcony will be required in any case, but will differ depending on the purpose of the room. So, for the home warehouse, only external walls and windows need to be insulated, but for other options this will not be enough.
Floor, walls, ceiling - how to arrange them? We are looking for a reasonable alternative to plastic siding and lining
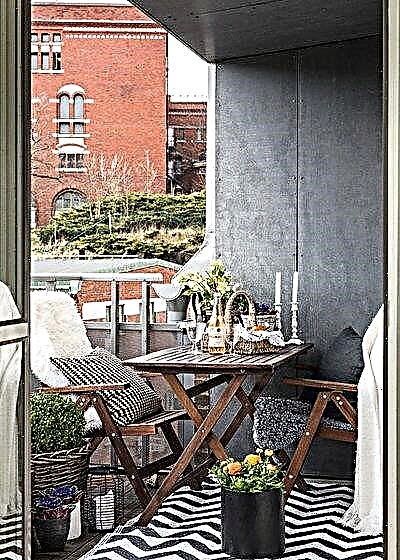
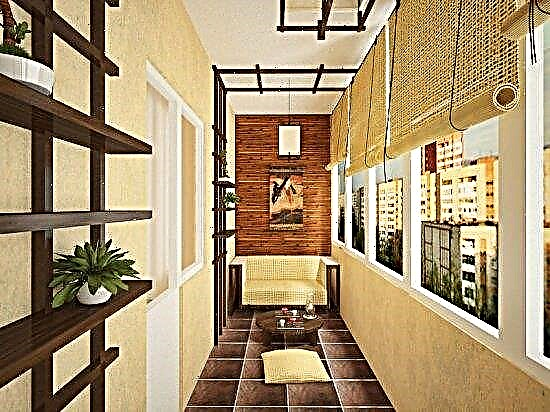
The balcony can be glazed, insulated and arrange there a relaxation area, a study or even a hookah room. But for a start - to finish the walls, floor and ceiling. And we have already selected inspirational ideas for decorating the balcony with a photo for you.
►We remind you: to ask the designer a clarifying question or to order your project, click on the photo you like, go to the portfolio of the project author
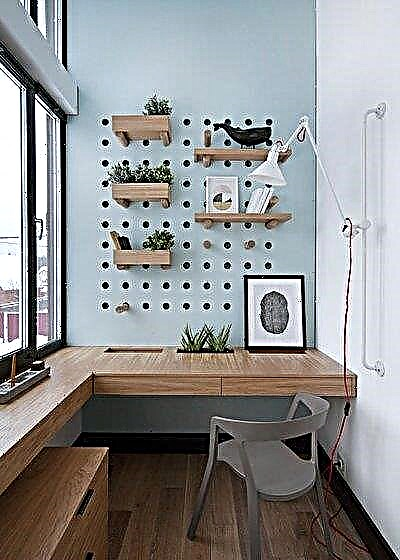
1. Perforated panels
Designers of the project: Ze | Workroom Studio
A place: Bunteikha, Moscow region
What do you like: loggia wall decoration can be literally functional. In the example with the photo, a perforated panel was attached to the wall, and the position of the shelves is easy to change by rearranging the holders into other holes.

2.Textile panels
Designers of the project: Levelhouse
A place: Moscow, Russia
What do you like: the size of this loggia made it possible to organize a relaxation area. The walls and the seat were made of soft textile panels.

3. Bright lining
Designers of the project: Lavka-design
A place: Moscow, Russia
What do you like: The color scheme of the design of the loggia may be unexpected. Why, for example, not paint the lining in a saturated color. In the example in the photo, the landlady took the hue of her favorite handbag.
BIG PHOTO…
Balconies — 1610 design ideas from real projects at Houzz

4. Painted lining
Project Designer: Natalya Maslova
A place: Moscow, Russia
What do you like: in this apartment, the lining on the loggia was painted in a light gray shade. Please note that only the wooden part was made gray. They did not cover the wall with the window with wood and painted white so that the loggia did not seem too gloomy.

5. Panel from the boards
Project Designer: Alla Senicheva
A place: Saint-Petersburg, Russia
What do you like: the wall of the loggia is decorated with a panel of tinted boards laid in different directions.

What do you like: the walls of this loggia are lined with a board (larch) and covered with transparent oil. This coating protects the surface like varnish, but it looks more natural. Due to the fact that the edged board is wider than the lining, the wall decoration does not look as “ordinary" as it could.

7. Wall panels made of wood
Project Designer: MO interior design
A place: Moscow, Russia
What do you like: wooden panels on the wall do not crush the surface and do not distract the eye from working in this mini-cabinet on the loggia.

8. Laminate for decoration
Project Designer: Olga Busorgina
A place: Chelyabinsk, Russia
What do you like: laminate flooring is a more economical alternative to wood panels.

9.Light and dark
Designers of the project: company "Dubrava"
A place: Nizhny Novgorod, Russia
What do you like: a loggia with a lining tinted under a dark wood would look gloomy. Another thing is the combination of dark veneer and solid oak with white walls.

What do you like: from the slats you can make a panel on the wall of the balcony or loggia - it looks beautiful, and if necessary it can become a backup for climbing plants, vines.

11. Striped painted walls
Project Designer: Olga Ievleva, OLGA IEVLEVA Interior design & decoration
A place: Moscow, Russia
What do you like: on this loggia the walls are painted with masking tape. In this way, you can make not only simple horizontal or vertical stripes, but also more complex patterns: for example, a herringbone pattern.

12.Moisture resistant wallpaper
Project Designer: Oksana Yakunina
A place: Moscow, Russia
What do you like: moisture-proof wallpaper (in the photo - Wall & Deco brand) you can paste on the bathroom, balcony, and sometimes even the facade of the house!

13. Wallpaper on the walls
Project Designer: Daria Ukhlinova
A place: Moscow, Russia
What do you like: For a glazed and insulated balcony, any non-paper wallpaper is suitable. The main thing is to align the walls well or glue the wallpaper on drywall.

14. Wallpaper panel
Project Architects: Owl
Project photo: Natalya Vershinina
A place: Moscow, Russia
What do you like: Large floral prints create a tropical mood on this loggia.

15. Moss wall
Project Designer: VM project
A place: Vladimir, Russia
What do you like: a small place to relax on the loggia with a panel of stabilized moss, which does not need care.

16. Cork on the wall
Project Designer: Natalya Zelenova
A place: Khimki, Russia
What do you like: cork coating is not afraid of moisture, does not rot, protects walls from fungus and perfectly retains heat on the loggia. And installation of such material is easier than lining or panels.

17.Just concrete
Project photo: Natalya Vershinina
A place: Novo-Molokovo, Moscow region
What do you like: concrete walls can be left intact. Just cover them with a light whitewash solution, giving a light whitish tint.
18.Panels for concrete
Designers of the project: REVENY
A place: Gothenburg, Sweden
What do you like: Large-format “concrete” panels can become an alternative to natural concrete coating.

19.Stucco and paint
Project Architects: Dmitry Baryudin and Igor Aparin, Architectural Bureau Kontora
Project photo: Yuri Grishko
A place: Moscow, Russia
What do you like: there are stucco mixtures for both open and closed (as in the photo) balconies. And even warm plaster with good thermal insulation properties.
Note: The floor on the loggia is lined with 10 x 10 cm metlakh tiles. Stacked in shifted rows, it creates an interesting optical effect.

20. Painted plaster
Project Designer: Natalie Nuvo
A place: Saint-Petersburg, Russia
What do you like: the walls on this loggia are covered with stucco (dry mix + PVA) under the “brushstroke” (applied by careless brushstrokes directly by hands). Over the owners applied matte washable paint.

What do you like: When choosing a tile for the walls of the loggia, pay attention to its weight - there should not be an excessive load on the walls (in conjunction with the frame).
BIG PHOTO…
Tile on the balcony — 354 ideas from real projects on Houzz

22. Tile wood
Project Designer: Rustem Urazmetov
A place: Dzerzhinsky, Russia
What do you like: the same color tiles used for the walls and floor helped align the complex configuration of the loggia.

23. Tiles on the windowsill
Designers of the project: MO interior design
A place: Moscow, Russia
What do you like: tiles can be used in unusual places. For example, on the windowsill of the loggia.

What do you like: clinker is perfect for the Russian climate, because such a tile is frost-resistant.
In construction stores, you can find clinker tiles of different types and colors. And if desired, it can be covered with paint.

25.Artificial turf
Project Designer: Anastasia fear
A place: Saint-Petersburg, Russia
What do you like: if you grow greens and flowers on the balcony there is neither time nor desire, then an artificial lawn is your option. It can “sprout” on the walls and even the ceiling: installation will be simple.

What do you like: Use materials unusual for interior decoration: for example, corrugated board, which is usually sheathed on balconies from the outside. Choose a wall (marking "C") - it has a minimum height of the corrugation, which "eats" a minimum of space.
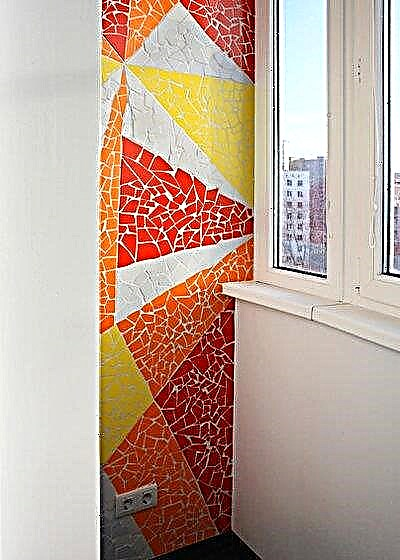
27.Mosaic from the remains of tiles
Project Designer: Vera Bedretdinova
A place: Moscow, Russia
What do you like: Feel yourself Gaudi: use the remains of the tile (or ask your neighbors, friends) to make a mosaic on one of the walls of the balcony.

28. Wpalette on an open balcony
Project Designer: mundojardin
A place: Spain
What do you like: such a hedge (climbing plants on the trellis) will protect from the sun on a hot day and create a favorable microclimate on the balcony.

29.Wpalette on a closed balcony
Project Designer: Anastasia Stenberg
A place: Moscow, Russia
What do you like: trellis can be used for other purposes. In the interior of this balcony, it is attached to the walls and creates a pleasant association with the garden.
note: The floor is decorated with teak.

30. Fence on the balcony
Project Designer: Petrina turner design
A place: Melbourne Australia
What do you like: another variant of the fencing on the balcony, inspired by the cottage, is a fence picket fence. It can also be purchased in ready-to-install sections. There is a more durable - metal picket.
_____________________________
This is archival material. First published in 2016, updated in 2020
_____________________________
YOUR TURN…
If you recently wondered what to choose for decorating the balcony, tell us about your experience. Share the pros and cons of the selected options and show a photo of the balcony trim in the comments section
Advantages of MDF boards
1. Moisture resistance (the possibility of wet cleaning). 2. Strength (comparable in strength to wood, exceed chipboard in this characteristic). 3. Low thermal conductivity. 4. Durability (resistant to temperature changes, not susceptible to mold, fungal diseases, damage by insects) 5. Accessibility of installation without special preparation. 6. High density of the material (if possible, it allows to process the plates on a milling machine, to create a diverse relief). 7. Low price response.
The disadvantages of MDF boards
1. Large weight (has more weight than a wooden plate of the same size). 2. Increased dust formation (requires the use of a respirator when processing plates). 3. The need for drilling holes for fasteners (nails, screws). 4. The composition of MDF boards includes adhesives and synthetic resins that increase the moisture resistance of the boards, but often contain harmful ingredients such as formaldehyde.
Material selection
The material that is planned to be used for interior decoration of the balcony should:
- be resistant to external influences (high humidity, sharp temperature difference),
- do not lose over time its attractive appearance (deform, burn out in the sun),
- differ in durability and simplicity in leaving. The lining, siding, MDF panels, moisture resistant gypsum cardboard are most often used. PVC and sandwich panels.
Properly prepared (treated with special impregnations with antiseptic components and flame retardants) lining meets all of the above requirements.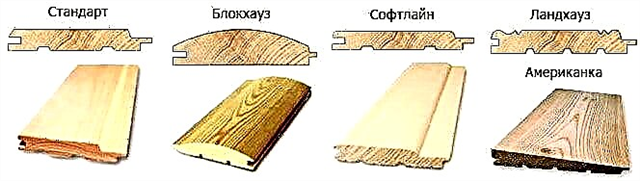
When buying, you need to pay attention to the class of the product - the higher it is, the better the material. Lining class “C” for decoration is not recommended
Siding panels can be used for lining the balcony from the inside - the material was originally intended for finishing the exterior surfaces of the building, therefore it has high moisture resistance, does not fade in the sun, and tolerates temperature extremes.
Moisture-proof drywall
Drywall for interior decoration is used only to create a base coat before applying decorative. It is cheap, allows you to align the walls, leaves room for the choice of finish.
The walls before installing drywall do not need to be leveled, as well as to eliminate minor defects (for example, chips). The installation process is not particularly difficult. The disadvantages include the fragility of the material.
The only thing that must be taken into account is that drywall can only be used on a glazed and insulated balcony or loggia.
Pvc panels
The material is characterized by a variety of color palette and texture, it is safe for health, durable, resistant to high humidity, fireproof. It is easy to install and easy to care for. The panels themselves are lightweight, so they do not burden the balcony.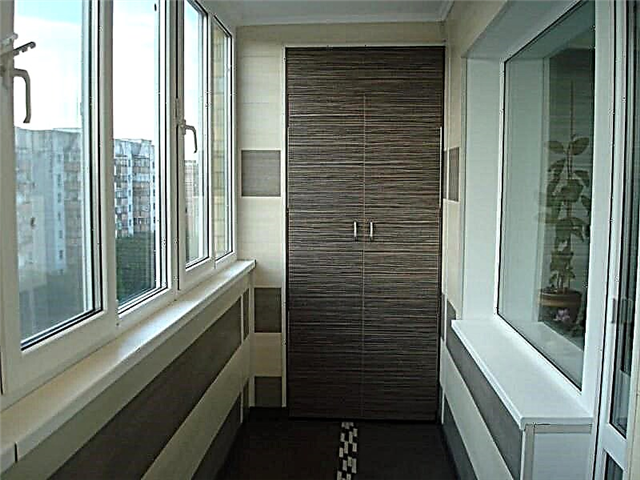
MDF panels
Wood-fiber panels have good performance, have a large selection of colors and textures (the coating can be made of veneer, plastic film, produce panels with a relief pattern). Sheathing the room with them is easy, and the walls do not need pre-treatment.
Sandwich panels
Three-layer material - the outer webs are made of a substance that is durable and resistant to external influences, and the inner layer consists of thermal insulation.
 Due to its structure, it is considered one of the most suitable materials for the interior decoration of a balcony.
- Among the advantages of sandwich panels: light weight,
- immunity to fungus and mold,
- safe composition for health
- good noise and heat insulation properties.
The balcony finished with such material does not need to be further processed; the surfaces look aesthetically pleasing.
PVC trim for the balcony
The material has a low weight and high moisture resistance, but it is not suitable for families with small children, as kids unknowingly can deform panels with sharp objects.
Apartment owners often choose to trim the balcony inside with plastic panels. If the loggia is not glazed, then first it is worthwhile to properly insulate it, because at low temperatures the material may crack.
Unlike plastic plates, when decorating a balcony with a moisture-proof laminate, such problems will not arise. They can even finish a cold balcony - the material due to the special substrate will retain heat inside the glazed room.
As an alternative, when decorating the balcony, tiles, vinyl siding and wood lining can be used. Interesting photos of the design of the decoration of the balcony are in our gallery.

Step-by-step instructions for finishing the balcony
Modern decoration of the balcony involves the use of waterproofing and insulation material. To properly do the repair yourself, you must adhere to the following rules:
Carry out the installation of the crate if plastic panels, siding, drywall or lining are used for decoration.
To lay a heater, which may be mineral wool or polystyrene
The interior decoration of the balcony is not done for one year, so it is important to do everything according to the rules so that the resulting interior delights the owners not only with the design, but also with its functionality.
Attach bars around doors and windows.
Directly carry out the interior decoration of the balcony with your own hands with one of the selected materials. For fasteners, dowels or kleimers can be used.
After such a decorative interior decoration, not only he, but the whole apartment will be transformed. Interesting ideas for decorating the balcony and its use can be found on the Internet.

The above materials and stages of work will help to understand how to make the decoration of the balcony yourself. This does not require special education or experience in the construction industry. When thinking about how much it costs to finish a balcony, you need to consider the price of the material, as well as the costs of its delivery and installation. If you do the installation yourself, it will be cheaper.
Preparatory processes
To make a long-lasting and beautiful decoration of the balcony inside, you must first prepare it. First, glazing is performed. It can be cold or warm. Any option will protect the balcony space from the wind, rain and large debris, and dust. If you plan to make the balcony a part of the living space, combine it with the apartment or arrange it as a separate functional zone, then choose warm glazing with wood or a plastic profile.
The next mandatory preparatory process is a thorough waterproofing. All cracks on the balcony are filled with mounting foam or special sealant. Surfaces are treated with impregnating or coating waterproofing so that moisture does not penetrate through the capillary.
After waterproofing, finishing work can be carried out if the balcony is not planned to be insulated. If it is insulated, then first heaters are mounted.
For insulation, foam, foam or mineral wool is used. Choose a heater, taking into account its characteristics and prices.
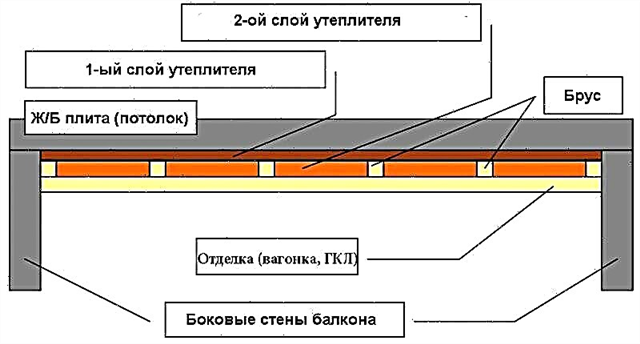
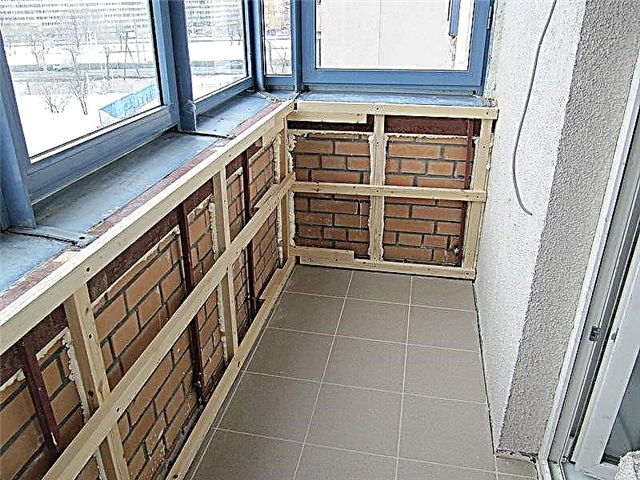 Fig. 2 Warming of the loggia before decoration
Finishing the balcony with wooden lining
Wooden lining for the upholstery of rooms is made from different species of wood: pine, aspen, larch, ash, linden. And if funds allow, you can use a more expensive, oak lining. In the interior of a sheathed balcony, any tree looks great, but pine and linden are easy to process and have the lowest cost. Also, when choosing a lining, it is necessary to take into account the class of wooden lining: “Premium”, “A”, “B” and “C”. The higher the grade, the better the quality of the wooden lining.

Wooden lining - an unsurpassed material for a covering of a balcony.
The interior decoration of the balcony with a clapboard begins with measurements. The area of walls, ceiling, minus window and doorways, gives a clean finish.
The interior decoration of the balcony with a wooden clapboard requires such materials.
- Lining.
- Bar 60 × 40 mm.
- Rail 60 × 15 mm.
- The insulation is foam or from mineral wool, 40 mm thick.
- Vapor barrier material.
- Antiseptic wood preservative.
- Varnish on wood.
- Cladding fasteners.
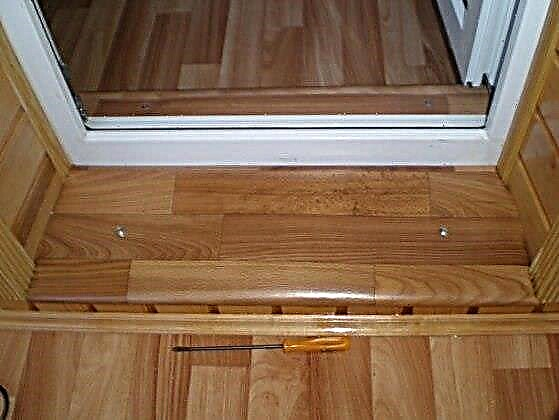
You can also use a planed board for windowsill and decoration of window and door slopes.
After mounting the casing frame, the balcony begins to finish with wood. First, we cut the boards of the lining of the required length and quantity. Next, we take the first finishing board, cut off the spike from it, apply it to the wall with a cut and fix it. As fasteners of wooden lining, you can use clamps, hammered directly or straight nails, through fastening with a plug. But the best option to solve the problem is how to fix the wooden lining inside - the use of clamps.
It is carried out as follows. At the intersection of the lining and the battens of the casing frame, insert the clamps in the groove of the board and fasten with nails. Further we carry out such steps. We take the next lining, insert its spike into the groove of the fixed board and press it tightly.
Note: in order for the lining to fit tightly, you can lightly tap it with a mallet or a hammer, but first attach the rail. In no case do not damage the groove crest, otherwise the installation of the next planking board will become problematic.
Similarly, install the rest of the lining boards. We cut the last one so that it fills the remaining space of the casing, and nail it along the edge with nails. Subsequent installation of the scraper will hide the head of the nails.
You can watch a video on decorating a balcony here:
Internal insulation of the balcony
High-quality internal insulation is not a whim, but a necessity. You can achieve a significant increase in air temperature in this area.
A significant role in warming is played by high-quality glazing. The absence of drafts instantly affects the microclimate. After installing the windows, you can proceed directly to the insulation.
First of all, you need to choose a suitable insulation. Consider the following options:

The scheme of insulation of the balcony with foam.
- Styrofoam. This material is absolutely not afraid of moisture and temperature changes. It is quite durable. Plates are mounted quite easily, in addition, you can choose the thickness of the plates, which is especially true for owners of miniature balconies.
- Extruded polystyrene foam. Modern insulation, fully suitable for indoor insulation of the balcony. It has all the qualities of polystyrene and is fireproof.
- Mineral wool. This material can also be used, but you will have to take care of the acquisition and installation of steam and waterproofing materials. Mineral wool absorbs water, which is extremely negatively reflected in its heat-insulating properties.
Advantages of Laminated Panels
1. Antistatic. 2. Mechanical resistance. 3. Heat resistance. 4. Moisture resistance. 5. High wear resistance.
The panels have a large selection of colors and texture. They successfully imitate the texture of velveteen, wood, leather, linen, which is widely used by designers to create eco-style.
The material of the laminated panels, unlike plastic, is antistatic, does not collect dust, which makes it easier to care for them. UV resistance allows you to use them on the sunny side of the apartment. It remains only to choose which panels to sheathe the balcony and get to work.
Warming process
To maintain a good result for a long time and significantly expand the functionality of the room, simultaneously with the casing, the balcony is insulated. This process is carried out after installing the lathing and before starting the finish.
The most popular materials: polystyrene foam, polystyrene foam and mineral wool. It is convenient to work with polystyrene foam, mineral wool provides reliable sound insulation, foam polystyrene is durable and fully complies with the requirements for thermal insulation for a balcony.
The selected material is cut into layers, slightly larger than the width of the cell frame - this is necessary so that the thermal insulation is held stronger. Fasten using construction foam and construction glue. Another option is to use it for fixing with nails or self-tapping screws, but in this case it is impossible to press the material too tightly.
Wooden lining
One of the finishes is a wooden lining. This version of the lining of balconies for many years does not go out of fashion.  In the decor you can always use natural drawings of wood and its natural colors. It is an environmentally friendly material. Periodically processing with special antiseptics and drugs that isolate moisture, you can extend the use of wooden panels.
It has long been known that wood carries good energy, breathes, radiates heat, retains heat, gives the room a certain coziness and comfort.
The disadvantage of this finish is the high price compared to other materials.
PVC interior paneling
Doing it yourself with panels with your own hands will be more economical than finishing the balcony with tiles, especially since this material is not inferior in color to the color palette. With its help, it is easy to adjust the curvature of the walls as successfully as when using a material such as plaster on beacons.

Paneled balcony. Photo
Finishing the balcony with PVC panels. Photo
The combination of sound absorption, moisture resistance and resistance to solar ultraviolet radiation gives plastic finishing materials significant advantages.
For decorating the loggia with your own hands with PVC panels, it is better to opt for panels with a width in the range of 30 to 50 cm and a thickness of at least 1 cm. Sheathe the balcony with PVC panels when following the recommendations clearly should not cause difficulties even for laymen in construction.
The interior decoration of the balcony with PVC panels is not so complicated. For training, watch the video below or read the article.
How to panel a video with a balcony
Plastic panels are easy to fit in size using a conventional cutting tool, they do not require complicated maintenance, they are safe in fire protection. The stiffening ribs located on the inside of the panels give them increased strength. This material is resistant to fading and significant fluctuations in ambient temperature.

Finishing the balcony with pvc panels. Photo
How to trim the balcony inside. Photo
Each of the options for finishing the balcony with your own hands is quite realistic to implement without resorting to the services of hired specialists. To do this, there is a huge selection of various types of building materials and several types of plaster, with which you can carefully prepare the work surface, decorate the interior and eliminate imperfections. And then more than one year to enjoy the results of their work.
Plastic panels
Plastic lining, plastic panels have many advantages. They differ only in their mix. With proper assembly, the seams between the panels are visually and tactilely practically indistinguishable and, in the final version, the assembled canvas is a flat surface.
Material characteristics
1. High strength, thanks to high-grade plastic and special design of stiffeners. 2. High fire resistance. 3. High moisture resistance. 4. High biostability, due to surface coating with special resins, which give plastic resistance to aggressive substances.
Raw materials for the manufacture of plastic panels are 100% environmentally friendly material. Plastic does not respond to ultraviolet radiation, does not change color for a long time, does not require additional processing in the form of painting, varnishing, very easy to clean.
There are a huge number of plastic panels on the market that vary in color, size, texture, which gives a wide selection for design solutions.
Covering the balcony with plastic panels, choose pvc panels for the balcony
As for the shortcomings, they are practically nonexistent. This is only the relative fragility of PVC panels for a balcony and the imperfection of very cheap samples. Remember that the cheaper the plastic sheets, the more trouble they will deliver during installation.


Covering the balcony with plastic panels is a pleasant and uncomplicated task, which a novice will be able to cope with. In addition, our video, shot by professional builders, is to help you. Actually, the technology of work includes the following steps:
- Installation of the crate. Perpendicular to the direction of the facing, install a crate of wooden or metal battens at a distance of 400-500 mm from each other. Control the quality of the mounted base by level.
- Installation of the first panel. Cut the wall panels for the balcony to the desired size and install the first sheet in the corner of the crate, align it with the level. Secure the part with self-tapping screws with a press washer or furniture stapler. Using the same principle, install the remaining structural elements.
- Installation of the final profile. The theory of how to sheathe a balcony with plastic panels does not end there. After processing each wall, it is necessary to install finishing profiles. The video demonstrates this technology in more detail.
- Installation of the finish panel. Having cut the PVC sheet to the required dimensions, snap it into the groove of the previous element.
Now you know how to sheathe a balcony with your own hands, and you can repeat the work of the master yourself. And for inspiration, we suggest you look at beautiful and high-quality examples of the skin of the balcony of the photos that are in the gallery.
Sheathing process
The principle of covering the inner surfaces of the balcony for siding, MDF, PVC, sandwich panels and lining is approximately the same. Work begins with a solid wall, and only then go to windows and surfaces with doorways.
The crate and the walls are treated with antiparasitic and antiseptic agents.
Sheathing is carried out in two ways - open or hidden. The first allows you to get a solid and even coating, the inside allows you to disassemble the skin at any time.
With the open method, the lining is fixed with nails or self-tapping screws from the side of the tongue. In the second case, a clip is used (a special clip), which allows you to remove individual elements in order to replace them. The process of work itself should not cause difficulties.
Panels are cut into pieces of the right size. Work begins with the installation and fixing of the start profile. It is placed in the corner, with the help of a level it is fixed exactly. One end of the panel is inserted into the profile, the other is fixed to the crate. The joints of the panels are fixed with a connecting profile.
To finish the corners, use an angular profile, and the finish set at the end of the work. Before securing it, make sure that there are no gaps in the skin. To hide the joints near the floor and ceiling, a plinth or ceiling molding is used.
Covering the balcony inside: TOP-6 materials
We considered these options in detail in the following articles:
Before sheathe the balcony inside, you must select the material for this. It must be resistant to ultraviolet radiation and have a high coefficient of density and thermal conductivity. Materials that reflect solar energy down are well suited.
Siding
This type of lining is best used on balconies and loggias that are not glazed. And since the siding is metal sheets prepared for fastening, then a hacksaw or scissors for metal will be required for work. In rare cases, a Bulgarian. If you are able to handle these tools, then cladding with siding is also not difficult.
Please note that this material quickly loses color when exposed to sunlight.
Sandwich panels for the balcony
They consist of layers of durable material, between which there is a heat insulator. This is only why they are considered one of the best options for covering the balcony. They perfectly retain heat in the room, provide good sound insulation, weigh a little and are environmentally friendly. Sandwich panels are also resistant to mold and mildew.
Another advantage of this type of finish is the lack of need for additional decor. The assortment contains quite a lot of design solutions. Sandwich panels are also easy to mount - on self-tapping screws or staples.
MDF panels
The main advantage is the wide range and availability. The variety of colors allows you to realize many design fantasies and create a unique design of a balcony or loggia. Modern MDF panels have a polymer protective coating, so that they are resistant to the influence of the external environment and are quite easy to care for.
But wood boards do not respond well to high humidity, so if the balcony is poorly insulated, they will change their structure, swell and warp.
Preparatory work
Before sheathe the balcony, you need to prepare it for decorative decoration:
- Choose the degree of insulation - depending on the purpose of the room.
- Inspect the floor slabs from below and from above and, if there is damage to the concrete layer, repair (for more details, see the article “repairing a balcony slab”) and make reinforced waterproofing of the balcony.
- Remove the old decor on the wall and all layers on the floor all the way to the stove.
- Inspect the screed and, if it is in poor condition, renew (for more details, see the article “floor screed on the balcony“).
- Perform insulation of the front and side walls.
- Replace the old window frames with double-glazed windows, and put a new door. (Read also the articles “balcony glazing with your own hands” and “modern glazing of the loggia“).
- To think over the future arrangement of furniture, appliances and make wiring.
If you do not take care of the waterproofing on the balcony, condensation will appear, and this will lead to damage to both the casing and the objects located in this place.
As a heater, you can use mineral wool, foamed foam, extruded polystyrene foam (For more details, see the article “How to insulate a balcony with foam”.). It is important to mount them after closing all the cracks, i.e., completely stopping the flow of air flows.
Lining installation
- Coat the potholes remaining after the old coating with cement mortar or putty.
- Check the level of the evenness of the walls and, if there is a significant blockage, apply a layer of plaster to which the lining will be fixed.
- Soak wooden boards with an antiseptic.
- Install the crate. To do this, make markings with the location of the lines 10 cm from the walls and at a distance of 50–70 cm from each other. Drill holes in wooden blocks with a pitch of 15 cm. Fix the crate with dowels and screws.
- Nail the first element to the crate with a nail in the middle of the spike.
- Take the second element and insert the spike into the groove. Do the same with the rest.
To install the lining in areas near the ceiling and walls, it is cut with a jigsaw.
Installation of plastic panels
- Carry out surface preparation work.
- Mark and install the crate (as in the section above).
- Fasten the first element to the ceiling lathing.
- Set the guide profile in the center of the wall.
- Close the ceiling surface by inserting the grooves into the spikes.
- Repeat these steps on the walls.
- Trim the corners with plastic plugs.
It is recommended to immediately buy plastic panels with a margin of up to 10%.
Drywall Installation
- Prepare the surface, make the crate of metal profiles (cut to size with scissors).
- Place the cut parts of the insulation between the crate and the rough surface. Cover the structure with foil, and secure it with a stapler.
- Trim sheets of drywall to the desired size, chamfer them.
- Attach the first element (20 cm from the corner of the ceiling) to the screws.
- Also set the remaining items. In the end - close the corners with pieces of material of the required size.
- Apply a primer to the drywall surface and then putty.
- Lay a serpentine on a still wet layer of putty and coat with a second one.
- Make a primer for further decorative lining of the balcony.
Hats of self-tapping screws should be buried in sheets, but not until they crack.
Installation of siding
- Perform preliminary work.
- Install the frame of wooden battens on the ceiling and walls.
- Mount the thermal insulation in the voids of the frame, close with waterproofing.
- Fasten special guide profiles to the frame.
- Cut the siding to the exact parameters with metal scissors.
- Install the first panel in the corner (without indentation) - on the self-tapping screw.
- Pull another tongue over a wide part and secure.
- After finishing the entire area, install the edges and caps.
Wooden frame slats are driven in increments of 40 cm on the ceiling, and 50 cm on the walls.
Installation of sandwich panels
- Fix fasteners and internal corners to the crate.
- To do the preparatory work described above.
- If the panels will reach the ceiling - make a baseboard.
- Put the first one in the corner near the ceiling, fix it with a self-tapping screw.
- Insert the next element into the groove (a self-tapping screw is not needed for fastening).
- Check for even joints - no gaps or backlash.
- Mount additional elements on the edges and external corners.
- Perform a final check at the construction level.
The rigidity of the construction of the sandwich panels provides a thorn-groove connection.
Installation of MDF panels
- Prepare the surface, make a wooden / metal crate.
- Place the first element in the corner, securing it to the clamp or bracket.
- Install the second in the groove of the previous one and also fix it.
- Thus close all the walls and put the plugs on the edges.
Preparation for installing MDF panels completely repeats the work with the lining.
How to sheathe a loggia or balcony with a laminate
Laminate is a common floor covering, but it can also be used for covering the walls of a balcony, if a number of requirements are observed:
- The temperature in this room should not fall below 5 C. Double glazed windows and an additional layer of insulation under the finish should be installed.
- The use of a special waterproof type of laminate on a plastic basis.
- Lack of rigid fastenings - so that there are no cracks during oscillation.
- The location of the panel fasteners outside the laminate locks.
The advantages of the laminate in the cladding are accessibility, ease of installation, a wide variety of colors and textures, strength, moisture and heat resistance, hygiene (mold and fungus cannot develop on it) and ease of care.
However, the laminate is susceptible to temperature changes, swells from high humidity and has a fairly large weight, which makes it difficult to mount it on the walls.
For self-cladding a loggia with this material, you will need a standard set for laying the laminate on the floor, and tools for the lathing: a hammer, drill, nails and screws, a hacksaw, clamps, bars for fitting, spacer wedges, a ruler, a square, a pencil.
Installation of the lathing of the balcony
- Check the evenness of the walls, mark the hollows with a pencil, plaster.
- Install the bottom stop for the first row.
- Determine the location of the vertical frame - with a large laminate, the crate should lie along their middle and edges (step 40 cm).
- Drill holes in the right places with a drill. Post the screws.
- Mount the extreme elements of the metal crate.
- Fasten wood slats on top.
- Lay insulation in between.
Laminate installation
With your own hands, it is easiest to perform horizontal laying of the laminate. To do this, you need:
- Fasten the first board in the central part of the walls with two clamps: insert into the grooves and nail with nails or screw with screws.
- Continue installation clockwise - turning the boards relative to each other, and closing the “locks”.
- Seal the lock joints with sealant.
- Fix aluminum corners at the edges and cover with sealant as well.
Many are worried about the question of whether it is possible to sheathe a laminate on the ceiling on the balcony and loggia. If the walls and floor are already finished with this material, then the answer is yes - yes. So the room will get a finished look and will look like an office.
The installation of the laminate on the ceiling does not differ from the wall decoration - this is the leveling of the surface, the primer base, the creation of the crate. Next, around the perimeter, you need to install a 5 cm rail and cut niches for the wires under the lights. The main nuance is a longer manual combination of adhesive surfaces, so that under the force of gravity the laminate panel does not fall off before the fasteners have time to “grasp”. When decorating the ceiling with a laminate, ceiling skirtings must be.
Conclusion
Today, independent lining of balconies is a procedure that even beginners can successfully perform. If you follow the instructions and purchase quality materials, you can get a new room in the apartment. And choosing what is better to sheathe the balcony inside, you should be guided by the purpose of the room (more in the article “Design of the balcony“).
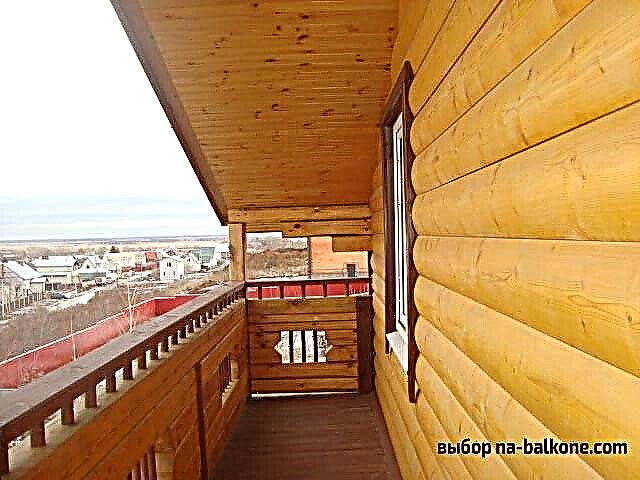
Block house
The effect of a rounded beam allows you to create a country corner in the room of the balcony.


The appearance of a block house imitates a rounded beam. Moreover, experts evaluate its performance better than that of a natural analogue. The main distinguishing feature is the maximum flat surface, without a single defect. That is why this type of cladding is so attractive.
Facing with decorative bricks and light-colored PVC panels.

The room is decorated with plastic panels in beige tones.

PVC panels in interior design.

Consider the advantages of PVC panels:
- PVC panels are easy to care for and maintain their initial appearance. Most often, the panels are cleaned with a soft sponge dipped in water,
- A large selection of shades allows you to find exactly the option that you need to create an interior,
- The duration of operation is longer than that of lining. PVC is not affected by moisture, changes in air temperature and exposure to light,
- It is one of the most economical ways to repair,
- The panels are fireproof.
Plastic panels in the space of the loggia.

Disadvantages:
For the design of a home hookah, we used PVC elements in a light green color scheme.

MDF boards resemble fiberboard, however, it is processed differently thanks to modern technologies.
Glossy MDF boards with marble texture. For repair used two shades in pastel colors.

Pros of MDF:
- High strength (not inferior to ordinary wood)
- The elasticity of the plates. Due to this property, the plates allow you to mask differences in the design of the crate (up to 50-70 mm),
- Practicality (long service life),
- Affordable price,
- Installation does not require much time and effort,
- Wide size range,
- Large selection of textures and colors of MDF panels. The collections of different manufacturers present natural textures - marble, wood, etc.,
- There are several coating options - MDF can be matte, glossy or textured.
MDF boards wooden texture.

Minuses:
- MDF boards are fire hazardous,
- Subject to moisture.
Drywall Sheets
The walls are sheathed with gypsum plasterboard, the top layer is wallpaper.

Wallpaper in the design of the room.

Wallpaper for painting. The walls are lined with drywall sheets.

The interior is in light green hues. Painted drywall sheets in a loggia space.
GKLV is often used in the repair of loggias, despite the fact that the material is fragile, and sheets without a finish lining quickly lose their initial appearance.
Finishing layer - two types of wallpaper (light gray and imitation stone).

The painted surface of the walls (at the base of the drywall board).
The reason for the popularity is explained by a number of the following features:
- Drywall sheets are easy to install,
- Due to the properties of the material, it is possible to implement various ideas in the interior of the loggia,
- Low price GKLV.
The niches in the room are made using drywall, the top layer is paint.


Drywall glued with wallpaper for painting.

Mini bedroom. Facing GKLV premises, the finish layer is paint.

In order to mount GKLV, you must first organize high-quality hydro and thermal insulation. Thus, fragility will not cause trouble during operation.
The walls of a small nursery are aligned with the help of GKLV. Finishing layer - paper wallpaper.

Decorative plaster
Finishing with this material is quite common in the repair of balconies.
The surfaces covered with decorative plaster perfectly complement the Scandinavian style in the interior.
The walls of the loggia are covered with decorative plaster.

Small living room on the balcony. Plaster is used for cladding.

Advantages of decorative plaster:
- This finish will last a long time (does not rot during operation), is resistant to chemicals, mechanical damage, high humidity and a sharp change in ambient temperature,
- The surface does not collapse
- Due to the special structure, using plaster, they create a different relief, pattern on the surface and texture of natural materials,
- The material is absolutely harmless and fireproof, has a high degree of vapor permeability.
- It allows you to create a comfortable atmosphere, provides good sound and heat insulation,
- The basis for application can be any: brick, concrete, from gas and foam blocks, drywall,
- The material can be applied in such a way that the surface becomes as flat or sloppy as possible, otherwise the plaster will look old. It all depends on your preference.

Terrace on the balcony. A special atmosphere is set by the texture of the plaster and inaccurate application of the material.

Fake diamond
The combination of decorative stone and plaster.
Balcony design using artificial material imitating natural stone.

Brickwork effect in a modern design.

Advantages of decorative stone:
- Affordable price,
- A variety of textures, colors and sizes,
- There are straight and angular elements, so the installation process is extremely simple (installation does not require special experience),
- Good resistance to rotting,
- Prevents the onset and spread of fire,
- Not subject to corrosion
- High abrasion resistance
- The service life is comparable to brick and concrete,
- Does not accumulate radiation, is harmless to humans,
- Eco friendly
- Low weight allows you to mount the stone immediately, without first reinforcing the walls.
Artificial slate in the decoration of the room.

Decorative brick in a modern interior.

Artificial brick goes well with the texture of wood and modern pieces of furniture.