The value of additional square meters in a city apartment is difficult to overestimate. The loggia can be a cold island for storing things or a warm room for living. But, in order to be able to fully use it, you need to take care of ensuring an acceptable temperature in this room.
Warming of balconies and loggias has become the main task for those who want to expand the useful area of the apartment.
The degree of insulation depends on the purpose of the room, as a living room or storage space.
And if the question whether it is necessary to insulate the loggia has long been resolved, then there is still no consensus on the place of insulation.
Three directions for warming the loggia
- loggia insulation outside - preferred option. In this case, the freezing point shifts to the outside, i.e. towards the heater mounted outside the loggia. This will allow not only to insulate the surface of the wall, but also to maintain the bearing properties of the material from which it is built. In addition, the internal space of the loggia is saved.
The only drawback of insulation from the street is the cost of high-altitude work (industrial mountaineering). A hard heat-insulating material (polystyrene foam, polystyrene foam) is used for insulation from the outside, which is covered with a polymer mesh and protected with a strong cement mortar and / or decorative plaster,
- bilateral warming and finishing of the loggia. It involves the installation of heat-insulating material outside and inside the loggia. Such a solution is impractical in principle, because from the point of view of heat efficiency, it does not matter which side the work is carried out.
- warming the loggia from the inside. Internal insulation is the most popular option, because It is possible to do the work yourself. However, in this case the useful space of the loggia is reduced. Nevertheless, we will dwell on this option in more detail.
Step 1 - Determining the need for insulation
Depending on the future purpose of the room, a decision is made on whether to insulate the loggia from the inside or outside, what type of insulation and what thickness will be used.
By definition, a loggia is a room in a building with one side open. This specificity makes it possible for owners to perform insulation with lower financial costs compared to balcony insulation.
The fact is that only one side will need to be insulated - the parapet of the loggia. As for the other parties, if they border on the heated premises of the apartment, there is no need to carry out insulation.
Step 2 - The degree of insulation of the loggia
It is a mistake to assume that the glazing of the loggia with double-glazed windows is a fairly reliable way to save heat in the room. In order to ensure the desired temperature in the room with minimal costs, you need to take care of the thermal insulation of all surfaces: walls, floor, ceiling. It is better to carry out the work at the same time, but it is possible in parts, the main thing is to follow the order.
Step 3 - Choosing a heater for the loggia
At first glance, the selection is not difficult. However, the variety of heat-insulating materials makes you wonder what is better to insulate the loggia from the inside.
- penofol (40-50 rubles / sq.m.). Belongs to the group of semi-rigid heaters. It is distinguished by the presence of two layers: foamed polyethylene and foil, which will serve as a reflector (reflects up to 97% of thermal energy). Warming the loggia with penofol is more justified than warming the balcony with it, but, despite this, using penofol alone is a rather rare occurrence,
- Styrofoam (2560-3200 rub./cub.). Optimum price / quality ratio. It has excellent thermal insulation properties, non-hygroscopic, does not require the use of films, easy to install. Polyfoam with different densities (15, 25, 35 kg / m3) and different sheet thicknesses of 20-100 mm is available on the market, which makes it possible to vary the thickness,
- polystyrene foam (extruded polystyrene foam or polystyrene foam) (3500-5000 rub. / cube). A newer generation of foams. When saving the advantages of the foam, it is distinguished by a high density (40, 100, 150 kg / m3) and a groove-comb fastening system, which makes it possible to avoid cold bridges. Warming the loggia with foam foam is one of the most effective ways of thermal insulation, but widespread use restrains its cost,
- cotton wool. Representative of soft insulation. Mineral (400-500 rubles / unitary enterprise = 5.76 sq. M.) Or basalt wool (650-720 rubles / unitary enterprise = 5.76 sq. M.) Are good because they make it possible to insulate the surface with irregularities or gaps. In the line of heaters of this type there are materials with different densities and prices. However, a common drawback of mineral wool is its susceptibility to moisture. This requires the use of waterproofing films,
- polyurethane foam. Thermal insulation material, which is sprayed onto the surface under pressure, allowing to fill the smallest gaps. Loggia insulation works are quick, but expensive,
- expanded clay. Loose insulation. It has a significant weight and can only be used for floor insulation,
- aerated concrete. Allows you to align the walls and insulate them, but the usable area is reduced.
With the exception of expanded clay and aerated concrete, each of the heaters can be used to warm the loggia.
Factors affecting the choice of insulation:
- the technical condition of the surfaces to be insulated: their configurations, the height of the floor / lowering the ceiling, the condition of the ceiling,
- the number of surfaces to be insulated. Often the wall adjacent to the room is not insulated,
- climate. In regions with high humidity, it is undesirable to use soft heaters,
- environmental friendliness. Polyfoam is considered the least environmentally friendly material, basalt wool is the most
- ease of installation. Rigid heaters are mounted easier. When using them, you can do without forming a crate for laying soft cotton wool. Also, there is no need to use films. Expanded polystyrene has the best qualities in terms of installation, thanks to the groove-comb system,
- type of finish coating
- project cost: insulation of a turnkey loggia or do it yourself.
Step 4 - Preparing Materials and Tools
For work, you need to prepare: heat-insulating material, mounting foam, primer, wooden beam (50x50, for the floor) and battens (50x30, for installing the crate for soft insulation), a film of vapor and waterproofing (for soft insulation), hardware, metallic tape, Decoration Materials.
From the tool: hammer drill, drill, level, hammer, tape measure, foam gun, vacuum cleaner, stapler, pliers, pencil.
 DIY loggia insulation tool
Step 5 - Glazing the Loggia
Glazing and warming of loggias are two interdependent actions. When installing plastic windows, it is necessary to give preference to a 4-chamber profile and a 2-chamber double-glazed window. During installation, it is necessary to monitor the tightness of the fit of all structures. Outside, the installation of the tide is mandatory, which avoids leakage of water. A window sill is installed inside, taking into account the thickness of the insulation.
Installing PVC windows makes it possible to increase the temperature on the loggia by 2-3 degrees compared with the temperature outside the window.
If it is not possible to replace old windows, they can be sealed. Warming of the windows of the loggia is best done according to Swedish technology. It makes it possible to increase the thermal insulation properties of a window without changing their functional characteristics.
Step 6 - Surface Preparation
Whatever type of insulation was carried out on the loggia, it, due to its insignificant area, must be freed from everything outside. For this reason, it is advisable to carry out the insulation of the entire loggia at the same time.
Then the actions necessary for further work are performed:
- Removing protruding parts that can be removed
- gating and drilling walls. If necessary, electrify the loggia,
- processing of elements that cannot be dismantled. The metal is cleaned and primed,
- priming all the surfaces of the loggia. This will inhibit the development of the fungus,
- cleaning.
Step 7 - Insulation of the floor on the loggia
It is advisable to start insulation work from the floor.
The insulation of the floor on the loggia, regardless of the material, is carried out on the lags. An exception is the installation of insulation with a subsequent screed under the tile or when installing the system underfloor heating. The work is carried out in several stages:
- installation of penofol. This is not necessary, but masters advise to lay penofol, with the reflecting side up. Due to the reflectivity of penofol, almost all the heat that comes from the wall adjacent to the room or from the heating source remains in the room,
- lag mounting. Prior to installation, the beam must be cut to size and primed. The longitudinal beam is laid at a distance of 50-70 mm from the walls, and transverse with a step that is equal to the width of the insulation (for polystyrene 500 mm, for cotton and expanded clay - 600 mm.). The bars are attached to the floor with dowels. During the installation of the logs, they are monitored for the correctness of their fastening, in the future they will serve as a guide for the arrangement of the floor and the installation of the final floor covering.
Note. Mounting the log close to the wall increases the risk of wood deformation if it gets wet.
- installation of insulation. Hard insulation lays between the lags. When warming the loggia with polystyrene or polystyrene, it is not recommended to use thick material. Masters advise you to purchase thinner sheets and stack them with offset. This minimizes the surface of the cold bridges. Cotton wool is also placed between the lags in such a way that the material is laid freely, without knocking down. A vapor barrier film is placed on top of the cotton wool to prevent it from getting wet.
- joint sealing. If the hard insulation is laid with gaps, they need to be blown out with mounting foam, which is a good insulator.
- arrangement of the rough floor. It is not recommended to lay laminate or lay linoleum before the end of work. If the floor is tiled, it is mounted immediately and protected (covered) with cardboard.
 Installation of logs for floor insulation on the loggia
  Log insulation on loggias on logs
  Waterproofing lag before insulation
  Mineral wool insulation
Step 8 - Insulation of the ceiling on the loggia
This stage can be excluded if the floor of the neighbors is insulated from above. If not, then the easiest solution is to warm the loggia with polyurethane foam. It adheres well to any surface, and work can be done in a day.
Often, the ceiling is insulated on the loggia with rigid heaters, less often with cotton. Work order may vary.
Option 1 - frame method of thermal insulation of the ceiling on the loggia
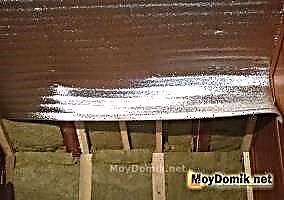
- installation of penofol. From the course of physics it is known that warm air rises. And in order not to warm the floor with neighbors from above, it’s advisable to install penofol on the ceiling,
- arrangement of the frame. For work, wooden slats are used, with a thickness equal to the thickness of the insulation,
- the insulation is placed in the cells of the frame. If cotton wool is used, a vapor barrier film is additionally mounted,
- the ceiling is being finished.
Option 3 - insulation of the false ceiling on the loggia
Lay insulation (usually cotton wool) on the ceiling decoration material. Suitable for false ceiling or ceiling decoration with laminate or plastic panels.
 Insulation of the ceiling on the loggia - frame, mineral wool, penofol
  Loggia ceiling insulation - installation of penofol
  Installation of thermal insulation on the ceiling of the loggia
  Technology of insulation of the ceiling on the loggia
Step 9 - Insulation of the wall on the loggia
Warming the walls of the loggia is the easiest stage. However, it has an important feature, namely: the walls of the loggia are insulated in different ways.
- the wall adjacent to the room is insulated in one layer,
- the outer wall is insulated in two layers or a thicker thermal insulation material is used. Moreover, it is stacked in pieces, and always with an offset.
Like ceiling work, there are two ways of warming: “wet” and frame:
- "wet" - Suitable for hard insulation and the only possible for aerated concrete. Often this method is used to insulate the loggia with foam.
- wireframe - required for soft materials. Without a frame device, it is impossible to warm the loggia with cotton wool. The frame can be made of wood or metal profile. The technology of laying cotton on the wall does not differ from its installation on the ceiling or floor. The protection of the wool is provided by the installation of the film.
 Wall insulation on the loggia - the device frame and installation of wool
  Wall insulation on the loggia - paneling OSB
  How to insulate the walls on the loggia - crate, mineral wool
 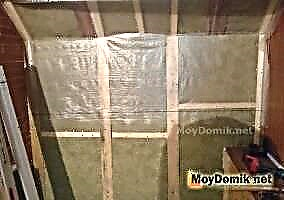 How to insulate the walls on the loggia - vapor barrier film
Step 10 - Finishing work
After all the surfaces of the loggia have been insulated, you can proceed to the finishing work. The work starts from the ceiling, then the walls are finished and the floor is completed at the end.
At the end, skirting boards, switches, sockets and a warm loggia become a full-fledged living space.
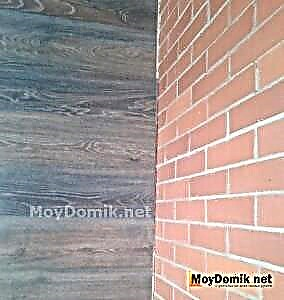 Lining the insulated walls of the loggia with laminate
  Finishing the walls of the loggia with a laminate - installation of the edge (plinth)
  Lighting on a heated loggia
 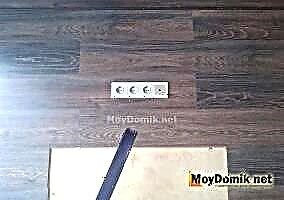 Installation of sockets on the loggia
 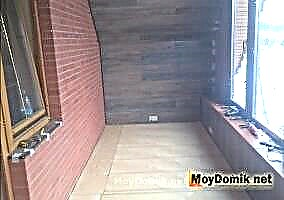 The insulated floor on the loggia is sewn up with plywood
  Carpet for laying on the floor of the loggia
  Laying carpet on the floor of the loggia
 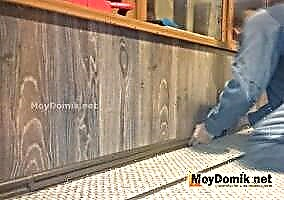 Skirting Installation
  Finished loggia after warming
  Insulated loggia - the result
Installation of double-glazed windows
The first stage, from which the warming of any room begins, is the installation of modern double-glazed windows. If you have old wooden frames, then a very large amount of heat goes through them, no matter how you insulate. But when installing double-glazed windows on the balcony there is one nuance that distinguishes it from other rooms - the parapet. On many old balconies, it is not strong enough to support the weight of heavy metal-plastic windows. In this case, it will have to be further strengthened.
Helpful advice! Strengthening the parapet is best reinforced. Thick iron rods and cement will withstand any extra weight. The brick option is also good, but it is thicker and heavier.
Before you warm the balcony with your own hands, you need to determine the material of the window structures - these can be frames made of PVC, aluminum or wood.
Properties of different types of windows
Wooden frames are the cheapest, but not the best option for window properties. Wooden windows do not retain heat well and are not airtight. Use them only if there is no severe cold in your latitudes.
Aluminum windows are more expensive, however, they retain heat better. In addition, they are the most reliable and durable, excellent resistance to corrosion and other negative influences.
PVC frames - the best option in terms of price and quality. Polyvinyl chloride is not afraid of dampness and temperature changes. It is not as resistant to loads as aluminum, but it provides the highest level of thermal conductivity.
How to insulate a balcony so that it was warm in winter? The following types of windows are well suited for this purpose:
- with swing wings
- with two-chamber double-glazed windows,
- with advanced profiles.
How to insulate a balcony with your own hands: step by step photos
When warming the balcony, one of the most important points is the thickness of the insulation layer. Often it turns out that you need to insulate not only the walls, but also the floor with the ceiling. The main criterion for the insulation material is its thermal conductivity.This indicator is inversely proportional to the amount of heat that the material can hold. One of the most frequently asked questions when warming is - what is the best way to warm a balcony: with foam or mineral wool? It all depends on your financial capabilities.
The most common material for warming balconies is extruded polystyrene foam. It is thin, lightweight, easy to cut and mount, it is durable and well resists moisture and corrosion. Its only minus is a rather high cost. In this case, the budget option for insulation for the balcony is polystyrene. It is also lightweight and easy to install, however, less durable.
Sealing cracks
There are gaps in any old balcony - this is an axiom. Through numerous slots, the heat will go away even if you installed the warmest and most modern double-glazed windows. It is best to patch them with polyurethane sealants and mastics, which are sufficiently plastic, hold for a long time and are resistant to various kinds of natural influences, such as frost or wind.
The cracks are sealed with a special gun or plastic nozzle, which comes complete with a cylinder. After the mastic or sealant has completely dried, you can proceed to the installation of insulation. If you do not know how to insulate a balcony with your own hands, a step-by-step photo will help you in this moment.
How to make floor and walls on a balcony with your own hands
After choosing and buying a heater, it must be fixed. Usually, this is done with dowels or construction glue. When installing with glue, you need to choose a composition without toluene - it can corrode the material. If you decide to attach the insulation with dowels, then they need to be placed around the perimeter with the calculation of about 10 dowels per square meter.
Use the step-by-step instructions, photos and videos that can be found on specialized resources when warming the balcony with your own hands.
Stages of warming the walls of the balcony:
- installation of vapor barrier film with gluing joints with construction tape,
- installation of the lathing of wooden blocks or metal profile,
- installation of insulation - polystyrene foam, mineral wool, etc.,
- sheathing of the crate with moisture-resistant drywall, plywood or other sheet materials,
- finishing walls.
Helpful advice! Seams between layers of insulation or foam boards must be repaired with mounting foam. This will prevent heat loss through them.
Each type of surface has its own nuances of insulation. So, the floor before warming should be leveled and waterproofed. And the use of vapor barrier tape will protect you from troubles such as fungus and mold. The walls and ceiling can be sheathed with moisture-proof drywall. Photos of the design of the insulated balcony show that the drywall, with proper finish, looks great here.
Stages of insulation of the balcony floor:
- installation of a waterproofing film with processing joints with moisture-resistant mastic or sealant,
- laying a heat insulator - for example, foam,
- pouring concrete screed with a thickness of 4-5 cm (in the screed can also be installed an electric heated floor),
It is possible to equip and insulate the floor on the balcony without using a concrete screed. To do this, after arranging the waterproofing, wooden logs are laid in the longitudinal direction of the balcony, which are attached to the concrete base. Between the lags, heat-insulating material is laid - foam, basalt wool, expanded clay, etc. Boards or sheet material (plywood, chipboard, etc.) are attached to the lags and the floor is finished.
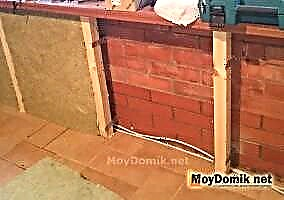
Stage 1. Preparing the parapet
The parapet is an external fence, which is the most vulnerable point of the structure. The parapet is in direct contact with the street and in most cases is a reinforced concrete slab. Before the insulation in the parapet, you need to close the cracks - for example, lay it with a brick (masonry in ½ brick will be enough to not load the ceiling).
 Parapet preparation
If the parapet is metallic, and its level does not coincide with the upper overlap, then first the masonry of this element and side walls is carried out. It is advisable to use foam blocks for this, although ceramic brick is also quite suitable. The outer surface is finished with siding, which also insulates the loggia a little.
Note! All elements of wood should be treated with an antiseptic to prevent the appearance of bacteria and, as a consequence, rotting of the material.
Stage 2. Glazing
First, the loggia should be glazed. It is advisable to install plastic double-glazed windows, and entrust the installation to experienced professionals. Packages must have a minimum of two chambers, the glass thickness (total) should be at least 3.2 cm. With proper installation, the glass packet will be surrounded on all sides by special expansion profiles.
 Preparing the parapet. Glazing
After installation, all joints are filled with polyurethane foam (the latter must be laid evenly, without drops and gaps). After that, the foam is masked externally by strips to protect it from ultraviolet rays.
Note! Sometimes at this stage the heater is mounted. In fact, this makes no sense, because without proper insulation of all structural elements, the temperature in it will be only two to three degrees higher than in the street.
Stage 3. Preparation of all necessary
To warm the loggia, the following materials will be required:
- insulation (preferably polystyrene),
- wooden slats 2x5, 3x5, 2x4.5 or 3x4.5 cm,
- polyurethane foam,
- galvanized suspensions,
- vapor barrier
- guides
- plastic dowels,
- timber for logs 5x7 cm,
- reinforced tape
- antiseptic.
 Loggia floor insulation scheme
You will also need a number of tools:
- hammer drill
- foam gun
- building level,
- electric jigsaw
- level,
- pliers
- scissors for metal,
- screwdriver
- roulette,
- marker.
Balcony roof insulation
If the roof of your balcony is not the neighbor’s floor, then a separate approach is needed to warm it. The video “How to insulate a balcony from the inside out with your own hands” clearly demonstrates the whole process. It is necessary to choose a reliable roofing material, it is desirable to apply sound insulation in the form of a spraying or a film on its inner side. The following layers are also used:
- waterproofing - films made of polyvinyl chloride or polyester are perfect here,
- windproof membrane - passes steam from the insulation, but does not pass drops that can penetrate with the wind,
- anti-condensation layer - does not allow water vapor to drain onto the insulation,
- wooden frame - holds the roof,
- the insulation itself - serves for thermal insulation of the roof,
- vapor barrier insulation - preserves the insulation properties of the insulation, does not allow water vapor to enter inside it.
Additional insulation
In order to keep your balcony warm even in the most severe frosts, you can install a radiator, air conditioning or even a warm floor on it. The answer to the question "What is the best insulation of balconies from the inside?" Depends on your imagination, needs and financial capabilities.
If the balcony is combined with the room, then additional insulation can not be mounted, the air conditioner will cope well with this task. But there is a nuance - the air warms up, and the floor will still remain cold, even if it is carpeted. Therefore, underfloor heating is a very appropriate option for the complete insulation of the balcony. Installation of underfloor heating is another difficult point that is best entrusted to experienced professionals. A step-by-step video instruction on warming the balcony with your own hands also helps here.
The better to warm the balcony inside, the nuances of warming in different seasons
Sometimes it happens that it is necessary to warm the balcony in winter. Many people wonder whether it is worth doing and what it threatens. It all depends on the materials used for insulation. Some of them at low temperatures change their properties, and it becomes harder to process and assemble.
It is quite problematic to warm the balcony with foam rubber with your own hands in winter, and cement in the cold freezes very quickly and does not have time to really grasp. This leads to a weakening of the masonry and the rapid destruction of the parapet. But there are a number of special winter adhesives and mixtures that are oriented to use at low temperatures. Video of warming the balcony with your own hands in the winter can also be found on the Internet.
Foam is also temperature dependent. If you choose the “summer” option for winter warming, then this will not lead to anything good - the foam will quickly collapse and become unusable.
Another important point to consider when warming is dampness. You can often encounter it if you insulate the balcony in the fall or spring. Most types of glue or mastic do not stick to a damp surface, and humidity also has a very bad effect on the performance properties of insulation, if it is not foam. That is why it is necessary to start warming and waterproofing the balcony from the ceiling. In this case, a sudden rain will not prevent you from continuing to insulate the walls and floor.
Helpful advice! Warming the balcony with foam and penofol can be done even in conditions of high humidity.
From the foregoing, it is clear that it is possible to insulate a balcony not only in summer. The only exception is if the temperature drops below 20 degrees. Then even the most frost-resistant materials begin to behave very badly, and normal insulation will not work, even if you know for sure how to properly insulate the balcony from the inside.
Do-it-yourself balcony interior decoration: step-by-step instructions and recommendations
If the answer to the question "How to insulate a balcony with your own hands?" and step-by-step photos can easily be found on the Internet, then the interior decoration remains entirely at your discretion. The best option here is drywall, which is moisture resistant and is easily amenable to further decoration: painting, tiling, wallpapering.
The wiring can be hidden in hollow plastic casings so that it does not catch the eye and lay carpet on the floor. A step-by-step video “How to insulate a balcony from the inside with your own hands” will help you determine the type of insulation and interior design.
By the way, one of the most frequently asked questions is “How much does a balcony insulation and its decoration cost?” There is no exact answer to it, it all depends on the selected materials and the complexity of the work.
3 main directions in warming
- Outside - so the freezing point is shifted outward, towards the mounted heater. This saves the interior space and not only insulates the wall, but also retains its load-bearing properties. However, this option requires an appeal to professionals (industrial climbers). More details in the article “Insulation of the balcony outside”.
- Inside - the most popular option that allows you to perform all the work yourself. But this reduces the area of the room.
- On both sides, it’s an absolutely inexpedient solution, because the thermal efficiency does not increase from this, but the costs are growing exponentially.
It is important to note that in many cases, work on the insulation of the loggia from the outside is not limited to an agreement with specialists in high-altitude decoration. To start them, you need to get permission from the city authorities, especially when it comes to buildings that have architectural value. Therefore, more often they still choose insulation from the inside.
The better to insulate: TOP-5 materials
The range of building materials allows you to find heaters that match the climatic conditions of the region and the selected heating system. The main technical characteristics in this case are the heat transfer coefficient, resistance to mechanical action and water resistance.
1. Expanded polystyrene (polystyrene)
The most popular material for balcony insulation. Usually used foam sheet with a thickness of 5 cm, or, in harsh climates, 10 cm.
- low coefficient of thermal conductivity - i.e. high thermal insulation even without additional materials,
- satisfactory strength - you can use dense finishing materials,
- high rate of moisture absorption - there is no need for an extra layer of waterproofing,
- environmental friendliness and hygiene - does not emit hazardous substances, mold will not develop, during operation - dust does not form,
- ease of installation - the foam sheet is easily cut into pieces,
- long service life - up to 30 years (subject to technology).
- poor air conduction - additional ventilation methods are needed,
- low noise isolation
- poor resistance to chemicals based on alcohols and petroleum products, as well as to some varnishes and varnishes,
- high flammability.
Warming of a loggia or a balcony is carried out with building polystyrene with a density of 35–40 kg / m³. It is easy to distinguish it from packaging by polygon cells.
2. Extruded polystyrene foam (penoplex)
The disadvantage of extruded polystyrene foam is its high cost. There are several types of material on the market (as intended):
- "Foundation" - for insulation of structures buried in the ground.
- "Roof" - for finishing attic rooms, is fragile.
- “Wall” - for cladding external walls and partitions above ground level.
- "Comfort" - for warming loggias and balconies (balanced view).
Usually foam sheets are fastened with polyurethane foam or “liquid nails”.
This material is an improved version of conventional foam - a lower thermal conductivity due to the uniform porous structure. Other differences of the penoplex include less fire hazard and greater strength - it can even be laid on the floor. Otherwise, the merits of the materials coincide.
3. Mineral wool
To warm the balcony, basalt mineral wool is best suited - the most environmentally friendly kind of material with excellent technical characteristics.
- low coefficient of thermal conductivity - almost like a foam complex,
- water tightness - if a basalt type of cotton wool is selected,
- good breathability - the formation of a healthy microclimate,
- excellent indicator of sound insulation - street noise is minimized,
- sufficient strength - mineral wool can be used to warm the floor,
- fire resistance - the melting point is 1000 ° C,
- safety for ecology and health - no emissions of harmful substances, the development of mold and fungi is excluded,
- resistance to chemicals.
- high price,
- the formation of dust when cutting, work clothing is required.
It is not necessary to warm the loggia with your own hands using traditional glass wool - its particles can eat into the mucous membranes, skin and hair.
4. Penofol (foamed polyethylene with a foil layer)
The main advantages of the material are the ability to reflect heat and ease of operation - it is available in rolls and mats. But it does not make sense to use penofol without other materials, because it does not provide the necessary level of thermal insulation.
There are several varieties of it:
- "A" - with a one-sided reflection layer, for combined insulation.
- “B” - with double-sided reflection, for underfloor heating, underlay for screed.
- “C” is a self-adhesive type with minimal surface requirements.
In order for penofol to really reflect the heat fluxes, it must be laid with the foil (metallized) side towards the inside of the room.
5. Isolon
An improved version of penofol, already well suited for warming the loggia and balcony. Also available in rolls and reflects heat fluxes.
- fire resistance - in contact with fire it decomposes into carbon dioxide and water,
- good heat and sound insulation performance,
- resistance to sharp temperature drops,
- long service life - more than 100 years,
- ease of installation - the flexibility of the material allows you to close difficult places,
- protective properties - can act as a barrier in case of water leakage.
- high price,
- subtlety - the structure is easily damaged and loses its characteristics,
- the need for strict adherence to styling technology.
How to insulate a balcony: preparatory work
Whichever of the materials was chosen as a result, the steps for preparing the premises will be the same. And they must be carried out, because if water leaks through cracks and cracks under the insulation, then it will gradually lose its functionality and the lining will have to be changed.
Preparatory work before warming is carried out in a clear sequence:
- Cleaning all surfaces from traces of cement, old paint, etc.
- Cleaning all small debris and dust - preferably with a vacuum cleaner.
- Cement mortar and putty of all cracks, cracks and gaps.
- Widening the gaps between the plates. Then they need to be sprayed with water and filled with standard foam for installation.
- Cutting off excess foam, sealant and other mortar - after drying of all surfaces.
- Primer coating.
The next stage is the waterproofing of the balcony or loggia: the floor and the bottom of the walls. These works can be performed in several ways, each of them is suitable:
- Laying of rolled materials. In most cases, it is a roofing material. Previously, it was glued to mastic preheated by the burner, but now they release material with an already applied adhesive layer, which also needs heating.
- Impregnation with penetrating compounds. Suitable for concrete surfaces. When applying such waterproofing, you need to be very careful, as these compounds can cause burns. They are applied in several layers, waiting for penetration into the thickness of the plate: there they crystallize and seal the pores.
- Liquid rubber coating - used for tile floors. For this, a special composition is poured into puddles and spread with a roller and a brush.
- Application of waterproof plaster mixes - the coating method is the same.
- Painting with thick-grated oil paint is a “folk method” suitable for tiled walls, because concrete will absorb it too quickly.
- Laying a thick plastic film. It is lined so that the film forms a kind of container for insulation. Available method.
Step 1. Insulation of the floor
After the waterproofing layer has been laid on the floor of the balcony or loggia, lags are installed. These are metal beams or wooden bars that act as the basis for the floors (for more details, see the article “logs on the balcony“). For the balcony, wooden parts are best suited with a moisture content of not more than 12% in the material and with antiseptic treatment.
The height of the bars is 10-15 cm, and the distance between them should correspond to the width of the insulation. To fix the bars in the right position and seal the holes between them and the wall, use foam. This will not affect the aesthetics of the base, since after drying the excess foam is easily removed with a knife.
Then a thermal insulation layer is laid so that there are no gaps between the material and the lags, otherwise the work will be in vain. If the insulation goes in several layers, then the next one must be displaced so that the seams do not match.
Next is the vapor barrier layer - protection against condensation. Then it remains to attach the “draft” floor from the boards, fiberboard, particleboard, plywood to the lags. After all the work on warming the loggia or balcony is completed, it will be possible to lay on it the selected flooring - carpet, linoleum, etc.
Step 2. Insulation of the ceiling
There are two technologies - with a frame for a balcony and without it. But in both cases, before starting work on the ceiling plate, it is necessary to apply an antiseptic composition (protection against mold).
The frame insulation of the ceiling on the balcony begins with a crate of bars and dowels. Then, a heater is mounted in the crate. Mineral wool and polystyrene are well suited for this option. It holds without additional fasteners. Minvata needs to be fixed with construction foam. Further, the ceiling can be finished with drywall, clapboard, PVC panels, etc. For details, see the article “Covering the balcony“
Thermal insulation without a frame begins with the treatment of the slab with reinforcing soil. This is done to more firmly fix the insulation material. Then glue (necessarily without toluene content) is applied to the sheets, and they are glued to the ceiling. If there are doubts about reliability, you can additionally use a dowel-nails. The joints are sealed with mounting foam, and its remnants are cleaned off.
Step 3. Wall insulation
First, a wooden crate is created. The distance between the bars is equal to the width of the insulation sheets (as when working with the floor). Then the selected material is refilled in them, and the joints between the parts are also filled with polyurethane foam.
Above is a protective layer of vapor barrier film. Usually the wall that connects the balcony and the living room is insulated in one layer, the outer ones in two layers.
Step 4. Insulation of windows
With cold glazing it does not matter how to insulate the loggia or balcony. The air will still pass into the room and be there will also be uncomfortable. Therefore, thermal insulation work also involves the installation of plastic windows.
To remodel space into a living room (office, mini-cinema, children's play area), it is better to choose five-chamber PVC windows with energy-saving double-glazed windows or with three glasses and hinged shutters. They have high tightness and good heat and sound insulation. Only you need to carefully consider the arrangement of furniture, so as not to interfere with their opening.
Before installing plastic windows, it is important to check the parapet of the balcony - i.e. external partition. It must be durable, because the window structure has an impressive weight. In an extreme case, you can try to insulate the windows with your own hands - by filling the voids through which the air goes, with foam or silicone sealant. You can also use mineral wool. But such methods cannot provide truly high-quality thermal insulation of the balcony.
Step 5. Heating and ventilation system
Winters on the territory of the Russian Federation are usually cold, so even being on the insulated balcony is not always comfortable. However, it is impossible to carry out central heating on it - according to building standards. The best option would be an electric heater, but it should be placed near the wall, and not near the windows (so that they do not sweat). More details in the articles “battery transfer to the loggia” and “balcony heating”.
Another solution is the “warm floor” technology. It can be electric or water. Modern systems guarantee a long service life. It is recommended to choose an option with a heat regulator - for temperature control.
And since all the cracks on the balcony or loggia are closed during the insulation works, it is necessary to ensure the influx of fresh air into the apartment. In addition to airing, this can be done by a “breather” - a simple and compact system of supply ventilation.
Step 6. Finishing work
Final finishes start from the ceiling and end with the floor. After laying the skirting boards and installing switches and sockets, the work on warming the loggia is already considered completed. Further, the room can be decorated to your taste.
For wall decoration, PVC panels, lining and even a laminate are used. Sometimes they simply wallpaper them or paint them. These works are also easy to do on their own.
Common mistakes
It is important to know not only how to properly insulate the loggia, but also what cannot be done. No one is safe from mistakes, but recommendations will prevent them.
Submission to the balcony or loggia of central heating radiators
Such actions will be detected sooner or later and the system will have to be removed. In addition, it is unsafe - radiators are included in the general network, re-planning of which can cause serious violations. Plus, a fine is imposed. More details in the article “Battery Transfer to the Loggia“
Demolition of a door or window block from an apartment to a balcony
From a legal point of view, this is a redevelopment that requires permission. It follows that in some cases this permission may be lawfully obtained. Read more in the article “combining the loggia with the room“
Blind repetition of television repair programs
In such programs, a balcony and a room are often combined. Supervisory authorities may recognize this as a violation: for example, for a deterioration in the heat supply of neighboring apartments. Then you will need to dismantle and pay a large fine.
Frameless glazing
Visually it looks very interesting. But for insulation, double and triple PVC windows are needed.
Features of insulation
- All wooden parts must be treated with antiseptics and compositions with waterproof properties.
- The best option for thermal insulation (in regions with a harsh climate) is a “pie” with an air gap. As layers, foam and penofol are suitable.
- A good substrate for the lathing on the ceiling is foil polyethylene. It can be mounted on double-sided construction tape.
- The outer layer of polyurethane foam must be treated with putty, paint or sealant, otherwise it will quickly darken under the influence of ultraviolet radiation.
- To seal the joints do not use gypsum putty - it is afraid of moisture.
- From heaters suitable electric, oil and infrared.
If the repair was carried out correctly and in compliance with all technologies, the balcony and loggia will become a full-fledged continuation of the apartment. There you can place an office on the balcony, as well as a dressing room or a mini-gym. Warming increases the useful area of the apartment, which can be very important when expanding the family.
It usually takes from three days to a week to work (with independent execution). For a more complete understanding of the whole process, you can watch a visual video.