A loggia or balcony is another room that needs to be neatly decorated and decorated. Upholstery can take a lot of money, but self-decoration helps to save money.
- The entire perimeter is studded with a frame made of metal or wood. These elements will be further fixed to the inner upholstery. They are selected individually, depending on what materials will be used in the future at the finish stage.
- The next stage is the glazing of the balcony. This will be described in more detail in a separate paragraph.
- The third step is the interior upholstery.
- The final step is the final decorative work.
Do-it-yourself balcony decoration is made of the following materials:
- Siding - this material is used for interior and exterior decoration. It is durable, reliable, has a wide color palette. But in the sun it can quickly fade, it is not always pleasant to smell in an enclosed space.
- Plastic panels - they look neat and beautiful on the walls, but create a sealed room effect. Also available in different colors - from shades of color to rich textures.
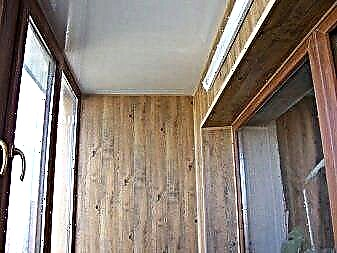
- Wood - wooden lining is the most common material for facing loggias. It looks neat and beautiful, with proper treatment with varnish it does not fade in the sun, does not break, does not crack. Also, the material is simple, convenient to work with. The only negative - it is quite expensive.
- Drywall - moisture resistant material is installed on the crate. Top plates can be coated with paint or wallpaper. Inexpensive and easy-to-use material, but it looks less impressive than a wooden lining.
You can beat the balcony inside yourself.
First, make sure that you have all the necessary tools, as well as materials for work:
- facing material
- insulation
- dowel nails,
- wooden slats,
- jigsaw
- self-tapping screws
- waterproofing material
- polyurethane foam,
- drill,
- screwdriver.
DIY balcony decoration: step by step instructions:
- Preparatory stage - at this step it is necessary to clean the room from unnecessary things, remove the old coating if available, inspect the walls for cracks from close them up, and also carry out cleaning.
- Installation of the crate - the final material will be attached to it. The frame is made of strong wood beams, then mounted on the walls.
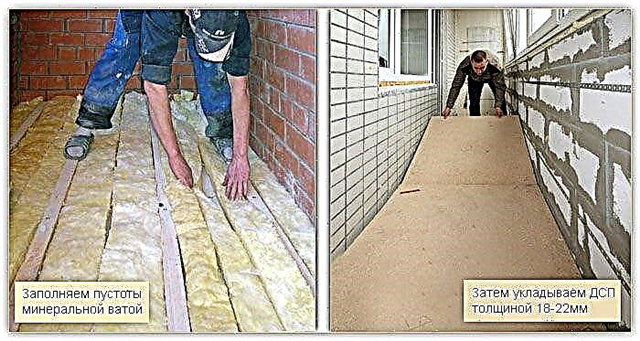
- Warming - after installing the crate, the free cells are filled with insulation material, which allows you to keep the room warm and comfortable even in cold weather. Penoplex is the most commonly used insulation, which is attached to the cells and has the form of plates. It is fixed with glue or mounting foam, and the material must fit very tightly in the cells. Mineral wool is also used for insulation, but waterproofing films should be used during its installation.
- Waterproofing is a very important stage, going immediately after insulation. Moisture penetrating the balcony leads to a gradual violation of the material, constant smudges from the ceiling and the appearance of mold. Repeated repairs will require large temporary and financial investments. Waterproofing is carried out using a plastic film, roofing felt or other membranes.
- Facing installation - lining begins to be attached to pre-installed plastic elements. The panels are fastened with screws or staples.
- Ceiling repair - without facing the ceiling, the room will have an unfinished look. You can make the same coating on top as on the walls, whiten it, cover it with decorative plaster, or even install a stretch ceiling. Before starting the cladding, it is necessary to make good waterproofing so that moisture does not penetrate from neighbors or from the roof and does not spoil the view.
- Carrying out lighting is a final, but not obligatory stage. Light on the balcony or loggia can be carried out using insulating channels made of white plastic or buy lamps on batteries.
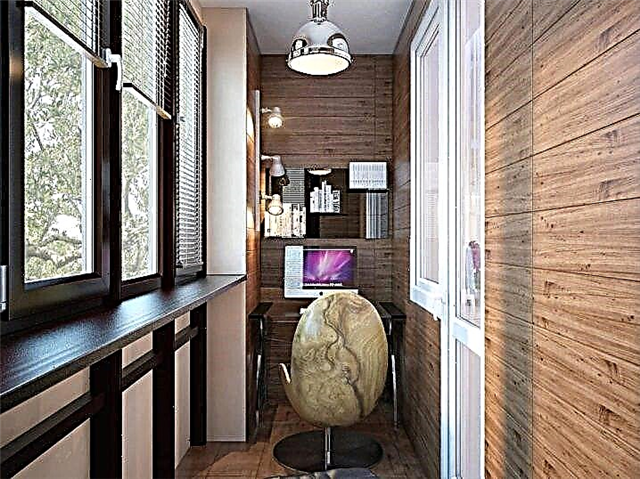
Do-it-yourself interior decoration will turn the loggia from a food storage room into a full-fledged living room, where you can organize a library, a small gym or a relaxation area.
Plastic balcony trim
Do-it-yourself balcony
Developers balconies in houses were not originally glazed, leaving an open area. Due to adverse weather conditions and the desire to store some of the things there or to make a recreation area, people began to order a glazing service.
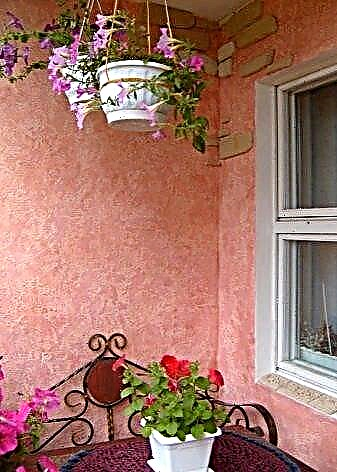
The glazed and insulated balcony becomes a full-fledged part of the living space, because it is as comfortable to be in it as in the apartment. Rocking chairs, wardrobes and bedside tables, small sports complexes, flowers, etc. are installed here.
Glazing the balcony can be done independently, if you have basic knowledge in the field of construction. There are 3 types of installed double-glazed windows:
- Wooden frames - they are of high quality and durability, completely unlike their old counterparts. These double-glazed windows perform the function of noise insulation and thermal insulation, and also look stylish on balconies. The design also has drawbacks - moisture can get into the sliding frames, and its large accumulation adversely affects the tree. Also in winter periods, when outside the window is minus temperature, drops can freeze and prevent the windows from opening.
- Frames made of metal-plastic - one of the most popular options for double-glazed windows. Average life of 40 years or more. In addition, the material is not exposed to moisture or cold, equipped with drainage systems and made of high quality raw materials.
- Frameless windows - this version of glazing has appeared recently. The developers thought that massive frames take part of the glass, and less sunlight penetrates into the apartment. Then frameless double-glazed windows were invented, which are not inferior in quality as frame analogues, and look harmoniously on the balcony. However, in such a room it will be quite cold, a little warmer than on the street, so it can only be considered as a residential one in warm weather.
There are 2 main types of glazing:
- Cold is a more economical way, because the installation uses single-pane windows and lightweight frames. In the cold season it will be really cold here, so the balcony can only be used to store things that are not afraid of frost.
- Warm - in this case, full-fledged frames and double-glazed windows are installed, taking into account all the requirements that do not allow the cold to go inside and do not let heat out.
We get rid of possible condensate:
- provide adjustable ventilation,
- install double glazed windows and quality frames,
- provide waterproofing of the floor covering,
Preparing the balcony for glazing:
- The metal parapet is insulated before installing the frames,
- All activities for finishing the balcony are made after the installation of double-glazed windows,
- The brick parapet is leveled with cement mortar,
- Dismantle the top of the old fence, if it is not horizontal.
Installation of frames made of wood:
- The lower beam of the wooden box is installed at the railing level, and the upper one at the ceiling level. Docking places are stapled to the wall.
- A crate is installed for further decoration.
- Mounted processed and pre-painted, if necessary, painted frames.
- Visors are installed outside the balcony to protect against moisture.
Installation of frames made of plastic:
- From a wooden bar, support stands are installed.
- Support racks are attached to the ceilings and the parapet using self-tapping screws.
- Double-glazed windows are removed from the frames before installation.
- Sashes are removed using pliers.
- A bottom profile is fixed at the bottom of the frame.
- Anchor plates must be included with the double-glazed windows; they are installed in the grooves of the frame.
- Frames are installed in the openings and fixed with screws and anchors.
- Double-glazed windows and shutters are attached in place.
- After this, the window sill is installed and the grooves are closed with foam.
In order to prevent moisture on the balcony and keep warm, it is necessary to seal all the cracks with sealant.
Independent warming of the balcony
Insulate the room with 2 materials:
- mineral wool
- foam blocks.
Foam blocks are more reliable and durable, but do not create vapor barrier. Mineral wool cannot be used separately from waterproofing materials, as it absorbs moisture, ceases to retain heat. Penoplex is installed between the wall battens with brackets, fasteners or self-tapping screws. Cotton wool is decomposed into free cells, then closed with metal ceilings. The first installation option is easier.
We give new life to the floor on the balcony
The floor on the balcony, like the walls, should be neatly finished.
You can also lay a new floor yourself, observing the algorithm of actions given below:
- Floor preparation - before starting repair and finishing work, the balcony floor slab should be prepared: remove all things from the room, use a vacuum cleaner or a broom to collect garbage. Detected holes and gaps must be sealed with sealant or foam.
- Leveling the surface - the floor should be flat. First, carefully ground it, then after complete drying we collect possible small debris with a vacuum cleaner.
- Filling the floor - the floor is poured with a special mixture sold in stores. First, the solution according to the instructions is prepared in a separate container, then gently poured from the edge of the room and distributed with a spatula on a long handle. After completely covering the floor, a needle roller is used to remove air bubbles. After a few hours, you can walk on the floor, and after a few days to fully use.
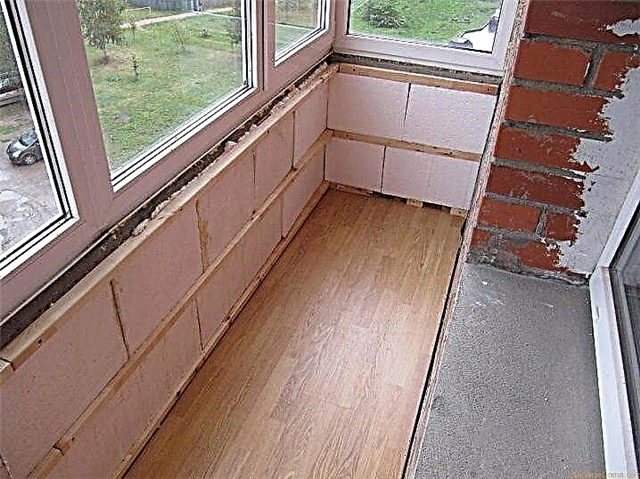
- Insulation of the floor - if the floor needs to be insulated, then you should start with laying thermal insulation material, for example, penofol. We carry out heating elements on top of the material, isolate the ends from moisture and connect to electricity.
- Installation of the final coating - at the very end, a laminate is installed to give the floor a finished look.
Insulation and sealing must be closely monitored, because moisture can cause a short circuit, which will damage the heating system. To fix the problem, you have to fully open the floor.
It is not necessary to insulate the floor on the balcony, then the technology will be called “laying the cold floor”.
For this, materials are used:
- paint,
- tree,
- floor tiles
- linoleum,
- terrace boards, etc.
With this installation, you should also follow some rules:
- Clean the work area before it starts, otherwise small debris can spoil the appearance of the floor.
- Carefully consider waterproofing, because the flooring can swell, then you have to redo it.
- The colors of the floor should be in harmony with the surrounding interior and not be a white spot.
- Read instructions for making mixtures or glue, as well as information on complete drying.
The positive and negative sides of each coating:
- Laminate - moisture resistant, tolerates temperature extremes, constant directional sunlight. But with incorrect styling, a creak appears when walking. Also, the material runs the risk of breaking if heavy objects fall on it.
- Tile - the material is easily cleaned of contaminants, not amenable to environmental influences. Also, when laying out, you can create shapes or patterns on the floor from tiles of different colors. Of the minuses: the material itself is very cold, slippery, and mold can also appear on it due to high humidity.
- Linoleum is one of the most inexpensive materials. However, it is easy to spoil it by tearing or cutting it. It also burns out under constant exposure to sunlight.
- Paint is another cheap material that is easy to apply, replaced if desired. But it has not the best appearance, and also quickly collapses during operation.
- Decking - easy to assemble. use, they are durable, reliable. But it’s very heavy, so old balconies can collapse under their weight.
Useful videos for arranging a balcony
For clarity, below are informational videos:
There are a lot of options for finishing balconies - the main thing is to choose the one that matches the taste. A careful reading, studying instructions, features will allow you to carry out repairs yourself without any problems.
Finishing work sequence
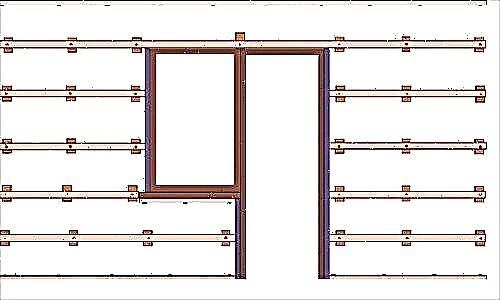
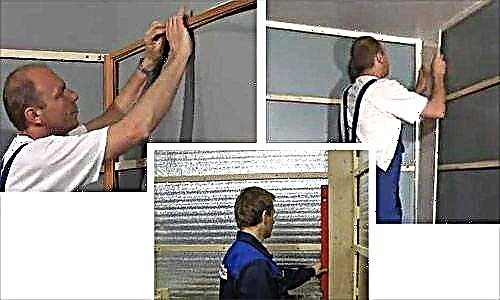
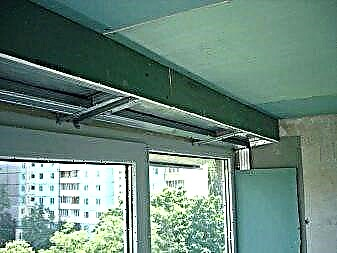
First of all, a frame made of wooden or metal elements is mounted around the perimeter of the loggia, designed to install a window system and fasten materials of internal and external cladding.
 Frame for finishing work and insulation of the loggia
The fastening step of the frame elements is selected individually, taking into account the characteristics of the selected glazing system, insulation and finishing materials.
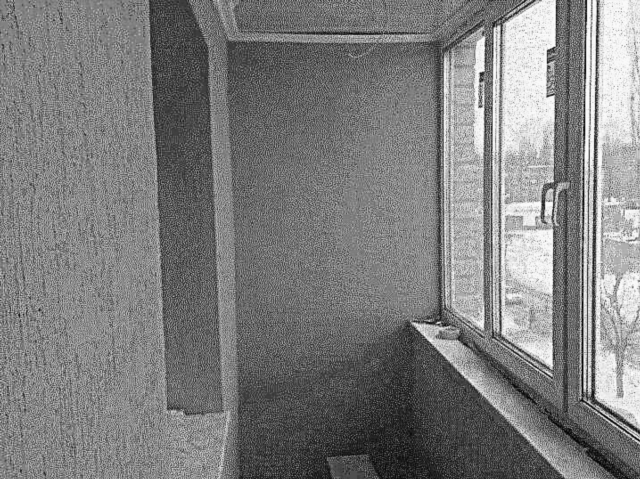
 Frame on the loggia before decoration and glazing
After installing the frame, glaze the balcony. To do this, you can use plastic, aluminum or wooden systems.
Window structures made of aluminum and wood are characterized by higher rates of environmental friendliness and durability. Plastic glazing is in most cases the most budget. For glazing a loggia, it is best to use two-chamber double-glazed windows, because single chamber are unlikely to provide adequate protection from noise, dust and cold.
For the exterior walls of the loggia, use high-quality sheet materials that can provide adequate protection of the interior from dust, atmospheric precipitation and cold. Galvanized sheet materials and moisture-proof plywood are well suited. Sheet materials are attached to a pre-equipped frame using self-tapping screws. Finishing is mounted on top of the sheet skin. Siding and other moisture resistant materials are well suited. The remaining slots are filled with construction foam.
The inner lining is carried out according to the standard scheme. First, frame elements from wooden battens or metal profiles are fixed to the walls. A plastic film or other suitable waterproofing material is attached to the frame rails. Foam boards, mineral wool, or other suitable insulation are glued onto the film using a “liquid nails” type compound. On top of the thermal insulation, vapor barrier material is attached to the base rails. To the lower crate are fixed the rails of another crate, intended already for fastening the finish.
 Balcony insulation
  Balcony insulation
  Insulation scheme
As a finishing finishing material for the interior of the loggia, you can use moisture-proof plywood, wooden lining, sheets of drywall, PVC panels and siding.
The floor as a whole is finished like walls. Tiles, laminate, linoleum and other similar materials are suitable for finishing the floor of the loggia. To visually expand the space of the loggia, tiles or laminate can be laid diagonally.
 Tiled floor on the loggia
The arrangement of the loggia is best done in the warm season.
Finishing Choice
As noted, all the popular materials for decorating the loggia are equipped according to the same principle discussed above.Your main task is to choose the optimal finish. Examine the information provided on the finishing materials and you can choose the option that is most suitable for your situation.
Plastic panels
If the cost of decoration is a decisive factor for you, use PVC panels for the interior design of the loggia. Among the main advantages of this material, the following points should be highlighted:
- resistance to water
- large selection of colors,
- ease of installation
- undemanding care - you only need to wash the panels periodically.
 Plastic paneling
 Plastic paneling
 Available accessories for plastic panels
A wide range of colors allows you to create from PVC panels both monophonic and multi-colored surfaces. At the same time, decoration with imitation of textile, tile, wallpaper, wood and other materials is available for sale.
 An example of fixing the lathing under plastic panels
The panels are initially equipped with a convenient locking system, known as a spike groove. The entire installation of the decoration comes down to attaching the panels to the crate using self-tapping screws and snapping factory connections.
 The most common ways to attach plastic panels
Initially, such panels are designed to design interior rooms, so they can only be lined with a loggia after it has been thoroughly insulated. At low temperatures, the mounting plate of the panel may deform and spoil the entire lining. In particular, a similar phenomenon is often encountered when decorated with elements of a width of 20-25 cm.
 Installation of the necessary fittings and the first plastic panel
 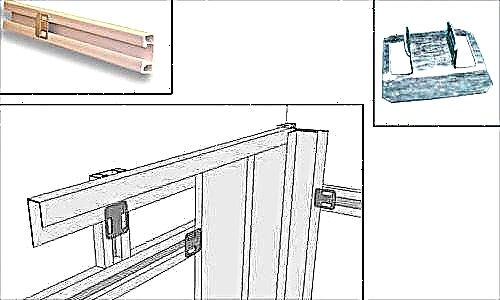 Fastening panels using a plastic profile with special clips
In view of all of the above, it is strongly recommended to use panels with a width of 9.6 cm for finishing the loggia. Such cladding is characterized by high strength and frost resistance, unlike analogues with a more impressive width.
Lining
This material stably remains the most popular option for interior design of loggias and other premises. The panels made on the basis of natural wood are characterized by excellent environmental, external and operational properties.
The panels are extremely easy to mount. For the manufacture of lining different wood can be used.
 How to fix the lining
Differences between ordinary wall paneling and the so-called. “Eurolining” consists only in the size of the strips. In the case of euro-lining, the dimensions of the panels comply with the standards approved in Europe. Also, such panels are equipped with a convenient and easy-to-use lock mounting system.
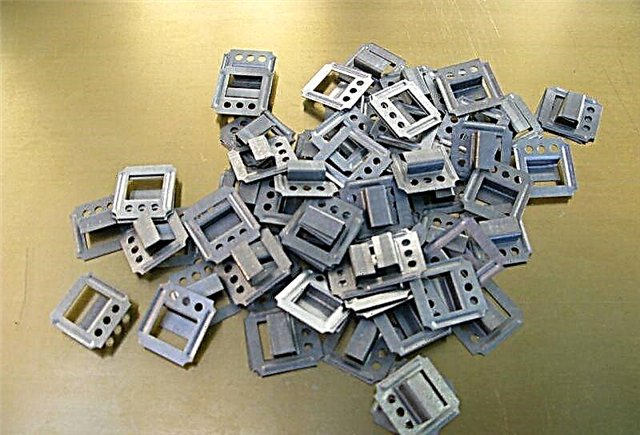 Kleimers
  How to fix the lining
A wooden coating requires regular and thorough care. Before installing the finish elements must be treated with an antiseptic. This treatment must be repeated every 2-3 seasons, followed by coating the finish with varnish or an oil-wax composition.
 Lining the loggia
Consider the fact that wood tends to dry under the influence of direct sunlight and elevated temperatures. In view of this, overly long panels are strongly discouraged for finishing the interior of the loggia.
 Lining of a balcony lining
However, all these shortcomings are fully compensated by the atmosphere created in the room, equipped using natural wood.
Siding
It is a modern composite finishing material, widely used for decoration of various kinds of premises. In terms of its external properties, siding is very similar to euro lining.
 Cladding siding
Among the main advantages of siding, it is necessary to highlight its durability, resistance to moisture and other adverse conditions. This allows you to use the material for exterior decoration of various surfaces, including the walls of the loggia. Indoors, such decoration will also be very appropriate.
Under the influence of fire, the siding melts, but does not support combustion.
The panels are initially equipped with a lock mount, which makes their arrangement convenient and extremely simple. To fix the siding to the crate suitable compositions such as "liquid nails" and other varieties of adhesive mixtures, adapted to perform external finishing work.
Plywood and drywall sheets
Moisture resistant sheets are also well suited for finishing the interior of the loggia. It is important that the room is glazed and properly insulated. Sheets can be used both as a full-fledged independent material, and serve as the base for other types of finishes: facing stone, tile, mosaic, cork panels, various kinds of plaster compositions, etc.
Drywall and plywood are attached to a pre-prepared crate of aluminum profile or wooden battens.
Under any circumstances, it is recommended to at least putty the finish from plywood or drywall. This will give the surfaces a presentable appearance and will contribute to additional insulation of the walls.
 Loggia flooring with plywood
  Loggia flooring with plywood
Designer Tips
If you wish, you can leave the loggia not glazed by equipping it with a graceful outdoor terrace. This loggia is perfect for summer get-togethers in good company.
 Open loggia
However, glazed rooms are much more comfortable and functional. If desired, a glazed loggia can be equipped with a winter garden. Or you can equip the loggia for a study or use it in another way to meet your needs and requirements.
 Winter garden on the loggia
If the loggia is open, special attention should be paid to the finish of the floor. For finishing cladding, use tile or frost-resistant linoleum, which normally tolerates the effects of high humidity and freezing temperatures.
 Insulated large loggia
Also make sure that the design of the loggia is in good harmony with the interior of the neighboring rooms. In other moments, when decorating the premises, focus on your preferences and affordable budget, because no one except you knows what exactly your loggia should be.
Finish
Why should we transform the loggia? During the day, we drop in or go into this room more than once and watch there a dull and neglected look - not a very pleasant experience. Another thing is a repaired, finished loggia, inscribed in the overall design of the apartment or adjoining room. There may be a corner-greenhouse, a place of solitude for a coffee lover, for a schoolboy with a book, for mom with a fashion magazine in her hands. The head of the family will also drop in to enjoy the family idyll.
See below for more details.
In order to finish the loggia inside, you need to prepare both materially and theoretically, and master at least a minimum of knowledge before starting work. When interior wall decoration, several parameters must be taken into account:
- what we want the end result
- will it be warm or cold
- financial costs (sometimes it comes first)


If you correctly determined the future design and selected high-quality and preferably inexpensive material, then after finishing the loggia will become a welcome and constant place for hanging out of family members and guests.


Materials
Lining is the most popular material for interior work. This is a board made of wood of various species with a tenon groove profile, 1.5 cm thick, 9 cm wide. Other sizes and types of lining can be made to order (euro lining, log block house). The lining has good working qualities and appearance. Environmentally friendly material with low thermal conductivity is well suited for many types of work and decoration.
But it should be noted and disadvantages:
- application of protective compounds
- it is possible to work only with glazed loggias, moisture and temperature changes harm the material
- may fade in the sun
- not cheap


There is also a lining made of plastic - siding. It successfully replaces wood both in the interior and in the exterior. Siding can be of different colors and shades, the finish with its use does not depend on the glazing of the loggia, it does not fade in the sun. Its cost is lower than a wooden lining.

PVC panels
Finishing work using these panels is as simple as siding. Wide (25-30 cm) units cover the working field faster. They are durable, resistant to external influences, so they are suitable for both warm and cold loggias. Colors and shades are different, low cost, suitable for any option.

MDF panels
These are plates from pressed wood fibers, covered with PVC film to match the color of a tree. They are wear-resistant, good heat and sound insulators, aesthetically pleasing in appearance, easy to install and inexpensive. But they have low mechanical strength, instability to moisture. The loggia should be glazed and insulated.

Drywall
Using drywall significantly speeds up all work due to the large size of the sheets. If the loggia is glazed and insulated, then this material will help to quickly and efficiently finish the room. Finishing sheets may require painting, wallpapering, decorative plastering. Usually use moisture resistant drywall. The thickness of the gypsum plaster sheet is 9.5 mm or 12 mm.

Decorative plaster
Finishing with its use implements interesting ideas, gives unusually vivid effects.

To obtain the desired effect, three different decorative plasters can be used:

All of them are sold ready-made, but if you wish, you can prepare the compositions with your own hands. Let us dwell on the “Venetian” transparent plaster. This is a mixture with marble flour, a seemingly transparent viscous mass in containers of 7-25 kg. It is applied on perfectly even surfaces in several layers, can be tinted in any color. The application technology is not complicated, but rather voluminous, allows you to get the effect of marble coating a wide variety of surfaces and shades. This plaster is waterproof, environmentally friendly, odorless, wear-resistant, able to dry quickly.

If the material and overall design is selected, then you can start work. We assume that the glazing has already been made, but it is desirable that the glass and double-glazed windows be removed from the window frames in order to avoid any trouble. Finishing work on the floor is performed after finishing work on the ceiling and walls.


So, we have window frames, a frame for hanging intermediate or finishing materials. We start the finish directly.

Step-by-step instruction
The work of lining the clapboard is simple, but requires attention and patience.

We determine the required amount of material in square meters. We multiply the height of each section by the width, summarize and increase the resulting area by 15%. We select conifers with a moisture content not exceeding 12%. We still need slats, corners, skirting boards, waterproofing film, sealant and fasteners. Tool: hacksaw, drill, hammers, screwdrivers, including electric, and levels, simple or laser.
If necessary, cover the wall with a film for waterproofing and make a crate of wood or metal profiles. Withstanding a distance of about 50 cm between the rails, we fasten them to the wall. Fill the gaps with insulation.

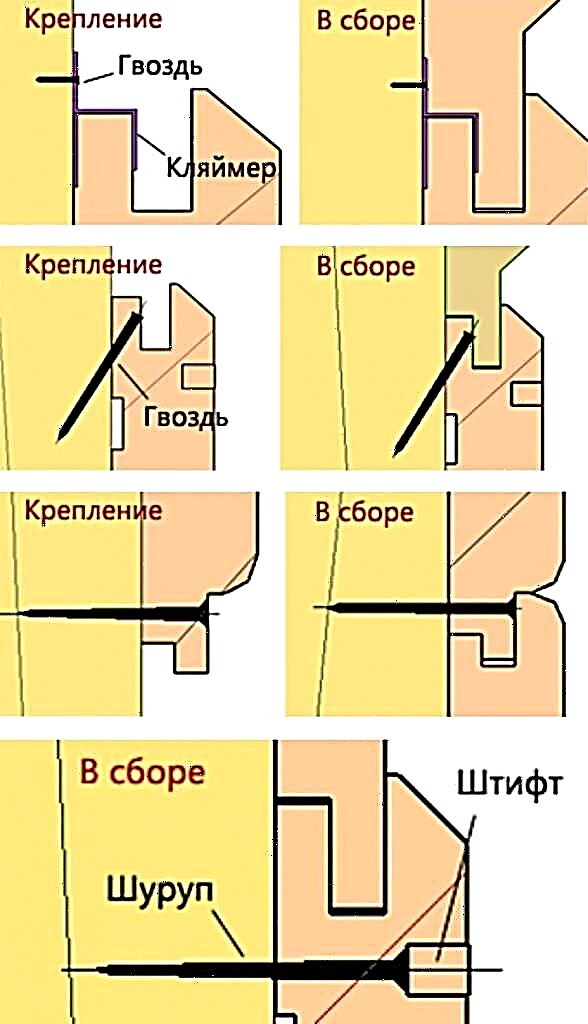
We start the lining from the corner, align the first board with the level and fix the groove to the corner. We insert the kleimer and fasten it to the crate. The next board should groove tightly to the crest of the first and is fixed with a kleimer nailed to the crate. The position of each board is controlled by level. It is very convenient to have a laser level, which allows you to quickly control the position of the board.

At the end of fixing all the boards, fill the slots with sealant, close the joints of the corners with corners. Then we process it with a protective solution of the Autotex type, which not only protects against rot and bugs, but gives the surface of the skin an aesthetic appearance.