Article published: Nikolay Strelkovsky
The pleasure of living in a cozy house begins with a renovation. This is a long and costly process that requires attention and responsibility at all stages of work. One of these steps is waterproofing the floor before the screed.
As you know, pouring screeds is one of the most time-consuming components of a good repair. She doesn’t forgive mistakes, she will have to redo everything all over again, so it’s very important that even the most insignificant, seemingly, work is done correctly.
Screed floor waterproofing
What is waterproofing for?
The most obvious function is leakage protection. No one is safe from accidents, therefore, in order not to spoil relations with neighbors and not to compensate them for damage from a possible flood, it is better to take care of everything in advance.
In addition to leaks outside, outside the apartment, leaks inside are also possible. Of course, this problem primarily concerns residents of private houses and ground floors, as well as owners of garages and basements.
What is waterproofing for?
Another function of waterproofing is to improve the quality of the screed. Usually, they try to slow down the process of drying: they moisten the surface and cover with polyethylene to avoid cracks that occur during quick setting of the solution. Waterproofing helps to slow the drying of concrete, so it becomes more durable.
Waterproofing the bathroom floor
Waterproofing is recommended in all cases when you need to protect yourself from the possible effects of moisture. In urban apartments, it is mandatory in the bathroom, kitchen and toilet. In these rooms, the entire floor is insulated, since the risk of a flood is the greatest.
Many craftsmen recommend waterproofing in living rooms, since the pouring mixture, which makes up the screed, also contains a lot of water, and it may well leak to the neighbors, but usually in these rooms they are limited to isolating the joints of concrete slabs of the base, walls and floor , and spaces under the pipes.
Residents of the first floors can not be afraid to flood the neighbors, but they are advised to do waterproofing in all rooms. The proximity of the screed with cold, moist air will not do her good. Concrete is a porous material and has the ability to absorb moisture, and this accelerates its destruction.
Waterproofing the floor is a mandatory stage in the construction of private houses. If it is not done, then moisture will be absorbed into the floor and walls, destroying and cooling them. In a few years, microcracks will begin to appear in the screed, which will then grow, spoiling both the floor and the top coating. That is why experts often recommend that owners of their own houses do even two layers of waterproofing: before and after screed screed.
Types of waterproofing and methods of application
The modern market for building materials is wide, diverse and actively developing. It is hard to even imagine what new products developers will offer customers in a few years. Of course, the wider the assortment, the more difficult it is to make a choice. By the method of application, the following types of materials for waterproofing can be distinguished:
Types of waterproofing materials and methods for their installation
The construction market has a wide selection of waterproofing materials. At the same time, in each technological group there is a variety both in price and in quality characteristics. Therefore, it is very difficult to make a choice.
According to the technology of insulation, all materials can be divided into:
- Roll, which in turn are:
- Marshy - fastened to the base of the floor and between each other, with multilayer insulation, using bitumen mastic,
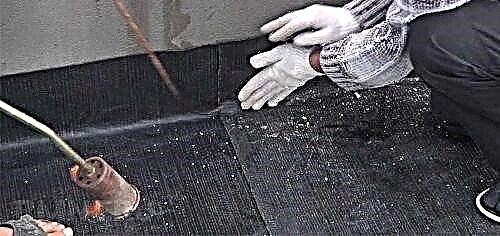
- Surfaced when one side of the material is impregnated with an adhesive closed by a protective film. Heating the roll with a special gas burner on the protection side leads to its melting and opening of the adhesive layer,
- Polymer - joints are heated with a building hairdryer and glued together.
- Liquid application materials (coating mastic, liquid rubber, etc.),
- Penetrating primers
- Dry plaster mixes of knitting type.
Roll insulation
The presence of many types of roll waterproofing is explained by the large number of combinations between the main layer of material and the types of insulating means. The basis may be:
- Fiberglass. Low cost, it has a short life,
- Fiberglass. The cost of the material is several times higher, but this is justified by an increase in strength and durability by 5 times compared with the first option,
- Polyester materials. Having the same strength as fiberglass, they are 4-5 times more elastic, which allows you to maintain excellent adhesion to the floor base with temperature fluctuations,
- Cardboard. Builders gradually abandon such materials when waterproofing the lower parts of the building due to their fragility,
- Foil,
- Asbestos paper. For waterproofing under the screed is practically not used.
Waterproofing layers are applied:
- bitumen:
- butyl rubber (rubber compounds),
- tar.
For example, ruberoid is a mixture of bitumen with cardboard. Replacing bitumen with tar gives material familiar to the older generation - only. The application of a bitumen layer to fiberglass allows you to get hydroisol, glassruberoid, glass fiber, etc. Rubber mixtures give a multilayer, but without a base, hydrobutyl and other materials.
In addition, a separate group of roll materials is allocated plastic wrap. The variety of types of materials predetermined several technologies for their installation.
The oklyekechny method of laying waterproofing
All technologies for laying various types of waterproofing under the screed begin with a thorough preparation of the base. This process is discussed in detail in the work "Preparing the base for screed", posted here. Therefore, when considering all waterproofing technologies, the initial stage of work will be omitted.
The subsequent work on installing waterproofing with your own hands consists of the following steps.
1. Concrete flooring is treated with a primer - primer for concrete made on the basis of bitumen. This will ensure the necessary adhesion of bitumen mastic to the base of the floor.

2. A damper tape is attached to the walls around the perimeter with an adhesive layer or liquid nails. Its purpose is to enable the screed to expand without damage during temperature fluctuations.

3. Roll material is cut, along the way it is cleaned of dust and dust. It is necessary to consider:
- this technology provides for at least two layers of material,
- the material should go 15 cm on the walls (after laying the screed, excess is trimmed)
- overlapping by 15-20 cm,
- in places adjacent to the threshold, leave at least 30 cm, so that it is possible insulating material to enter the next room.
4. The cut material is rolled out and left in this position for a day, which will allow waves and bubbles to be avoided during sizing.
5. The next day, the contact points of the waterproofing material with the base of the floor and the walls are treated with bitumen mastic.
Important: cold mastic is applied in one layer with a thickness of 1 mm, hot - in two layers. The second layer must be applied after 3-4 hours, so that the first layer does not have time to completely dry.
7. When processing the base with the mastic for the second sheet, also glue the joint on the first sheet, where an overlap is formed.
8. After laying the first layer, it is tapped to identify non-glued spots.
9. The resulting waves and bubbles are cut crosswise, aligned, smeared with mastic and again attached to the base. Places of the cut are dried, smeared with mastic. An overlap patch is applied on top.
10. The second layer is laid in the same order. The only thing to consider is the joints of the second layer should lie approximately in the middle of the sheets of the first layer.
This method of insulation is relatively inexpensive, reliable, has a long service life (at least 18 years), is not damaged by the formation of cracks in the base of the floor, can be performed on its own.
The disadvantages include the high complexity, long installation time, a high degree of fire hazard.
Surfacing Method
The waterproofing of the floor screed by the surfaced method is a new, highly effective method of protection against moisture. The material is laid in one layer, and the overlap does not require primer treatment. The first steps of the technology repeat paragraphs 1-4, with the exception of subparagraph 3.1, pasting method.
Further work with this type of materials is due to their arrangement. Fiberglass impregnated with polymer materials is the basis of surfaced waterproofing. The top layer performs protective functions, and the bottom - the role of glue. To prevent sticking of rolls, the adhesive base is covered with a special protective coating.

The surface of the laid material is rolled with a roller for a snug fit to the base, without the formation of bubbles. The second sheet is also overlapped, as in the previous method. Work is fast.
This method also has disadvantages:
- cannot be laid on wooden floors due to possible fire when using an open flame,
- high price of the material compared to roofing material,
- the work can be done by builders with experience in such insulation laying,
- The styling technology is designed for 2 people.
The method of bonding joints of polymeric materials
This method completely repeats the previous one, with the exception of one but - does not provide for the adhesion of the waterproofing material to the base of the floor.

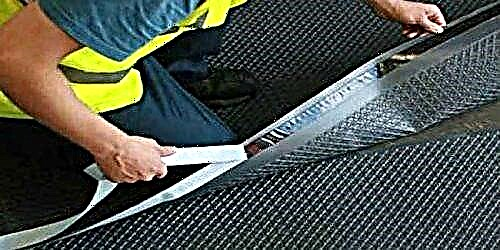
Important: all rolled materials simultaneously perform the function of soundproofing. The use of other types of waterproofing materials requires sound insulation.
Mastic
Coating waterproofing mastics are liquid insulating materials based on bitumen, rubber, polymers, or a mixture thereof. For example, bitumen-rubber, bitumen-polymer, etc. mastics. Apply with a paint brush or roller, similar to paint.
The work is carried out in the following sequence.
1. The prepared concrete slab is treated with a primer, preferably of the same brand as the mastic. In addition, walls along the entire perimeter are subject to processing. The height of the applied strip on the wall is 15-20 cm. A roller and a brush are used for application. You need a brush to work out places inaccessible to the roller, such as the space around the pipes, corners, joints of walls and ceilings. The primer is applied in a single layer over the entire surface, without spots of passage. Dries no more than 2 hours.
2. A damper tape is fastened around the perimeter of the walls (this operation can be performed before laying the screed).
3. Using a wide brush, roller and spatula (with its help, the joints of the walls with overlap are easier to process), the first layer of mastic is applied. Work begins with a distant wall with respect to the exit. All hard-to-reach spots are carefully oiled. Rubbing mastic with force is not necessary. Each layer is applied in one direction, at the same time perpendicular to the previous one.
4. The next layer is applied to the previous one after 3-4 hours. If you let the mastic dry, then its polymerization sets in and the next layer will simply lag behind. Total insulation is applied 3-5 times. Complete drying of coating coating occurs after two days.
The advantages of the method include:
- reliability,
- simplicity of laying - no work experience and many tools and devices are required,
- environmental Safety,
- durability,
- the ability to handle hard to reach places.
There are several drawbacks, but very significant:
- can not be used in houses with constant vibration - near a highway, railway or construction site - mastic loses its insulating properties,
- insulation is not resistant to sudden changes in temperature,
- it is easily damaged mechanically, and therefore, when reinforcing the screed with a metal mesh, special polymer gaskets lie under it.
Important: such waterproofing of the floor under the screed in the apartment is effectively done in residential premises. In the bathroom, in the kitchen and in the toilet there should be a combined method - rolled waterproofing materials are laid on top of the mastic, which gives a 100% guarantee of the quality of the work performed.
Penetrating primers
The introduction of new technologies into production did not pass by the construction industry. Penetrating waterproofing is one of them. The essence of the new waterproofing method is to change the physical structure of concrete under the influence of impregnation components.
Reacting with concrete binders, they create a protective film of insoluble crystals, clogging all microcracks and pores to a depth of 0.5 mm. In addition to protection from water, such a film increases the resistance of concrete products to aggressive chemicals.
Penetrating waterproofing primers are available in the liquid state - Penetron, Pronitrat and in the form of dry mixes - Kema. How to waterproof a penetrating primer?
- The concrete surface is abundantly wetted, but leaks should not be allowed on the neighbors below.
- Dry mixes are bred according to the instructions on the package.
- Immediately before applying the penetrating primer, the surface is once again wetted.
- The first layer of insulation is applied with a roller or brush.
- After the time specified in the instructions, a second coat of primer is applied to the again wetted concrete.
- The treated area is closed with plastic wrap or moisturized regularly for 2 weeks.
- After complete drying, waterproofing protection of the wall is carried out along the entire perimeter at a height of 15-20 cm from the base of the floor and joints with mastic using a wide paint brush.
The advantages of the new technology include the fact that the waterproofing carried out:
- has no limitations on the period of operation,
- withstands any mechanical stress
- It has the ability to tighten microcracks arising during operation.
There are a lot of minuses:
- impregnation primer is not effective on concrete with a low cement grade,
- not applied to brick, gypsum and lime plaster, which requires the processing of such materials with mastic,
- very high price
- long technological cycle.
Conclusion: the use of penetrating primer in housing construction is ineffective. Penetrating primer was originally created for waterproofing large areas.
Plaster mixes
Plaster waterproofing mixtures consist of sand, cement and polymer components that provide protection against moisture. Unlike a penetrating primer, it can be applied to any building materials:
- brick,
- concrete,
- gypsum and lime plasters.
Such waterproofing has a high level of adhesion (adhesion) to the surface and a low coefficient of elasticity, which allows it to be applied in rooms with a high temperature difference - from -50 to +70 degrees C.
Work execution order:
- The mixture is diluted with water to the state of condensed milk.
- A thin layer is applied with a spatula on the prepared surface.
- After drying the first layer, the second layer is applied for 15 minutes in the opposite direction to the first.
- The third, and if necessary, the fourth layer is applied in the same way.
- Drying takes place within 2 weeks, but in the first 5-7 days, the surface of the plaster must be moistened: every 4-5 hours using aerosol cans (spray guns) the first day, 2-3 times in the next 4-6 days.

We considered the main types of waterproofing.However, there are no less effective, but not very popular types of protection against water - liquid glass, molten (liquid) rubber, bulk polymer mixtures, etc.
Attention: waterproofing the floor after screed is possible only with rolled materials due to the damper tape (neither mastic nor plaster mixes will come into tight adhesion with the tape and, therefore, there will be no insulation layer at the junction of the wall and screed).
Features of waterproofing an apartment and a country house
Differences in the technology of waterproofing a private house and apartment appear only with the installation of a sand and gravel base for the floor. If concrete floors were used in the cottage or country house, there are no differences in the procedure for performing protective work between the apartment and the residential building.
How to properly lay the soil base for the floor is shown here. Further steps are as follows:
- the soil is covered with geotextiles to protect rolled waterproofing materials from mechanical damage,
- rolled waterproof protection is stacked.
The service life of a new floor is determined by many factors. But its protection against moisture is decisive. All types of floors, except for ceramic floor tiles, are actively subjected to irreversible changes under the influence of open water or its vapors in the air.
Rolled materials, surfaced or glued
Rolled materials, surfaced or glued
Usually they are a mixture of bitumen and special synthetic additives based on fiberglass, which is why they are reliable and durable. Previously produced on a paper basis, which reduced the service life. Such funds can be found now, in addition, they are very attractive at a price, but it is not recommended to buy them. Still, they have a lot of responsibility, and people usually plan to live in the house after repair longer than they need such waterproofing to fail.
Modern roll insulation is of two types: surfaced and glued. When laying the first type, construction gas burners are used that heat the bitumen in the composition, and for mounting the insulation of the second type, the roll is fixed to the base.
Work order
- The first step in the implementation of any waterproofing is to prepare the foundation. It is cleaned, existing cracks and potholes are wiped with a cement-sand mortar.
- Primer with bitumen emulsion. This is required when laying roofing material. It is possible to further treat base plates with penetrating insulating compounds.
Primer with bitumen emulsion
Laying damping tape around the entire perimeter of the room
Such waterproofing is affordable, reliable, relatively inexpensive, but very time-consuming to install, it also requires experience, the availability of tools and protection against mechanical damage.
Hydrophobic mastics
These are liquid materials based on bitumen. Brushed like a thick paint. The cheapest option is just bitumen heated to the desired consistency, but this method is less reliable and durable. It will be much more convenient and efficient to use bitumen-rubber and bitumen-polymer mixtures. They are more expensive, but easier to use, more reliable and more durable. Mixtures with polymer additives, in addition, are not afraid of low temperatures.
Work order
- Preparation of the basis for work: all garbage and dust that can prevent the mastic from clutching with the insulated surface are removed. Be sure to remove stains from oils and any other substances that can destroy the insulation. All cracks and cracks are rubbed with a cement-sand mortar, delaminations and sharp protrusions are knocked down.
- Primer treatment. This will help improve adhesion. Usually a primer is purchased from the same manufacturer whose mastic will be used. The product is applied thoroughly to the entire surface and dries for about two hours. More accurate information is indicated on the packaging of the product.
Brush or Roller Insulation
Such waterproofing is affordable and very reliable, while it is environmentally friendly, non-combustible, does not require experience and many tools. The only negative is that it has a low resistance to mechanical damage.
Penetrating waterproofing
This is one of the most modern and effective technologies to date. Penetrating waterproofing can change the physical structure of the base itself. The components of the mixture react with concrete, resulting in insoluble crystalline formations in its structure. They literally brick up the smallest pores of concrete without damaging its structure, and prevent the penetration of moisture even under pressure. In addition, treatment with such compounds increases the resistance of floors to aggressive chemical attack.
Compositions for such waterproofing are available in the form of liquids or dry mixtures.
Work order
- Surface preparation, which in this case will require not only cleaning and grouting of cracks, but also plentiful moistening. The base should be saturated with water, but in moderation so that moisture does not leak to the neighbors.
- If the composition is dry, then it must be diluted strictly in accordance with the instructions.
- Before application, the surface of the substrate is once again wetted.
- The first layer of waterproofing is applied. Next, wait for the time specified in the instructions, and apply the solution again on the newly wetted surface.
- Then they tear the surface with a film or moisturize it continuously for another two weeks before final drying.
With such a solution, it is recommended to treat not only the base, but also the finished screed, which will provide additional insulation.
These were the most basic and frequently used methods of waterproofing, but besides them there are many others, for example - cast, liquid rubber, naive mixtures. The choice depends on the preferences and financial capabilities of the developer.
After carrying out all work related to moisture protection, you can proceed with the screed. For more reliable waterproofing, it is better to use not one, but several methods, for example, combine the impregnation with the coating of cracks and cracks with mastic in living rooms. Protection and durability of the floor and screed will depend on professionalism and literacy of actions, therefore, it is not worth saving on materials. If there is no experience and self-confidence, it is worth entrusting this matter to professionals, but if you have the skills and desire, all actions to waterproof the room can be done on your own.
Do you like the article?
Save so as not to lose!
Why do waterproofing before screed
Many believe that repairing living rooms without high humidity does not require additional floor work. But the first judgment may be erroneous. Waterproofing works are needed absolutely everywhere, and there is several evidence for this:
p, blockquote 3,0,0,0,0,0 ->
- Protection against external leaks. In the living room, the bathroom and the kitchen are the places that are most prone to flood. Moreover, the global process will not affect the final result. And, provided that the apartment is above the first floor, even an overturned bucket of water can cause contention between neighbors. Another type of external leak is a screed. More precisely, water, which is a significant component of casting mixtures. And which, too, can seep to the people living on the floor below.
- Protection against internal leaks. The humidity level of rooms located close to the ground will be clearly increased. Such buildings include private houses, basements, ground floor apartments and garages. Needless to say, concrete is a porous material that is easily absorbed by water. And in order to prevent moisture from spreading along the floor and walls, leading to cooling and their destruction, experts recommend double waterproofing - before and after screed. This is especially true for the construction of private houses.
- Improving screed quality. In order for the concrete screed not to crack during quick setting, it needs to dry very slowly. Experienced craftsmen even moisturize the coating, covering it with polyethylene. Thus, the drying time of the concrete screed is significantly extended. From a professional point of view, the waterproofing layer will contribute to this process, as well as possible.
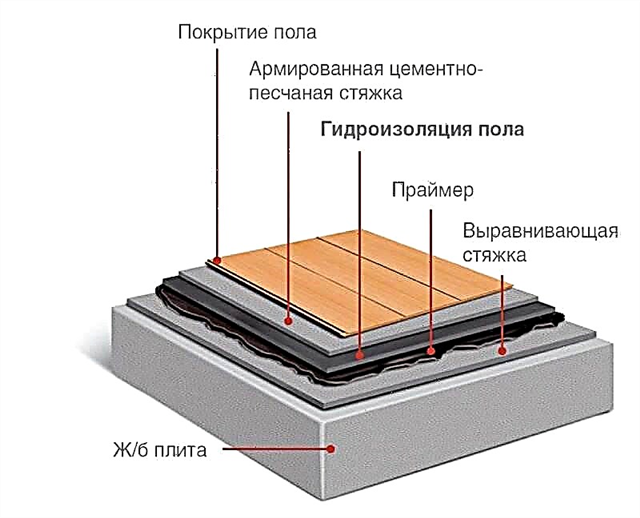
Varieties of isolation
There are several types of materials for waterproofing under the screed in the apartment. Thanks to them, not only a protective layer is created from water, but also the floor in the room is qualitatively leveled for further repair actions with it.
p, blockquote 4,0,1,0,0 ->
- Plastering. Such insulation consists of several layers with a total thickness of up to 2 mm and is used in two forms - cold or hot. It can be used well in brick and concrete buildings, however, it is completely unsuitable for a wooden floor.
- Painting. This coating is applied with a wide brush for painting until a thickness of 2 mm is reached. Materials for coating may be bituminous mastics, as well as polymer coatings. Paint insulation is also of two types - hot and cold. The cold look is considered the most convenient because of the ease of application and high efficiency, as a result of using an epoxy-rubber mixture. With the hot method, it is necessary to melt the bitumen, which in closed space is not always possible.
- Okay. The essence of such insulation is to fix waterproof roll coverings on the floor, for example, roofing material, isospan, techno-nikol, etc. Roll strips are laid in several layers with a small overlap. To fasten them, they take mastic or a gas burner. The latter is used by specialists in the surfaced method. Such insulation is universal and can be used both in concrete houses and in wooden ones.
- Impregnating. It consists of a porous material that is pre-impregnated with moisture-binding binders. It can be polymer varnishes, bituminous resins, as well as petrolatum. The use of such insulation is recommended by professionals for wooden houses. In this case, it is advisable to impregnate not only the floor, but also wooden poles with all the existing ceilings.
- Cast. According to experienced builders, this method is considered the most durable and reliable. For a protective coating, they resort to a mixture of hot asphalt and bitumen mastic. It is poured in 2-3 layers to a thickness of 10-25 mm. Naturally, this greatly affects the cost of insulation and its weight. Therefore, in order to avoid unforeseen consequences, it is necessary to do all the calculations with special care.
- Backfill. Here the name speaks for itself - this is insulation, which consists of bulk materials with increased moisture resistance. For reliability, bicarbonate powder and asphalt isol must be covered with a thick layer - at least 50 cm, which is unrealistic in comparison with other methods. However, such a thick pillow has an undeniable plus - good additional thermal insulation, which is most often used either in the basement or on the ground floor, where the cold is felt most.
- Mounted. The components of such insulation can be different - from profile tapes to plastic or metal plates. They are attached to the floor using special mounting brackets.
- Injection This is one of the best modern and high-tech solutions that creates protection against water by filling all microcracks with liquid material. Thanks to a special formula, the mixture penetrates into concrete and solidifies in the form of crystalline formations. Moreover, the integrity of the structure is fully preserved and, moreover, withstands the penetration of moisture at pressure. Also, this insulation increases the resistance of the floor to aggressive chemicals.
Waterproofing the floor with rolled materials
The insulation in rolls can be of two types - fused when special gas burners are used for melting bitumen and glued, when the roll is fixed on the base.
p, blockquote 8.1,0,0,0 ->
Roll insulation technology is as follows:
p, blockquote 9,0,0,0,0 ->
- First, along the perimeter of the walls, it is necessary to lay a damper tape, which is a foam polyethylene. It is needed in order to avoid cracks in the connecting seams between the floor and the wall. This is due to the fact that temperature fluctuations affect the floor area - it can expand and contract accordingly, leaving huge gaps after that. To fix the damper tape, you can use dowel nails or glue.
- The next step will be the alignment of the floor area. Sometimes there are potholes in the floor that need to be covered with sand or sealed with cement-sand mortar.
- Roll insulation is laid on the floor with stripes with a small overlap of at least 10 cm, and with "climbing" onto the walls - 15 cm. The ruberoid must be glued to the floor with bitumen mastic, which also glues joints (overlap).
- When using deposited materials, for example, stekloizol, they are attached to the base of the floor with a gas burner. And lapped polymer films are easy to weld with a construction hairdryer.
- The waterproofing materials in the roll are stacked unequally. The ruberoid needs at least a double layer, and a single layer is enough for polymer materials with deposited films. After performing waterproofing work, reinforcement and screed are carried out. And the final feature will be trimming the extra pieces of insulation flush with the floor.
Important! Processing with a primer (primer) is only necessary when using roofing material, and when using polymer waterproofing films, you can do without it.

p, blockquote 11,0,0,0,0 ->
Features of waterproofing under floor heating
There are no special restrictions when waterproofing a warm floor. The material is allowed to be laid both on top of the cable and under it. This is due to the fact that manufacturers are counting on cable operation in various conditions, including and on the aquatic environment. The only condition is the prohibition of the location of the cable in direct contact with the waterproofing. To distinguish between these layers, you need to use a metal mesh or separation screed.
p, blockquote 14,0,0,0,0 ->
When waterproofing the floor in the bathroom under the tile, the insulation itself lies above the cable. Therefore, experienced specialists strongly recommend pouring the cable with a cement-sand screed.
p, blockquote 15,0,0,0,0 -> p, blockquote 16,0,0,0,0 ->
In case of bitumen waterproofing, with the use of burners, exposed parts of the cable must be protected from flame and high temperature with special materials.
Types of materials for waterproofing
The task of waterproofing a concrete floor can be solved in different ways. The fact is that there are different types of waterproofing materials. All of them are not perfect, but when used correctly, they all fulfill their task - they protect against the penetration of water. Here are just some that are effective against moisture in its liquid state, while others cut off vapors. Indeed, from fumes or capillary suction, concrete can also be wet. So in order to choose a material for waterproofing, you need to have a clear idea of the ways in which moisture appears and in what form it can come. It is also worth thinking about where and how moisture will go if it does end up in concrete. The tasks are different, but waterproofing the floor under the screed should solve all of them at once, otherwise there will be problems.
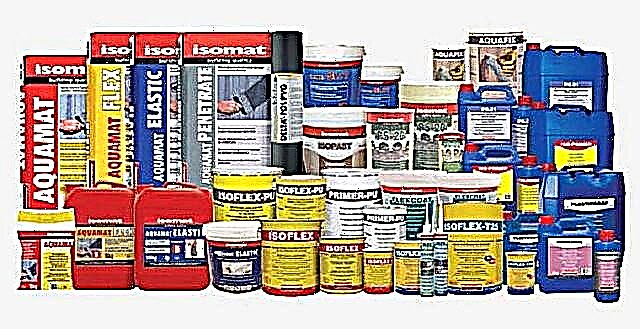
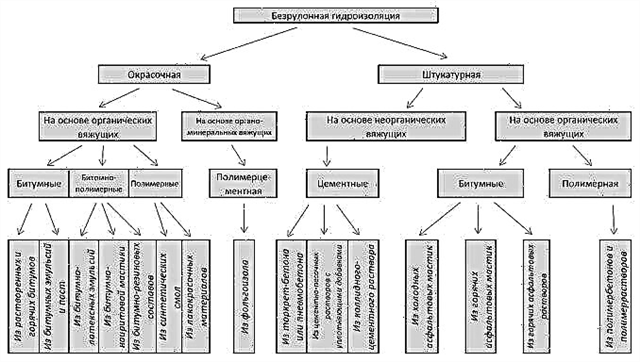 What are waterproofing materials
Separate all the compounds makes sense according to the method of application. Often this is the deciding factor.
Smear
They have a semi-liquid or liquid consistency. Apply to the base with a brush, but can be in the form of a plaster mixture.Actually, the usual stucco for us is also a type of wall waterproofing.
- Mastics. May be cold or hot. Hot are heated to a certain temperature before application. They are a mixture of organic binders and fillers, which add materials with high adhesiveness, improving adhesion to the base. They are applied on a clean and dry base, otherwise they simply "do not adhere" to it. Form a film on the surface, which usually does not pass either steam or water. The disadvantages include special requirements for dry surface, as well as low resistance to mechanical stress.
 After applying waterproofing, it can be said that the floor has been sealed
The easiest to apply class of waterproofing materials. The compositions have sufficient fluidity or elasticity before drying, so that they can be applied on uneven substrates. They fill in the bumps, even quite deep ones. And this is their advantage. But under loads or mechanical stress are destroyed. If coating waterproofing is used in the floor structure, you need to walk carefully on the surface.
Foamy or layered
This is the oldest and most likely popular method of waterproofing. Back in Soviet times, roofing material was used to protect against moisture. He is now, as well as a whole list of others that have some additional properties. A modern roofing material, by the way, although cheap, is too thin and unreliable. For high-quality waterproofing, it is hardly suitable. If possible, take something more durable.
- Roll or sheet. Both materials and the technology of their installation have long been known. There are adhesive for cold application or weldable - with the melting of the adhesive layer during installation. It has high surface requirements: the base must be dry and even. Permissible irregularities - 2 mm per meter. It requires a preliminary primer with a bitumen emulsion. It is easily damaged by mechanical stresses and therefore requires careful handling.
 Roll materials are usually widely represented.
Waterproofing under the floor screed in the apartment is usually done with a film. Adherents of old technologies put roofing material. With proper installation (with overlap and double gluing of joints), both materials perform their task. But only they must remain intact. And they will have to walk on them, exhibiting beacons, laying out and leveling the solution.
Water repellents
Water repellents are substances that make concrete impervious to water. Water simply stands in drops or puddles and does not seep inside. There can be two types - additive during mixing or mortar, which is applied to concrete. The second type may seem similar to penetrating waterproofing, but their mechanism of action is different.
The additive makes concrete impervious to moisture to the full depth. The absorbed solution forms a layer (to a depth of not more than 5 mm), which does not allow water to pass through. As you can see, both types solve the problem of protection against moisture. But the first can be used only at the manufacturing stage, while the second is already after curing (not earlier).
 If the fabric is treated with a hydrophobic compound, it will also become a waterproofing
Sometimes it is easier to immediately lay concrete that does not let water through than to create barriers afterwards. But the cost of hydrophobic additives is high and this is their only drawback. And water repellents that are applied to the surface are washed out over time, which leads to a deterioration in waterproofing characteristics.
In general, these are all types of waterproofing. There is plenty to choose from, but not to say that the choice will be simple. As usual, either simple and reliable, but expensive, or cheap, but it’s difficult and reliability is in question.
What tasks does waterproofing perform
The conventional wisdom that waterproofing the floor in the apartment before the screed prevents only leaks to the neighbors is not entirely true. Protection against water penetration performs a wide range of functions.
- a properly organized vapor permeation waterproofing structure will ensure the screed dries. This is important in houses with a wet basement or - built on the ground,
- waterproofing the floor in the apartment before the screed will protect the interfloor plate from the penetration of water. This ensures that there is no internal corrosion and damage that can significantly reduce the life of the building as a whole,
- waterproofing before screed plays the role of a load damper. It will significantly increase the service life of the floor, prevent the formation of cracks. The waterproofing screed is floating, mechanical stresses and deformations of the floor structure are transmitted to it to a lesser extent
- waterproofing under the screed in the bathroom, laundry or kitchen - required. In these rooms, a large amount of water is often spilled, which without protection will leak to the lower floor and literally impregnate the floors.
High-quality waterproofing before the screed is important both for residents of apartments of multi-storey buildings, eliminating many problems with neighbors, and for residents of private buildings. At the same time, the number of storeys of the latter does not play a role.
Why high-quality waterproofing is needed in a one-story private house
Leaks and damage to the floors is not the only problem caused by the lack of waterproofing. In one-story private houses without a basement, moisture protection is necessary. Moreover - double, from the penetration of water, roughly speaking, down and up.
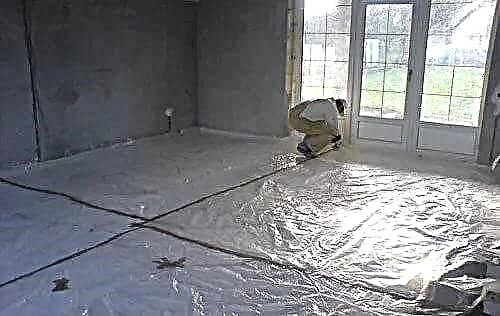 Wraparound insulation
In buildings built on the ground, the following occurs:
- when the air temperature drops, the soil cools,
- condensation forms, the air gap between the earth’s surface and the ground floor overlap, saturated with water vapor,
- moisture penetrates from below and can destroy a poorly protected screed.
Using the example of the ground floor of houses built on the ground, you can clearly illustrate the answer to the question of where to make a waterproofing layer: before or after screed. In the simplest case, the protection is placed under the screed. But it is recommended to ensure the removal of excess moisture, having a separate layer of waterproofing after screed.
It is created using membranes of one-side vapor permeability, drying concrete at a low speed. At the same time, floor coverings are not harmful - the movement of moisture occurs in very small volumes.
If the floor is on the ground
If we approach the issue of waterproofing floor screed on the ground floor in a building on the ground, it is necessary to take measures to prevent the so-called reverse capillary movement of moisture.
To do this, proceed as follows:
- waterproofing the bottom floor using impregnations, roll materials, bedding,
- a pillow of fine gravel is poured directly onto the stove or the subfloor, carefully compacting it,
- a layer of sand with a height of up to 100 mm is applied on top and compacted.
Geotextiles, a layer of insulation are laid on top of the formed base and waterproofing is made with roll materials. A layer of gravel and sand will prevent vertical condensate movement.
Acting on the given scheme, it is possible not only to improve the thermal characteristics of the house as a whole, but also to guarantee the long service life that the waterproofing of the floor before the screed and the cement-containing layer on it will show.
Floor preparation: general work
Before waterproofing will be done before creating a standard concrete, insulated screed or thin reinforced - a number of work is required to prepare the floor.
Their list is unchanged, regardless of what material will be used as a means of protection against moisture:
- Flooring, if any, is removed.
- The floors are thoroughly cleaned. Oil stains are degreased, traces of paint and glue are removed.
- Inspection of the surface. Cracks and seams are cleared, rotten boards are replaced on wooden floors, areas of weakened concrete are chipped. The lines of convergence of the floor and walls should also be freed from any extraneous pollution and materials.
- Garbage is removed rough, with a broom.
- Leveling the surface. The protrusions are cut or chipped, seams and depressions are sealed with putty. After the solution has hardened, it is cleaned with a sandpaper.
- Garbage is removed completely. First, sweeping, then using a vacuum cleaner, then wet-cleaning the floor.
Thorough cleaning of the floor is a must. The waterproofing under the screed in order to avoid damage should lie flat, adhere to the base over the entire surface, this will allow the insulator to show its maximum service life and show all the positive characteristics.
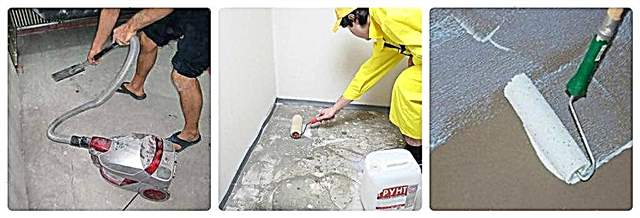 Preparation stages
Rolled materials for waterproofing
Waterproofing the floor before the screed, if you want to spend money reasonably and save, is done using various kinds of rolled materials.
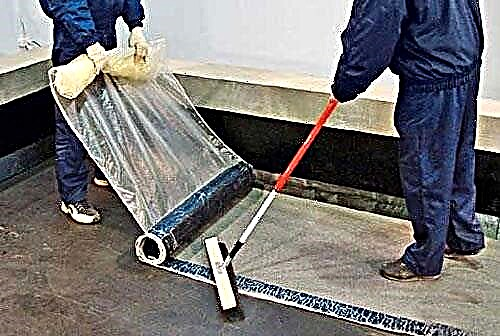 Roll performance
How exactly the insulators are applied will be described later, but now it is worthwhile to dwell on their properties:
- The most inexpensive and common are roofing material and glassine. These roll waterproofing insulators are easy to buy, they are simply applied, and bituminous mastics are used during operation. The disadvantage that waterproofing to a screed of roofing material or glassine is characterized by is low durability. Made on the basis of cardboard, ruberoid and glassine have one weak point: over time, the paper begins to crumble and rot.
- Bituminous waterproofing materials on fiberglass and fiberglass look better. The former are cheaper, but their basis tends to exfoliate over time. The second ones are somewhat more expensive, the fiberglass is durable, but because of the small holes in the structure, the layers of bitumen cannot join over the entire surface, therefore, over time, the waterproofing before the screed begins to lag behind the base. This does not happen in one or two years, the process can take decades. A small drawback of materials based on fiberglass is that it is easy to damage them when laying, the insulator breaks if the force is applied in a certain direction.
- Polyester based materials are an excellent choice for private home owners. They have a maximum tensile coefficient before breaking: up to 30% in length. The waterproofing of the floor screed made by a polyester-based web material will not be damaged if the floor of the beams or timber is deformed due to excessive or resonant loading.
- One-sided membranes. This modern material is used if it is required to provide the return movement of moisture. The wetted screed will dry out because the membrane on its side is impervious to water. But if condensation forms from the bottom (from the basement, cold soil) - moisture will pass up. Use a one-sided membrane is very careful. Excessive saturation of concrete with moisture can lead to rapid weakening and destruction of the screed.
- The last and most understandable material is ordinary polymer film. Such waterproofing of the floor in the apartment before the screed is very simple, has acceptable characteristics and will help to save if repairs are made in the bedroom, hall, nursery, rooms where a large amount of water leaks is more likely an emergency than a standard situation.
Additional properties
Modern rolled materials are available in various designs. When working with roofing material or glassine, they act by standard methods, gluing them with bituminous mastics.
But materials on a fiberglass and polyester basis are also available in a self-adhesive format: waterproofing before the screed is done by gradually deploying, releasing the insulator and pressing it to the floor surface for gluing. This allows you to work really quickly and do without the procedure of fusion seams.
Special mixes
A group of modern materials for waterproofing is presented in the form of semi-liquid mastics. One-component, fully polymer compositions of the road show excellent results. But it is more rational to apply more universal and inexpensive means:
- Cement-polymer mastics are morally outdated, but are used quite often.
- Bituminous waterproofing (not to be confused with mastic) is intended to form a protective layer by the method of coating. To start applying the mixture must be heated to a temperature of 160 degrees, which complicates the implementation of apartment repairs.
- The bitumen-polymer mixture is almost ideal if the floor is waterproofed in the apartment. This composition adheres well to concrete without the need for special means of increasing adhesion, has a good level of strength.
- Acrylic waterproofing of a water emulsion type is a universal and popular remedy. It is odorless, quick to apply, safe for health. The formed insulation layer is plastic and at the same time durable.
Special mixtures for waterproofing are supplied both in buckets, ready for use, and in the form of dry mixtures. The main rule when working with waterproofing of this class is to strictly observe the cooking recipe, temperature and rhythm of work recommended by the manufacturer of a particular product.
 The market provides any type of waterproofing
Foundation preparation
Primering the floor before creating waterproofing is a must. To guarantee good adhesion, especially when working with polymer compositions, it is possible to use special agents of the Concrete Contact class - a mixture of primer with quartz sand. Such compositions, when dried, not only penetrate deeply into the floor, but also form a rough, durable surface.
How is waterproofing made with different materials
Consider how to waterproof the floor under the screed after preparing and cleaning the base with different materials.
- The perimeter of the room is glued with a special construction tape for waterproofing along the convergence line of the floor and walls.
- When working with rolled materials around the room perimeter, a special damper tape is necessarily laid. Its task is to compensate for the thermal expansion of the screed.
- The polymer film is placed in strips directly on the floor. In this case, it is necessary to get rid of air bubbles between the insulation and the base. The strips are arranged so that each next one goes to the previous one by 10-15 cm. The seams are glued with wide tape. The waterproofing layer should go to the wall 10-15 cm, forming a kind of bathtub for laying the screed.
- When working with roofing material, glassine, other materials of the bitumen group, the base of the floor is covered with mastic. It is recommended to use compositions from the same manufacturer as the roll insulator. Laying of strips is done with an overlap with an overlap of up to 10 cm, this zone is heated by a building hairdryer for fusion. The rules for entering the wall are the same as for a polymer film.
- Depositional roll materials are not recommended for use in an apartment. They work with them according to the same rules as with roofing material, glassine. However, after applying a layer of bitumen mastic, it is heated by a gas burner, similarly, a waterproofing device is prepared. The strip is superimposed gradually, rolled by a roller until it cools. This ensures complete adhesion to the floor surface.
- Semi-liquid special mixtures are applied in thin layers in compliance with a number of rules. Work should be with a roller or a wide brush. The first thin layer is applied in one direction. After 3 hours - the second is formed, in the opposite direction. The process is repeated until a reliable floor waterproofing is formed, with a flat surface. The zones of pipes and other engineering networks are processed with a thin brush. When working with single-component polymer mastics, the number of layers is unlimited. The composition can be used for leveling and easily raising the floor level, it is allowed to lay tiles on it without screed.
Rules for applying waterproofing
The requirement of a pause of 3 hours between the application of the waterproofing layers by the method of coating is mandatory. With shorter drying times - it is possible to lubricate, mix layers, the formation of "sagging". With more - the polymerization process will begin, the floor waterproofing can delaminate. After applying all layers, the waterproofing must be thoroughly dried, the manufacturer indicates the time of complete polymerization, usually it is about 48 hours.
Floor waterproofing is an important component of modern floors. Do not be lazy and do not skimp on quality material. Choosing high-quality materials, you can be sure that waterproofing will not fail in the most unforeseen situations.
Waterproofing the floor before the screed: when, why, what and how
Waterproofing materials are laid under a concrete screed in two cases:
- in high-rise buildings, so as not to flood the neighbors from below,
- in private homes, when they make a final screed on top of a concrete preparation, cutting off moisture from the final screed and the coating that will be laid on it.
To begin, let's talk about how to make waterproofing under the screed in the room. Modern coatings require an even foundation, so that repairs are rarely necessary without this step.
Screed waterproofing materials in living rooms
In living rooms, the appearance of water is not very likely. Unless there will be a flood due to burst heating pipes or something like that. Therefore, in such rooms the most often used layered materials - film or roll waterproofing. They cope well with their tasks, inexpensive. The rules for laying the film and rolled waterproofing are the same.
- The waterproofing sheets are laid so that their edges go one on top of another 10-20 cm. These edges are glued with double-sided tape. It is safer to glue the joints twice, fixing both edges.
- The waterproofing is spread with the entrance to the walls. The edges are fixed on the walls slightly above the level of the future finish. It is easier / best to fix with strips with nails or screws. Then, a damper tape rolls around the room.
Film or roll waterproofing - the most economical options for laying under the screed
In the place where the film or roll material comes on the walls, make a small fold. If this is not done, the material here is often stretched, so that it is easy to tear.
One important point - the film must be thick and dense. Density - not less than 200 g / m². She goes with a sleeve, double. So, without cutting it and stack it under the screed. Then, when you walk along it, try not to break. Therefore, before laying, notice, remove all rubbish. Even a small pebble or sliver can tear your waterproofing material.
Yes, film is the cheapest type of floor screed waterproofing. And she performs her functions perfectly. But if the screed is reinforced or you will be laying pipes of a warm floor, the likelihood that the film will not tear is extremely small. Even if you walk in felt slippers. For such cases, it is better to use more expensive, but more reliable and durable materials. For example, smear.
For bathrooms and kitchens
The likelihood of water in the bathroom, bathroom or kitchen is much higher. Therefore, they try to make the waterproofing in the bathroom under the screed more reliable. For this, risk zones are additionally protected. Weaknesses in the ceilings of high-rise buildings are the joints of the floor with the walls, as well as the inputs / outputs of heating pipes, water pipes, other communications that are introduced through the floor. This is where additional protection is used.
The easiest way is to close up with a solution (cement + 3 parts of sand) all visible cracks, and then the corners, the places of entry of communications, to be coated with waterproofing. This is usually latex paint, but can be any mastic with suitable properties. But it’s better not to use bitumen indoors.
 The most vulnerable spots are covered with a double layer of waterproofing
And then, often, a film or rolled waterproofing is also laid under the screed. But there is another option, when then the base is covered with coating waterproofing.
 Which waterproofing is better for the floor? Whole and without holes
After drying, you can roll out the damper tape and pour or lay the solution. Please note that such a screed will still be floating. It has no connection with the base, even though the rubber film is very thin.
Do I need waterproofing over the screed
When installing the floor in “wet” areas or rooms, one sometimes wonders - can he make double waterproofing? Place one under the screed, the other on top. If you do not know if there is waterproofing in the existing screed, it is quite even and you are not going to remodel it, but you will install expensive or non-separable cover, then this solution seems logical.
 Waterproofing after screed is also sometimes necessary.
The second option - if you are very tormented by the fear of flooding the neighbors from below. For your own comfort, you can lay a second layer on top of the screed. There is no need for this, but you can’t do anything for your own peace of mind.
In the apartment
If there is tile on the floor, one (high-quality) layer of waterproofing under the screed is enough. Firstly, tile waterproofing material. Yes, cement grout joints allow water to pass through. But polymer grout is waterproof. If you are so afraid of the flood, it is better to use a good grout. So you will have double waterproofing.
When can you put waterproofing on a screed? If in the same kitchen or in the corridor you will lay a laminate. To soothe your paranoia, spread the film on top of the screed, then the substrate under the laminate, and then on the technology. Such a thin additional layer will not affect anything.
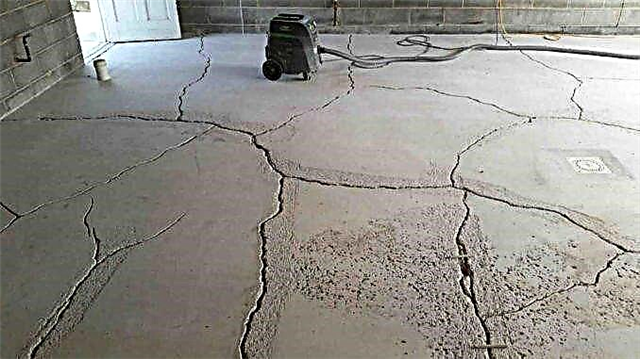 Screed cracks can be repaired and waterproofed
When is screed waterproofing still needed? If the screed is old, there are cracks. In general, in a good way, with a large number of cracks, it is necessary to remove the old screed and pour a new one. But if there are few cracks, the pieces of the screed are on the same level, under the tile it is quite possible to try to restore the plate. To do this, fill the cracks, fill them with a repair compound. Then, if you lay the tile, you can smear with smear or penetrating compounds. For other types of coatings, such a more serious waterproofing is also desirable, but you can get by with a film.
In a private house
The same approach - with laying the second layer of waterproofing on a screed under a laminate or carpet, can be justified in a private house. But here he is needed not to protect the "neighbors from below", but to cut off the flow of water from the ground. But if there is such a problem, then this is only a temporary solution. Damp accumulates under the film and you still need to redo everything.
 In a private house in concrete floors on the ground, it is necessary to protect against capillary moisture
What exactly needs to be done, you need to decide by examining the floor, foundation and surrounding area. But the first thing you can try is penetrating waterproofing. If the problem is that the bottom layer is torn and stops working, this will work. If the problem is foundation sludge, cracks, then you need to look at the degree of damage and then make a decision. In general, a little blood can not be dispensed with in such cases.

 Film or roll waterproofing - the most economical options for laying under the screed