At some point in life, the idea comes to bring some changes in the apartment due to lack of living space.
Since, according to the legislation of the Russian Federation, tenants do not have the right to expand their living space at the expense of a common place, such as a vestibule, a basement or an attic, the redevelopment of the balcony or loggia remains the best option. By law, a balcony can be decorated as a separate room, or as a continuation of the room.
In any case, the total area of the apartment increases, as, in fact, the street becomes residential. Therefore, the owner of the apartment is obliged to apply to the state housing inspectorate to make appropriate changes in the cadastral and technical passports, as well as in the title documents.
Where to begin?
Since any work related to the redevelopment or conversion of residential premises requires permission from the state housing inspection, first you need to collect a package of documents:
- The redevelopment project, signed by an authorized BTI specialist,
- Technical report on the security of the living quarters for living,
- Documents confirming the legal rights to own this property,
- Certificate of compliance of the project with fire safety standards,
- A document confirming the consent of the remaining tenants to redevelopment.
In some cases, authorities may require a certificate confirming that the house is not in a dilapidated or damaged condition.
Legal liberties
After long disputes between lawyers and experts about excessive requirements for the list of works that needed to be agreed with the State Housing Inspectorate before redevelopment, a number of some types of work were canceled.
So, for example, glazing a balcony and changing materials of structures from the outside does not require coordination. Also, you do not need approval to install glass sliding doors. Coordination requires an opening in the load-bearing wall, the width of which should not exceed 110 cm, as well as the demolition of the window sill.

Categorical prohibition
The redevelopment process is strictly controlled by the competent authorities, which will in no way allow the following manipulations to be performed:
- Transfer any engineering communications,
- Move radiators from the demolished wall to the balcony,
- To dismantle the sills in the opening of the balcony,
- Remove the block under the window (as part of the facade of the house).
An unauthorized change in the balcony threatens not only a fine, which can reach 350,000 rubles. Law enforcement agencies may require that the changes be corrected and the premises be restored. In addition, problems may arise when selling an apartment, as the old project will not coincide with real changes.

What is the best way to insulate a balcony?
When all the documents are signed and all permits are received, the turn of warming the balcony comes, so that in the end you get not only a beautiful, but also a comfortable additional living area.
The walls of the balcony, as a rule, are very thin, so it is advisable to cover them with additional silicate brick, which, being full-bodied, has increased soundproofing properties, frost resistance and resistance to temperature extremes. Its main advantage and difference from foam blocks is that subsequently it does not need to be plastered.
The next stage of insulation will be the glazing of the balcony. The most optimal options are sealed double-glazed windows, which will be in perfect harmony with other windows on the general facade of the building. Foam plex slabs are ideal as insulation, which are laid in a timber frame on all walls except the inside, as well as on the floor and ceiling.
The final layer will be reflective thermal insulation - penofol, which will retain heat in the winter and cool in the summer. Finishing the balcony can be made of various materials, depending on the taste and financial capabilities.
You can use wood or plastic panels, drywall, followed by wallpapering or applying decorative plaster.

Children's room from the balcony
The re-equipment of the balcony into a nursery requires compliance with certain requirements, so that future small "inhabitants" lived there warmly, comfortably and safely. It is necessary to take care of good thermal insulation of the floor, ceiling and external walls.
Given the fact that children in games spend more time on the floor, it is worthwhile to provide heat on the floor by laying a water or electric underfloor heating. To avoid the dilemma, remember that an electric heated floor is easier to install, and also eliminates the risk of leakage.
It is important to know that it is undesirable to use linoleum as a floor covering because of the risk of harmful fumes when heated.
It is much safer and more practical laminate or wooden floor.
To prevent accidents, it is advisable to install shockproof double-glazed windows (to protect the glass from objects accidentally falling into it), as well as special locks or barriers that will prevent children from opening windows on their own. It is also advisable not to place swinging objects above the level of the windowsill.
Of particular importance in the children's room on the balcony is the lighting, which should not dazzle or bore the child with too much brightness or dullness. When arranging a corner for a student, a zone of creativity (drawing, needlework, etc.), it is worth taking care of zone lighting with the help of spot halogen or led lamps.
The design and interior of the balcony for the nursery directly depends on the gender and age of the child, so the possibilities are limited only by your imagination.
How to make a balcony a room
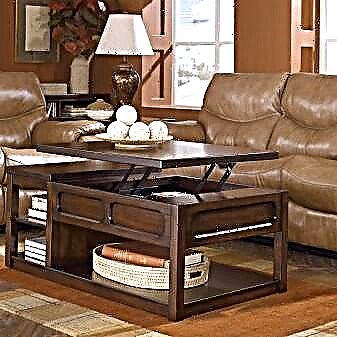
If the available space in the apartment is not enough to retire to knitting or sewing, calmly finish the report, place your favorite flowers, and your balcony is littered with all kinds of junk at this moment, then it's time to make a separate room out of it. As options, you can offer the following:
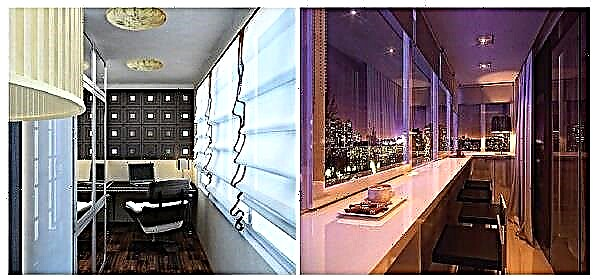
- The master’s corner - the ability to install cabinets and shelves on the sides of the balcony and under the window, as well as a folding table will give the creative person a place for the soul to unfold,
- A work home office is a great opportunity to retire for a quiet computer work,
- Flower meadow - balcony is a real outlet for gardeners, so you can equip various racks and shelves for flowerpots,
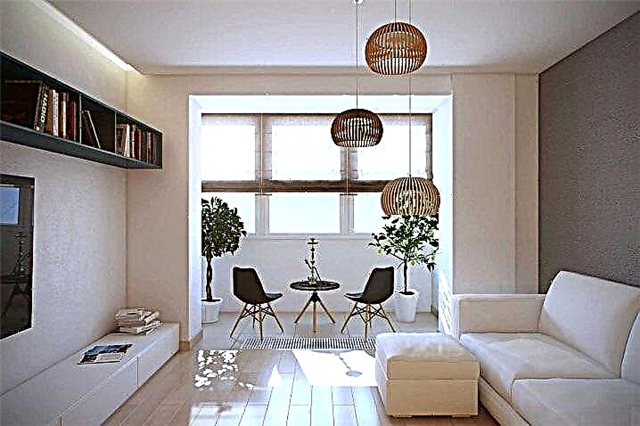
- Recreation area - a pair of comfortable chairs near a miniature table are ideal for intimate conversations and fragrant tea drinking,
- Mini gym - a treadmill, turnstile and rings will completely satisfy the needs of a sports lover.

Balcony as a continuation of the room
At the moment, housing legislation does not provide for any item that would accurately describe the procedure for joining loggias and balconies to rooms.
Previously, this item was, and allowed the union. In fact, today there is no ban on such actions, but the housing inspectorate recommends installing glass partitions when combining the loggia with the room and without fail to make a new project with the approval of the reconstruction with the architect, engineer and BTI expert.
The main condition of clause 5.1. The sanitary and epidemiological requirements is the preservation of the thermal circuit and natural lighting.
Step # 1: legal issue
The addition of additional space entails a change in the load on the ceiling and the appearance of the facade. Humidity changes inside the attached premises - materials and structures behave differently under its influence. Therefore, it is important to fully think through and calculate the project for warming a balcony or loggia - it is better to turn to professionals for help. The project will need to add documents for the apartment, BTI data sheet and several statements - in order to agree on the conversion to the housing inspectorate.
Step # 2: choosing a glazing
It is necessary to pre-select double-glazed windows for an insulated loggia -
Guided by the developed project, find windows specifically for your future new room. Plastic with a two-chamber double-glazed window, special profiles and reliable seals are the most common and justified choice.
Frameless glazing for a warm balcony is not suitable - it removes precious heat from the house and does not protect from drafts. You can use windows with frames from glued beams - however, such designs are quite expensive and have a decent weight. Aluminum frames can be “warm” and “cold” - be careful not to miss the chase for savings.
It all starts with windows
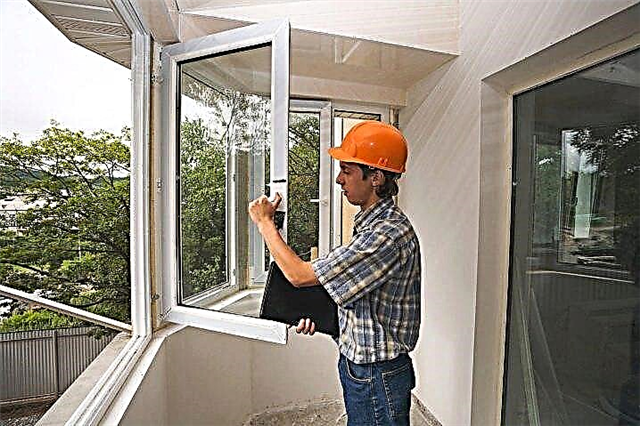
If you are determined to combine the room with the balcony, then the first thing you need to do is change the windows. As a rule, even in new homes the windows are not very high quality, they quickly become worthless, the paint falls off from them, and they do not protect against the cold at all. In addition, the frames themselves do not begin to open very well, but this is important for your idea.

The most ideal way is to put plastic windows. They protect well from the cold and hardly let out noise from the street. It is recommended not to engage in their installation yourself, but to invite a master who is specially trained in this. You need to install double-glazed windows on bricks or blocks, about a hundred to one hundred and five centimeters high.
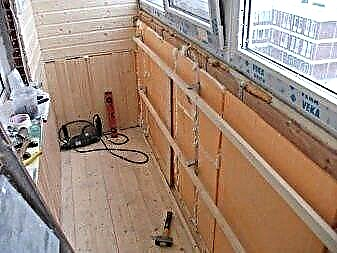
Warming
Further, to connect the living room with a balcony, you will have to do insulation. And there is good news - you can do everything yourself without resorting to the help of a wizard. So, after installing the windows, you need to carefully inspect the balcony for cracks and close them with mounting foam. Important note: do not save on foam and buy only high-quality, otherwise it will not cope with temperature changes and you will have to redo everything.

It is also necessary to remove the layers of the old insulation, and then apply sealant to the seams.
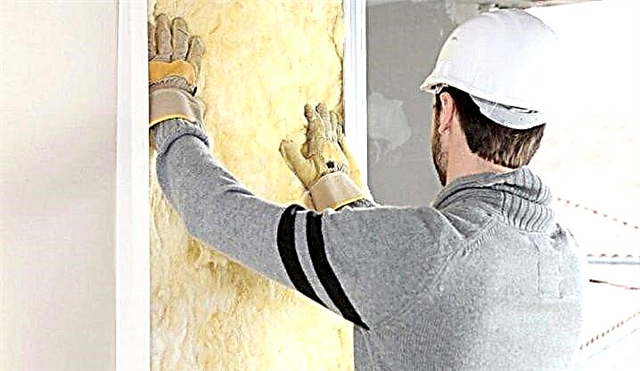
The most reliable, proven insulation materials are polystyrene, as well as mineral wool. There are other means, but these two are considered the best for this type of work.

How to fix the insulation?
- first you stick one layer of insulation to the fence,
- make a crate consisting of wooden blocks,
- fasten it to the floor and ceiling on metal corners,
- fasten another layer of insulation between the crate,
- at the final stage, finish the balcony as you like best - with plastic or lining.

The floor is insulated in the same way as the walls. If you want even more comfort and warmth, it makes sense to think about installing a warm floor, but it all depends on what purpose you decided to combine the room with a balcony. Whether it will be a nursery, an office, a living room - now everything depends only on you and your desire.

What's next?
After the balcony is insulated and has already turned into a continuation of the room, it can and should be decorated. Unfortunately, to completely demolish the partition that separates the balcony and the room will not work, since it is prohibited by law and very dangerous, because there is a huge load on the walls. But even without this, you can quite easily remake the balcony into a room, you just have to show imagination.

The space of the balcony can be expanded due to internal windows. If you remove them, only a piece of the wall and the battery will remain. The wall, if it is not too high, is suitable for creating an original table or bar.
Bedroom or study
If you decide to turn the balcony into a bedroom or study, then here, too, you need to consider some nuances. For example, a closet with clothes should not let light in, otherwise your things will quickly burn out in the sun. The same goes for the computer. Try to put the monitor so that the sun does not fall on it, otherwise it will be inconvenient to work, not to mention harm to the eyes.

If the sunny side, most likely, you will need to hang dense dark curtains, so as not to be under the sun all the time.

There is a double bed on the small balcony, and if there is no space left for the wardrobe, you can always think of and install drawers under the bed. If the cabinet nevertheless fits, then it is better to make its doors mirrored - this will greatly expand the space, as well as bright or light colors in the interior.

Continuation of the room
If you want to use the balcony as a continuation of the room, then you have several options. Either the balcony becomes a separate room, with a slightly different interior and purpose, or a room with a balcony is connected together.

The first case is suitable for large apartments. Here you can share a balcony with a room with something like a panel or curtains, as well as come up with a different but complementary interior.

If the room is small, it is recommended to make the balcony a continuation of it. This will expand the area of the room and create more convenience.

In the case of combining it is best to make a general floor covering. And add a step if you decide to keep all the bumps between the room and the balcony. It is also best to pick up the same wallpaper and furniture. In the event that you do not like the opening between the balcony and the room, you can close it by making something from drywall.
In the event that the room next to the balcony is a bedroom, it is recommended to decorate it in bright pastel colors. Also looks great a large bed with a TV in front of her. Bedside tables on both sides of the bed also look good, in them you can store personal items, for example. Shelves are best done hanging - so they do not take up space and look beautiful and stylish.

Although, of course, the rules are designed to be broken, and you can decorate everything in a completely different way.
What is a room for on a balcony for?
The balcony (loggia) is often used as a utility room for storing old things that go the standard way: balcony → cottage → trash.
 Photo: a person’s foot has not stepped on such a balcony for a long time The area of the loggia depending on the type of house can vary significantly: from 1.5 to 10 m 2, which is sometimes comparable to the area of the room.
 Photo: balcony (loggia) may have a different area The height of the loggia also affects the overall space of the room, sometimes reaching more than 3.5 m.
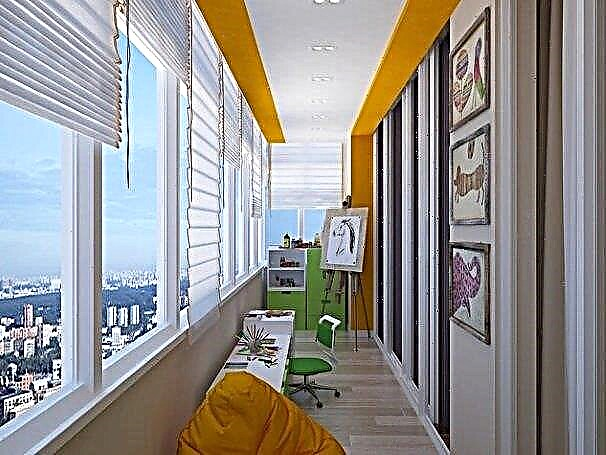
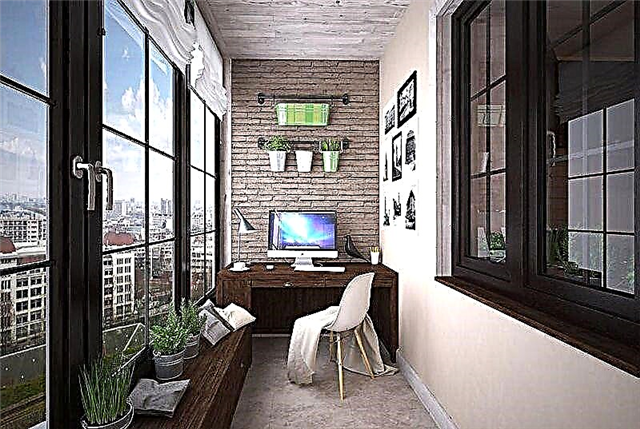 Photo: study on the balcony On the balcony room you can place a creative workshop, a study, a winter garden, a gym and use them all year round.
To choose the right glazing and insulation of the balcony, you need to determine how the room will be used.
There are 2 ways to convert a balcony into a room:
- Separate warm room
- Part of the living room (the topic will be discussed in another article).
Separate warm room on the balcony
When choosing the option of a separate warm room on the balcony, both external glazing of the loggia and glazing of the exit to the loggia will be required.
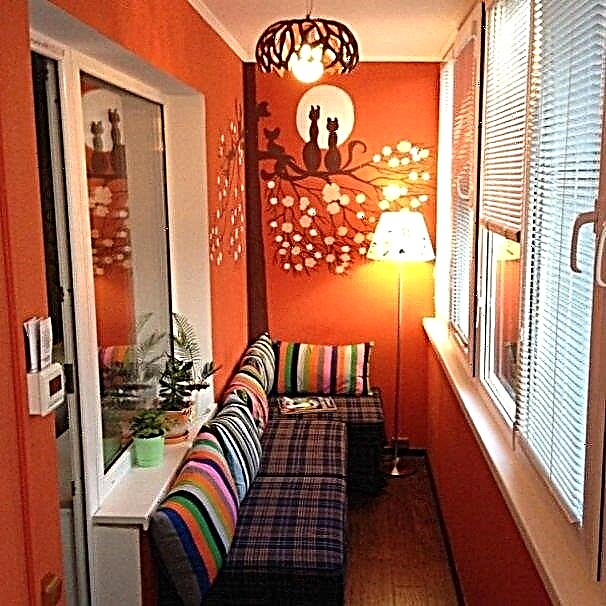
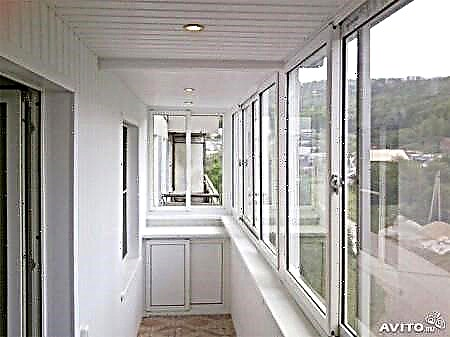
 Photo: a cozy room on the balcony To turn a balcony into a room, you need to carry out the following work:
- Sealing gaps to eliminate blowing,
- Integrated insulation: cladding of walls, floors, ceilings, heat supply. Attention! Transfer radiator to the loggiarequires coordination, an additional radiator cannot be agreed. Therefore, you can consider options for a warm floor and an additional electric heater for using the loggia year-round,
- Hydro and vapor barrier,
- Loggia glazing selection,
- The choice of glazing exit to the loggia and more.
The choice of external glazing of the loggia - equipment:
✔ Window profile: wood, warm aluminum or PVC (depending on the level of the desired thermal protection, the profile width is from 70 mm),
✔ Reinforcement: the loggia glazing has a large area in contrast to a conventional window. For such a design, the window company must calculate steel reinforcement thickness for sufficient glazing strength. The metal must be at least 2 mm thick, or you need to use an additional reinforcing profile - a pilaster.
✔ Double-glazed window: 2-chamber with i-glass (increased heat saving) or multifunctional (heat saving and sun protection). If the balcony is located above the 10th floor, the outer glass in the double-glazed window should be thicker - 6 mm in order to withstand wind loads.
✔ Hardware - the "engine" of the window, is responsible for the density of the clip and proper operation when opening and closing. The way of opening depends on the type of hardware:
- Swing wings (pivoting and pivoting).
 Photo: swing wings on the windows of the balcony Swivel - with opening flaps, it is convenient and safe to wash.
Swing-out - allow safe and comfortable ventilation of the room. The difference in price between the pivot and pivot flap is 500 rubles, but ventilation by the flap method is much more convenient.
The best option for swing and tilt-and-turn windows will be - the use of fittings RotoNx from the world's leading manufacturer of hardware with a functional guarantee of 10 years and the highest 5th class of anti-corrosion coating.
Shtulpovoe opening - Suitable for a loggia with a panoramic view. When opening the shtulp window between the leaves there are no extra partitions. The opening will be large and free. A window with a shtulp is approximately 10% more expensive than a hinged window, and inexpressible emotions are guaranteed to the owners of such balconies.
New shtulpovoy constipationPlus Roto NX hardware has a number of advantages compared to the traditional design of the shtulp - the opening mechanism is more convenient and safe.
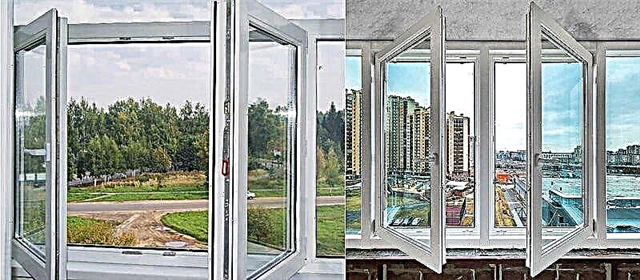 Photo: Shtulp window (left) and a window with an impost (right)
- Tilt-and-slide windows:
When opening, the sash moves sideways, which saves space on the balcony.
 Photo: glazing with tilt and slide fittingsRotoPatioAlversa with a shtulp *
Recommendation! Window companies, often next to sliding sashes, make dull windows, referring to the fact that it is impossible to put the ones opening there. The handle will interfere with the moving leaf.
Solution: it is optimal to use handles with lowered height in such constructions, or folding or removable handles. You can also open the adjacent leaf so that the handle is on the opposite side.
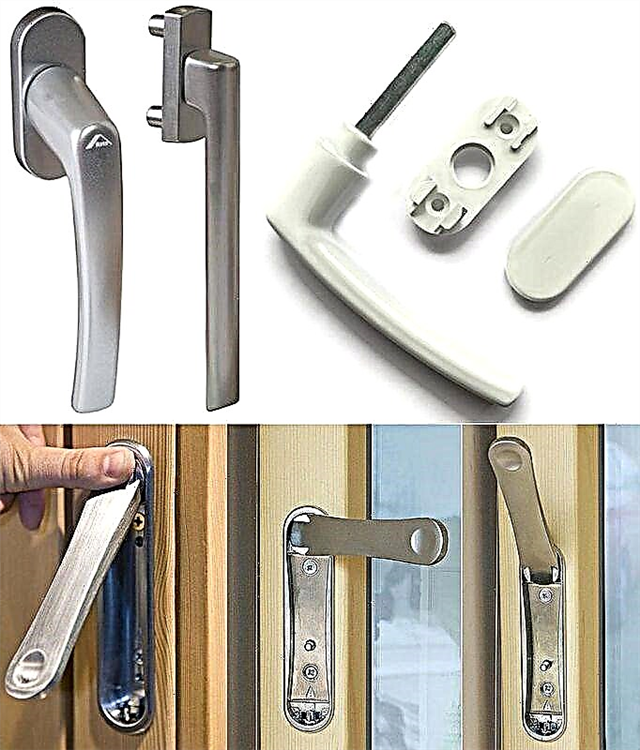 Photo: Top row (from left to right): handle of standard height, lowered height and removable. Bottom row: folding handle - does not protrude behind the sash in the closed position. After pressing on one side, it moves away and you can, by turning it, control the window
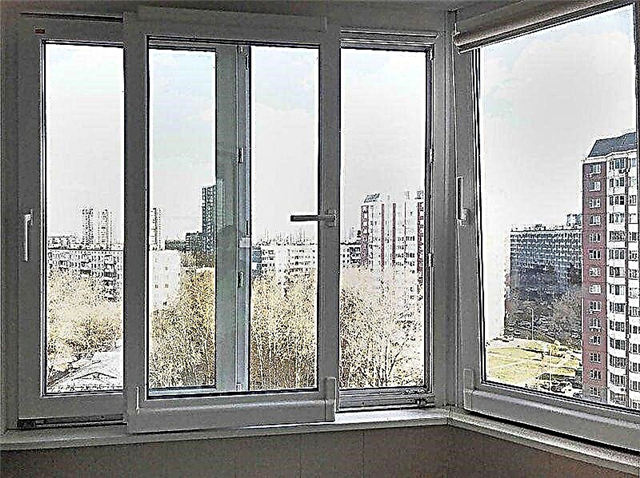 Photo: tilt-and-slide window with adjacent opening sashes, handle of the adjacent sash (far left) on the opposite side.
Loggia glazing - equipment
If the balcony is glazed and insulated, then you can save a little on the glazing of the exit to the loggia without overpaying for a very warm package - a balcony block or doors:
✔ Window profile: wood, “warm” aluminum or PVC - you can stop at 58-60 mm 3 cameras,
✔ Glazing: double-glazed window (depending on the level of sound insulation desired: single, 2-chamber or acoustic triplex, if you need complete sound insulation in the office from noise in the apartment). For higher thermal protection, you can use energy saving glass.
Type of balcony blocks:
1. Saving the configuration of the former balcony block.
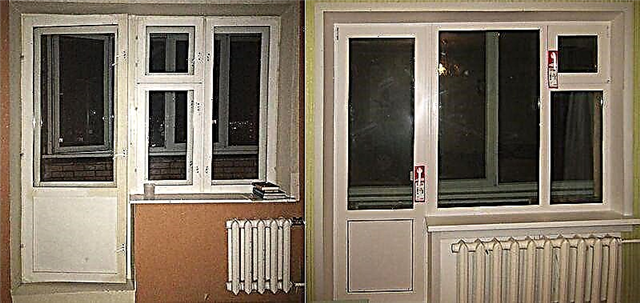 Photo: saving the configuration of the balcony block is the easiest option to replace the glazing of the exit to the balcony (the old wooden block is on the left, the new PVC one is on the right)
2. The balcony window is dull (for greater airiness the window can be made without jumpers), the balcony door is tilt-and-turn for ventilation in the tilt-off mode. With this option, glazing can be saved without ordering an opening window sash (2000 - 2500 rubles). It is necessary to initially assess whether there is enough ventilation of the room with the help of a hinged door. A dull window cannot be opened! The door is best made entirely of glass without a sandwich panel at the bottom and a jumper eating up space.
 Photo: a “dull” window in combination with a swing-out door made entirely of glass will save some of the money and expand the space
 Photo: a door variant with a sandwich (on the left) “eats” part of the space, a transparent door variant with an impost (on the right) breaks the integrity of the space and spoils the overall impression
For all tasks, a Roto NX hardware will be a good solution.
3. Expansion of the balcony opening:
- Due to the demolition of part of the wall under the window and the threshold under the door (minimal work). Attention! In certain series of houses it is possible, in some not. Mandatory approval required .
- Increasing the size of the balcony opening in height and width. As a result, instead of a balcony block, a double-leaf door can be placed in the resulting opening.
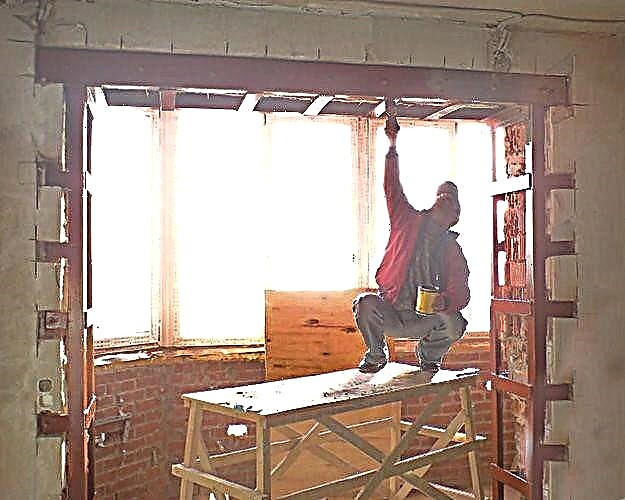 Photo: work to expand the opening must be carried out while maintaining the bearing capacity of the wall
Glazing options for balcony doors:
Opening door + blind:
- Hinged door + blind
The advantage of this option is - simplicity of design and low price. The disadvantage of this option is that the door, when opened, occupies part of the living room.
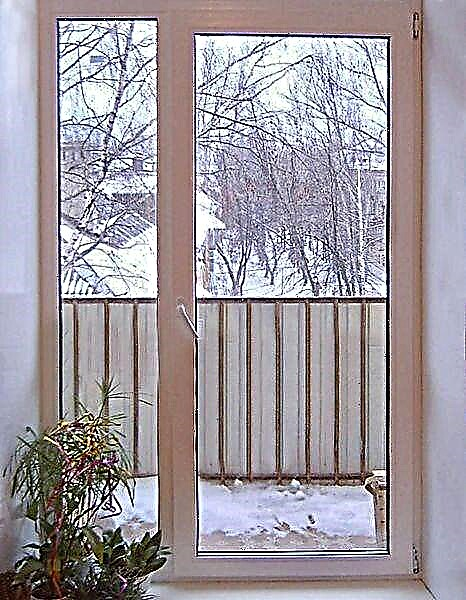 Photo: exit to the balcony - opening door + “blind” sash
- Sloping door + blind
 Photo: access to the balcony - the Roto Patio Alversa tilt-and-move fittings will allow you to not “eat up” the kitchen space when the sash is open *
- Sliding door + blind
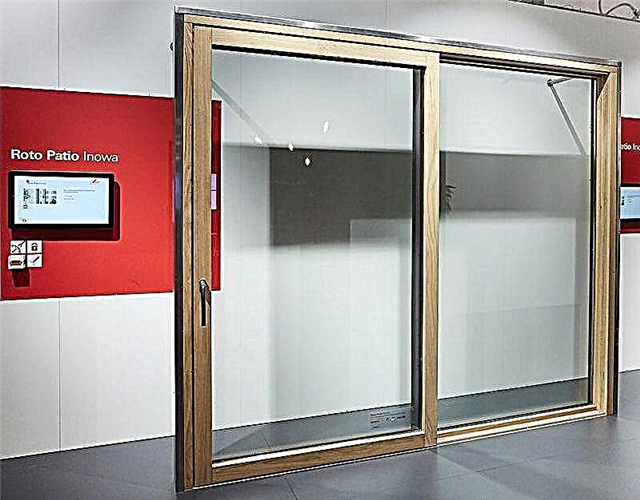 Photo: sliding door construction with Roto Patio Inowa hardware with increased tightness
The advantage of sliding options is that when you open the sash does not protrude beyond the walls and does not "eat" the space. The downside is the high cost of such glazing.
Recommendation! When choosing the glazing of the entrance group, you should pre-calculate the width of the opening part of the door, sufficient for carrying furniture!
Shtulpovaya door:
- Swivel + hinged sash. The main plus is the ability to fully open the doorway. The downside is that when you open the door will occupy part of the room of the room or loggia (when choosing to open outwards).
 Photo: the shtulpovy door is convenient for 100% opening, but the minus is the need for free space around the exit door (pivoting + pivoting and folding doors)
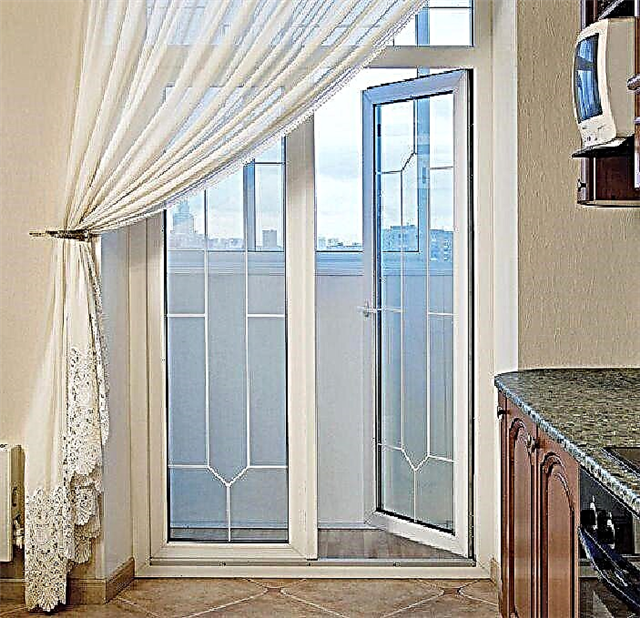 Photo: shtulpovy door with opening outward Sliding doors are about 10% more expensive than the version with a hinged door and a blind part, but much cheaper than sliding doors.
- Sliding doors with shtulp + "deaf" parts. Pros: a wide opening when opening, open leaves do not protrude beyond the plane of the door structure. Cons: you need a wide opening (about 3 m) and the highest price.
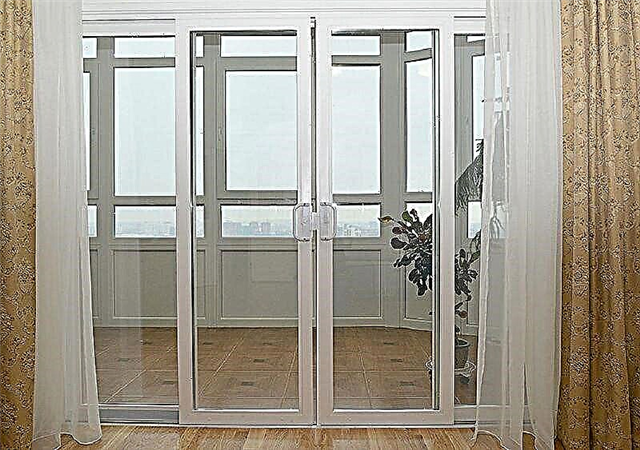 Photo: sliding portal with 2 opening sashes and shtulpThe world leader in the production of accessories Roto Frank has in its assortment all the accessories for glazing loggias and balcony exits.
Roto NX, RotoPatioAlversa and RotoPatioInowa - The latest models that entered the Russian market in 2019. In addition to high quality, all elements of Roto hardware are combined with each other in a modular type and can provide not only basic, but advanced window functions.
Expansion of the balcony
When creating a room on the balcony, you can carry out not only work inside the regular balcony, but also expand the space itself - create a loggia from scratch.
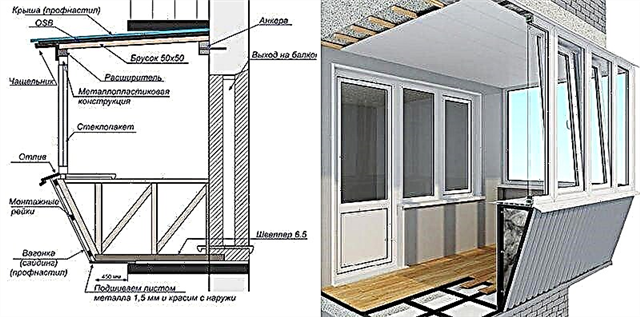 Photo: balcony expansion project
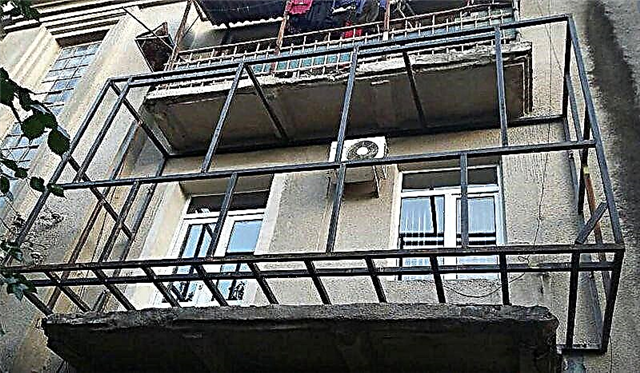 Photo: frame of an enlarged balcony For this, it is necessary to create a project with all the necessary drawings and calculations and coordinate it with the authorized bodies. If the loggia goes out into the courtyard, such an agreement is very likely. Changes should not be significant so as not to significantly stand out on the facade of the house. If the loggia goes to the outside of the house, then this idea should be abandoned.
 Photo: such a creation of a room on the balcony cannot be legalized Unauthorized erection of a new design can end sadly. The owner will be forced to return the balcony to its original appearance through the court. There is also the danger that an insufficiently calculated design can collapse and cause serious damage to others.
Balcony (loggia) are not originally residential premises. New modern materials and technologies make it possible to make a warm room out of them. Additional square meters of living space will increase the cost of the apartment and its attractiveness!
The second way: How to combine a balcony with a room - read in the materials WINDOWS MEDIA.
* The article contains contextual and visual advertising
Step # 3: building walls
First you need to close the gaps between the parapet and the floor slab. You already know what your windows will be - you may need to build the parapet to the height of the glazing, arrange the portal along the edges of the window structure. Increasingly, not heavy bricks are used for these purposes, but lightweight foam blocks. If space allows, duplicate all the balcony walls with them. And carefully seal the cracks with cement plaster and sealant. After these works, you can install balcony doors and windows.
Important: keep the configuration and size of the tides so that your new room on the loggia does not flood with rain - and so that the neighbors below are not flooded with water from your balcony.
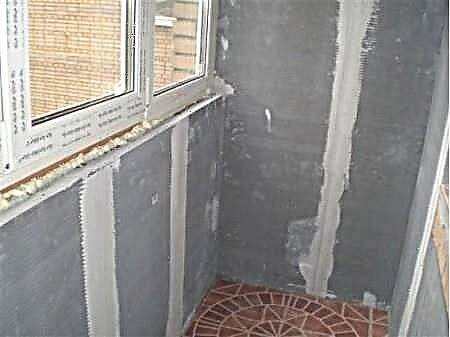
Step number 4: installation of insulation
To maintain heat in the space of the attached loggia, extruded polystyrene foam, mineral wool or polystyrene are most often used. In order to use mineral wool plates, you need to make a crate of bars. Styrofoam and polystyrene foam can simply be glued to the walls.
Isolon (also known as penofol) - foil foamed polyethylene - is usually laid on top of the insulation layer. It has both noise and heat insulating properties, and absolute moisture resistance - under its protection the insulation layer will not get wet, which means that the climate on the loggia will always be healthy.
Step number 5: work with the floor
One of the most critical stages. Calculate the insulation cake so that the floor surface on the loggia after all work is lower than the floor level in the room - or coincides with it. On top of the slab, put the same isolon (penofol) or vapor barrier film, on top - the crate for the subfloor (note: the logs are laid only perpendicular to the aisle). The crate can be left as is, or can be filled with mineral wool or polystyrene plates. In this case, add a vapor barrier before flooring the subfloor.
To make a warm floor, choose an infrared film floor or systems from heating mats. It is enough to lay out the thermal film or mats on top of the thermal insulation, connect the cables, close everything with a protective plastic film from above - and you can do the finishing.
Step 6: equipment and electrics
In any case, it is impossible to place water heating batteries on the loggia - therefore, it is easiest to heat the connected volume with an oil radiator - unless, of course, you refused to install a warm floor. In the case of a radiator, be prepared for the fact that electricity consumption will increase significantly. You will need a power outlet for the heater - plan at least one more if you decide to make an office, library, lounge area on the balcony.
Consider lighting before decorating - is it enough for you to use one lamp, or maybe you want to mount a spotlight? For the winter garden, you will need much more sockets and conclusions for lighting - you will actively use all kinds of lamps and various devices.
Step # 7: Finish
Designers use a variety of solutions for decorating attached balconies: someone roughly plaster the walls, and someone sheathes them with respectable wooden panels. Everything, ultimately, depends on the destination of the place: brick, concrete and wood are tuned in a contemplative manner. But for work, wallpapers of calm tones are well suited (although, perhaps, you will want to combine both options).
Choose vinyl siding for your home greenhouse - it will withstand high humidity. For flooring, linoleum, porcelain stoneware and even laminate are suitable. If children play on the attached balcony, it is wise to use a carpet,
Step number 8: functional filling and decor
According to your initial plans, place the furniture: it’s good to use a work table or a workbench for the workshop in the end part of the former loggia. For the lounge area, use narrow hinged countertops along the glazing line (they resemble bar counters). Add shallow racks for a game room or library with soft armchairs (bright frameless poufs “work” perfectly on the balcony). Advice: as a rule, on any attached loggia, for whatever purpose it is intended, a place for storage is necessary: design in advance in one of the ends of the shelving up to the ceiling or wardrobe.
Try not to overload the balcony with decorations - after all, its area is tiny. However, ceramics, photographs on the walls and green plants always enliven the interior. But you can experiment with fabrics - especially if your loggia does not have an office, but a place for relaxation. Designers choose bright colors and ornaments - why not follow their example, properly wrapping the former non-residential premises in soft canvases of the most cheerful colors?
How to make a warm balcony with your own hands
The main goal pursued when warming any room is to create a heat-insulating shell that will prevent the passage of cold from the outside and retain the heat generated by heating devices inside the building. To achieve such indicators, the thermal insulation process is performed in the following sequence:
- Installation of double-glazed windows.
- Warming of internal surfaces.
- Installation of underfloor heating.
Creating comfort should begin with the repair of the balcony and the elimination of all kinds of cracks and crevices. After all, precipitation, wind, cold air can get into them through them. Any comfort with such shortcomings cannot be achieved. Therefore, all defects are pre-sealed with silicone sealant, cement or foam.
Repair of the balcony

Many companies involved in glazing balconies do not seem to notice that they are installing heavy plastic frames on the construction of the parapet of the balcony or on a concrete base. The problem is that they can be shaken even by gusts of wind (not to mention a few tens of kilograms of aluminum lightweight windows), and in the end you have to redo everything. Do not forget that a lot of rubbish is stored on the balcony, which also presses on the stove. As a result, this can lead to at least subsidence of the slab, and sometimes even to the collapse of the balcony. This is due to the fact that concrete has a certain number of freeze / thaw cycles, and the lower its grade, the less such cycles it withstands. And since the old Soviet houses are made of concrete with low strength (not because of savings, but because in those days there were no necessary additives), most of the balconies are in poor condition. Yes, you yourself could see the slabs of balconies that were darkened by water, the concrete crumbled, the rusty reinforcement was even partially exposed - in general, they look like they were about to collapse, and this is not far from the truth. If you do not strengthen the balcony, then its glazing is out of the question.

It should be noted that Elitbalkon has been operating in the market for the improvement of balconies and loggias since 2000, and its employees know everything about the repair and restoration of balconies. One of the main advantages is following building rules. Elitbalkon company mounts balconies on metal frames according to its own technology, adheres to state standards that are suitable for the activity and carries out full control of all stages of repair and decoration of the balcony.
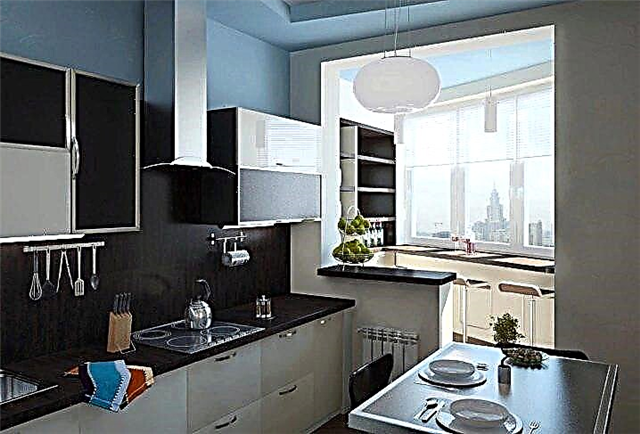
How to make a living room out of a balcony
Today we will talk about how to turn your old balcony into a comfortable room that can be used as a small room or office. Experts of Elitbalkon company, headed by Vladimir Kozhushko, who has experience in glazing since 1998, told us about the stages of creating a turnkey balcony. He started as an installer, then worked as a measurer, then as a manager, and since 2007 he has already become the owner of the aforementioned company. Thanks to the experience and direct participation of the CEO in each project, you can be sure that in your balcony there will be only high-quality glazing.
Elements of a warm balcony
Before proceeding to this section, it is necessary to answer one question that worries those apartment owners who decide to conduct insulation with their own hands. Do you need permission to carry out this type of work? Permission is not necessary, but note that the front of the balcony must meet the architectural standards of the building.
 This is especially true for those apartments in which balconies are located on the front facade, facing the main street. By the way, in large cities, permission for such apartments will still have to be sought. And practice shows that many do not receive such permission.
Wall construction
As mentioned above, at present, specialists use blocks of cellular concrete for the construction of walls. This is a small (non-standard) size wall material, lightweight, with good thermal insulation qualities.
 You can use the frame method for the construction, for which you need a wooden beam of dimensions 50x70 mm or 70x70 mm. A do-it-yourself frame is constructed in the form of a lathing (vertical posts, plus a frame around the entire perimeter of the walls), between the elements of which thermal insulation material is laid.
Please note that glazing (with or without removal) must be installed on the newly built walls of the balcony. But to carry out additional fastening to a metal fence
Finish
Since the warm balcony is a full room, the design of this room should match the decoration of all other rooms. Basically, you have to consider the purpose of the balcony:
- If it is decided to arrange a female boudoir in it, then the design should be light, soft, delicate.
- If it is a game room for children, then you will have to customize the design for game elements with bright patterns and shades.
- If it will be an office, then the design in the form of an office with elements of comfort with upholstered furniture and fabric upholstery is accepted.
- If it is decided to arrange a greenhouse (conservatory) on the balcony, then the design of this room should be natural. It mainly uses lining, wooden glazing (with or without removal), linoleum for parquet on the floor, and so on.
Do not forget that the design of the attached balcony is one of the main parts of the whole process.
Waterproofing
The installation of thermal insulation material on the floor is preceded by a waterproofing process. For these purposes, use penofol or polyethylene. Thus, a barrier is created from the penetration of dampness into the room. Experts recommend laying penofol with the reflecting side up. It will be useful to install waterproofing also on the walls.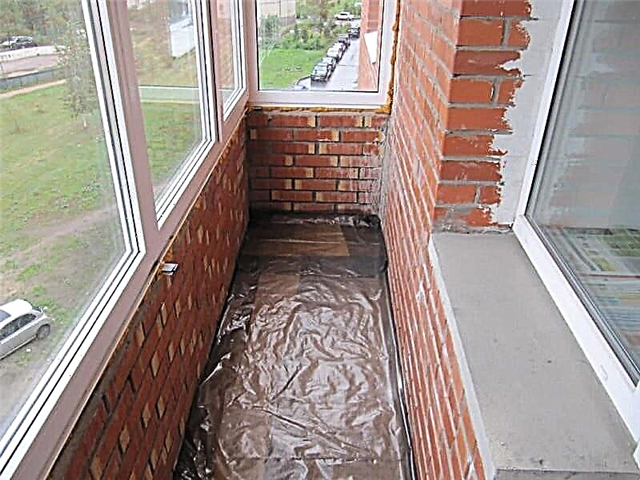
The joints between the sheets of waterproofing material are glued using foil tape.